Making our headboard disassemblable
Our headboard didn't fit up the stairs in our new house. A reasonable person would buy a new bed frame. I am not a reasonable person.

I am going to be very clear about this up-front: a reasonable person would not do this.
A few years ago, we upgraded from our adjustable queen bed to an adjustable split-king. It took us a while to find a king-sized bed frame that we were both happy with, but finally found a Crate & Barrel one that we were both over the moon about. With the adjustable bed bases, the bed frame does not need to actually hold the mattresses, but is built around them to give the bed a nice finished appearance.
Fast-forward to December 2023, we are moving into our new house in Seattle, and starting to discover that our house, which was originally constructed in 1917, had some quirks that made our life a little more difficult—notably, many of the doorways were more narrow than you'd see in a modern construction, and our stairs involve some tight turns.
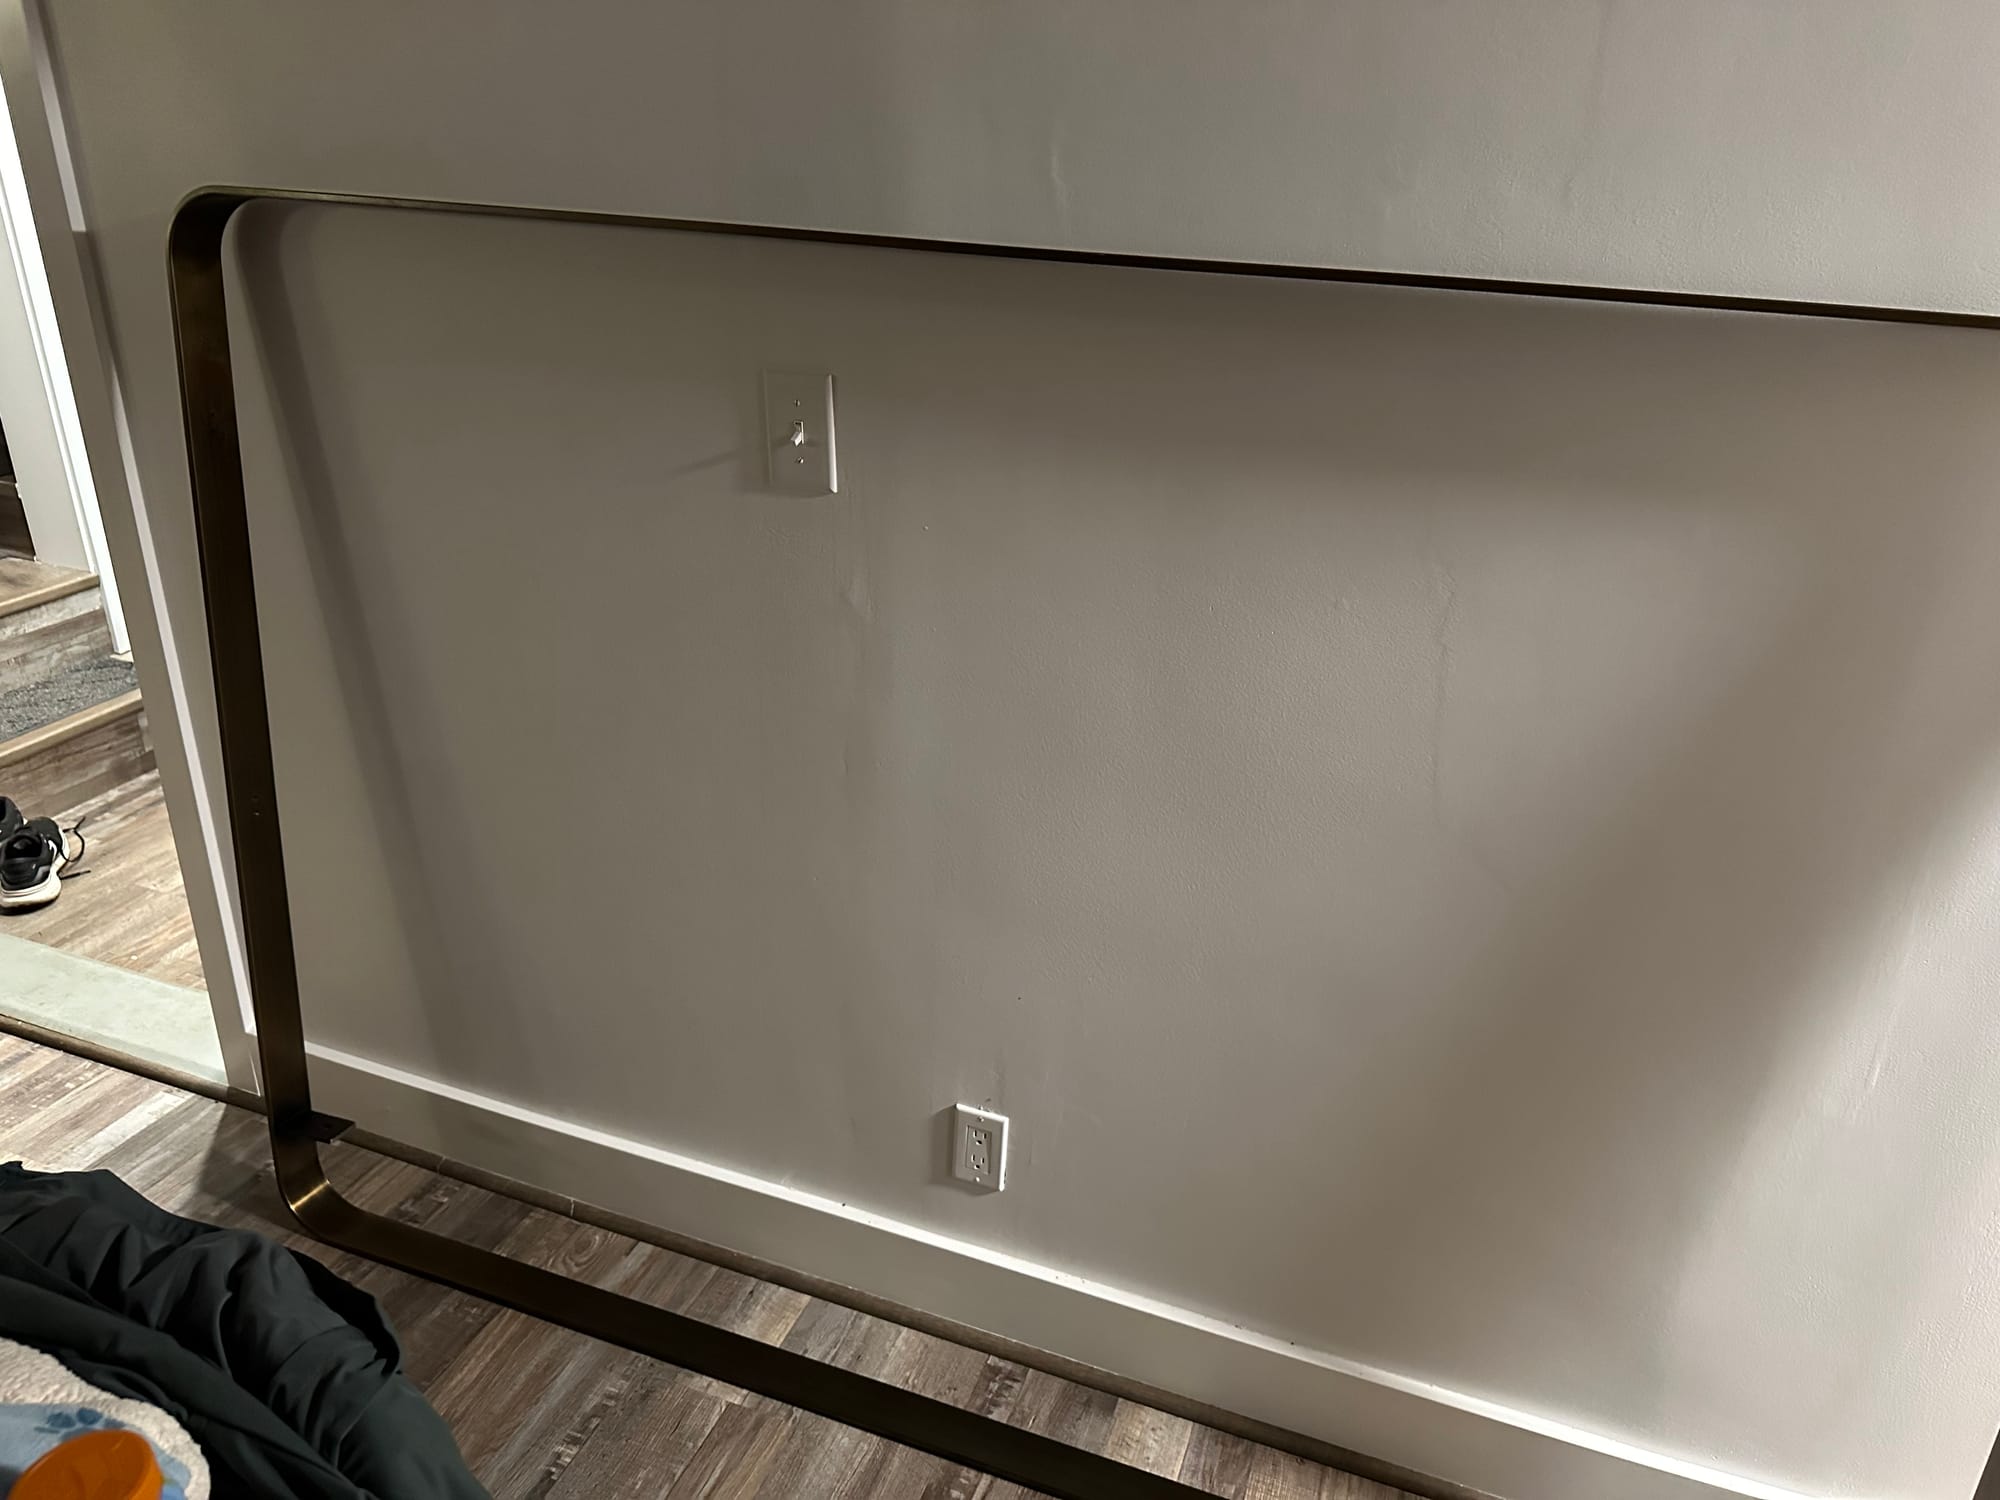
Most notably, after a full day of movers moving things in, we hit a snag moving the headboard in. Put simply, there was no way to get it upstairs to the master bedroom. No matter how the movers rotated it around, there was simply no way to get it up the stairs. The metal frame around the headboard, which is a single monolithic piece, was simply too big to navigate into the stairwell all the way. The headboard was clearly not designed or intended to be disassembled. We talked about trying to bring it in through a window, even though we weren't sure it could be done safely, but the biggest openable window in the master bedroom was several inches too small. We discussed some destructive possibilities to allow us to get it upstairs, but we expect we'll want to get it back out of that room someday.
We were tired and perhaps a little emotionally raw, and my wife was starting to get a little upset about the prospect of having to get rid of the bed frame that we loved. As I ran through possibilities in my head, I started to formulate a rough plan, so we secured a nearby storage unit and moved the headboard and a few other large items into it, then turned our attention to more immediate settling-in.
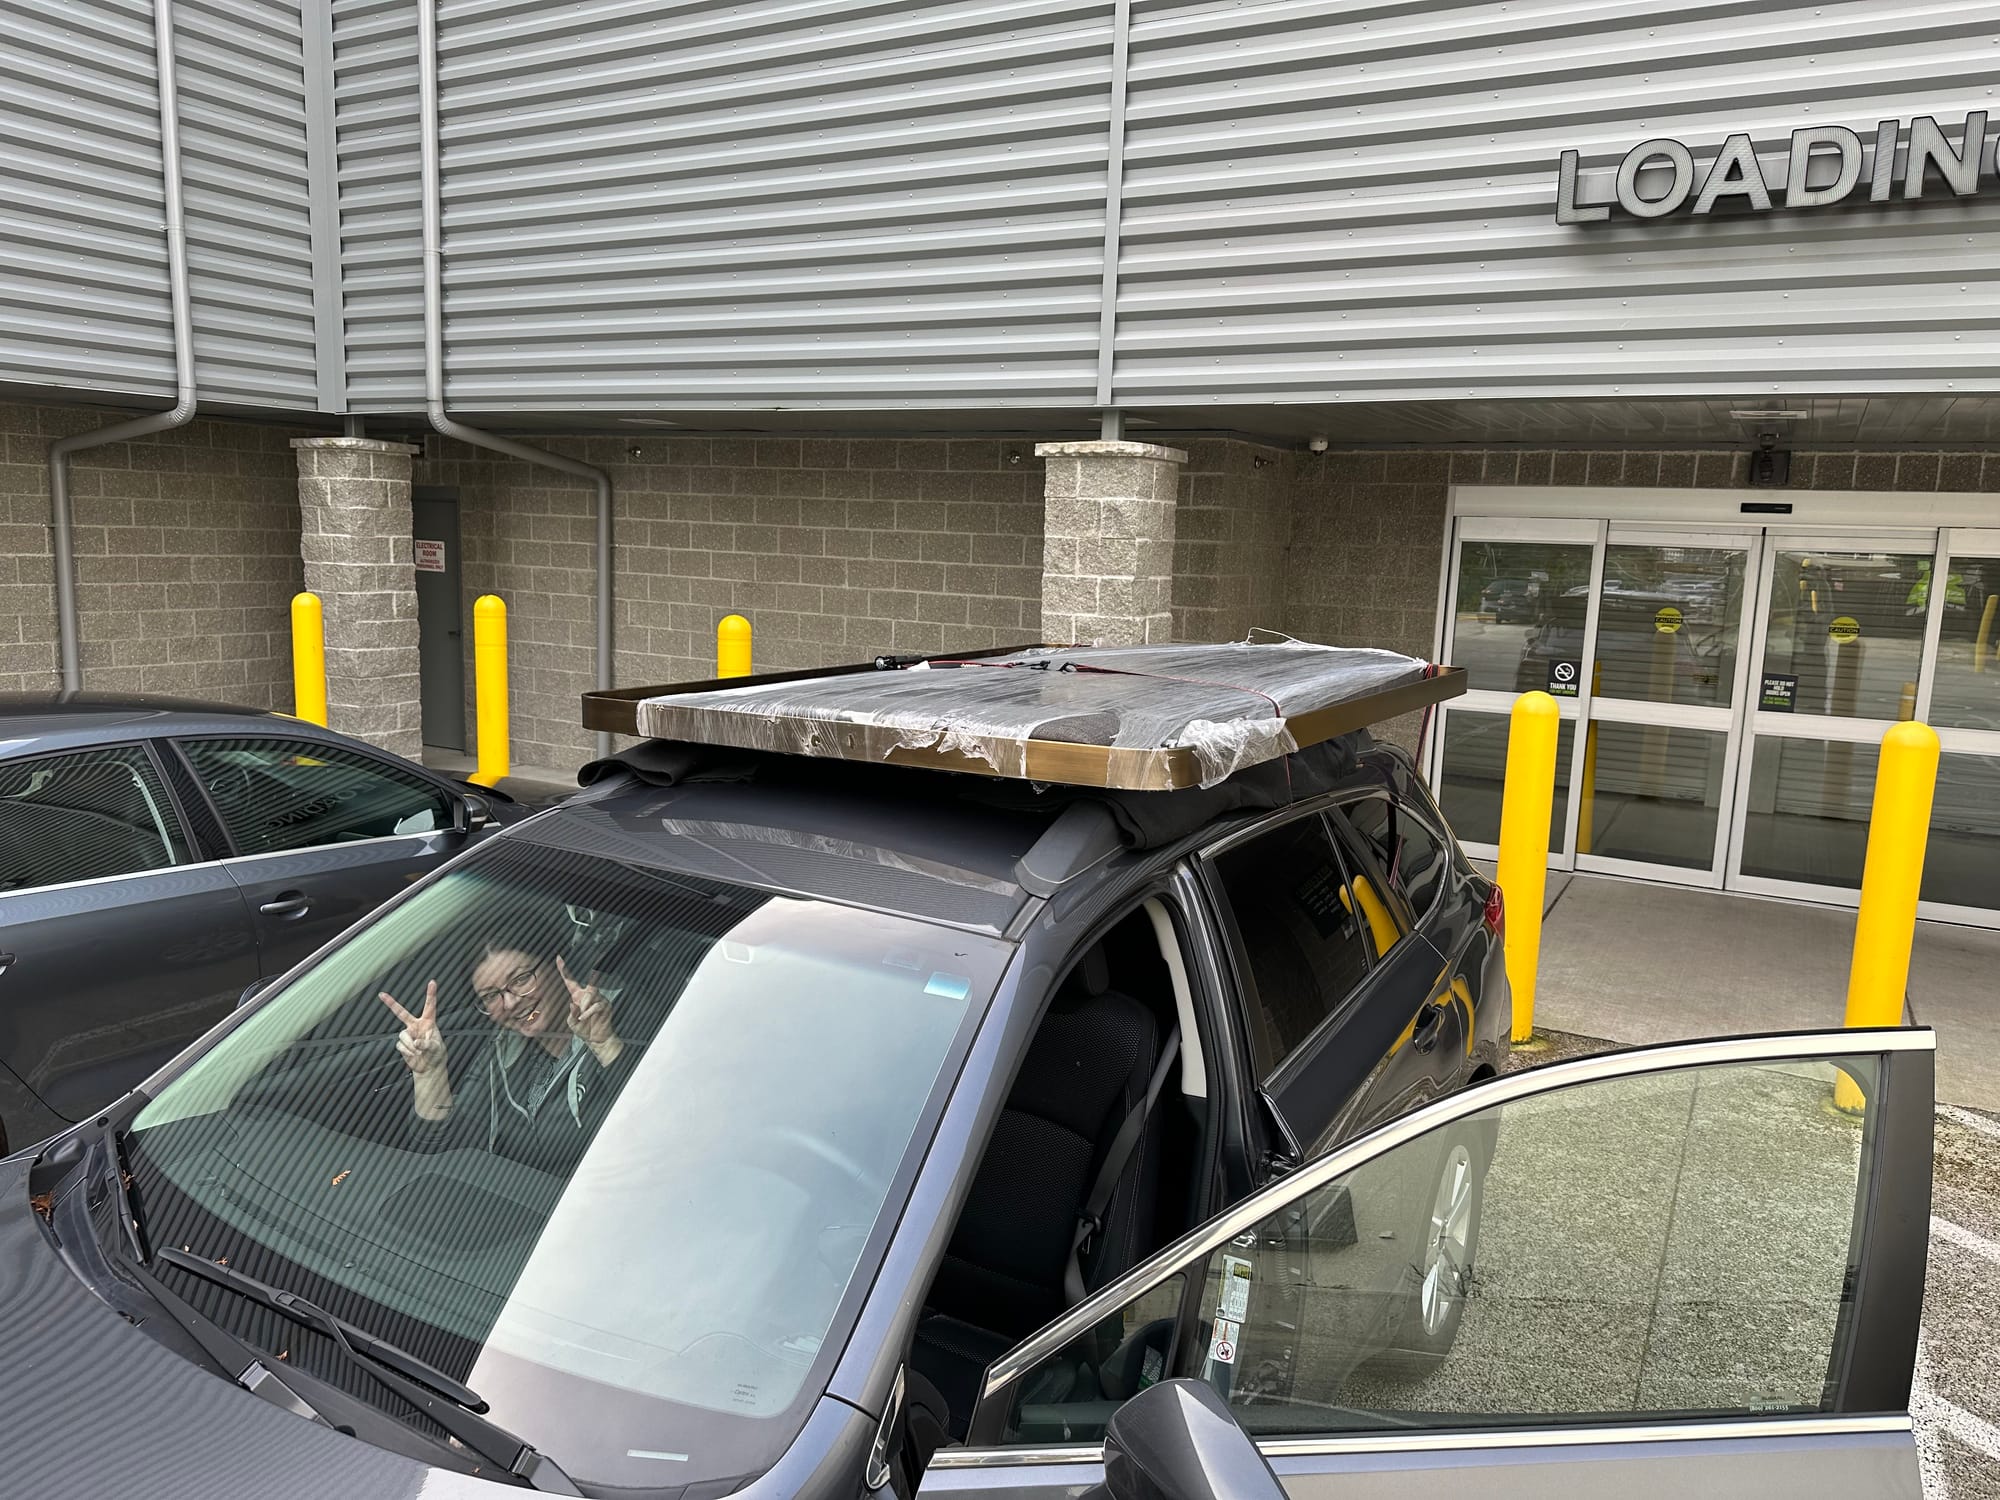
February 2024. On a nice Saturday, it was time to get the headboard back out of storage.
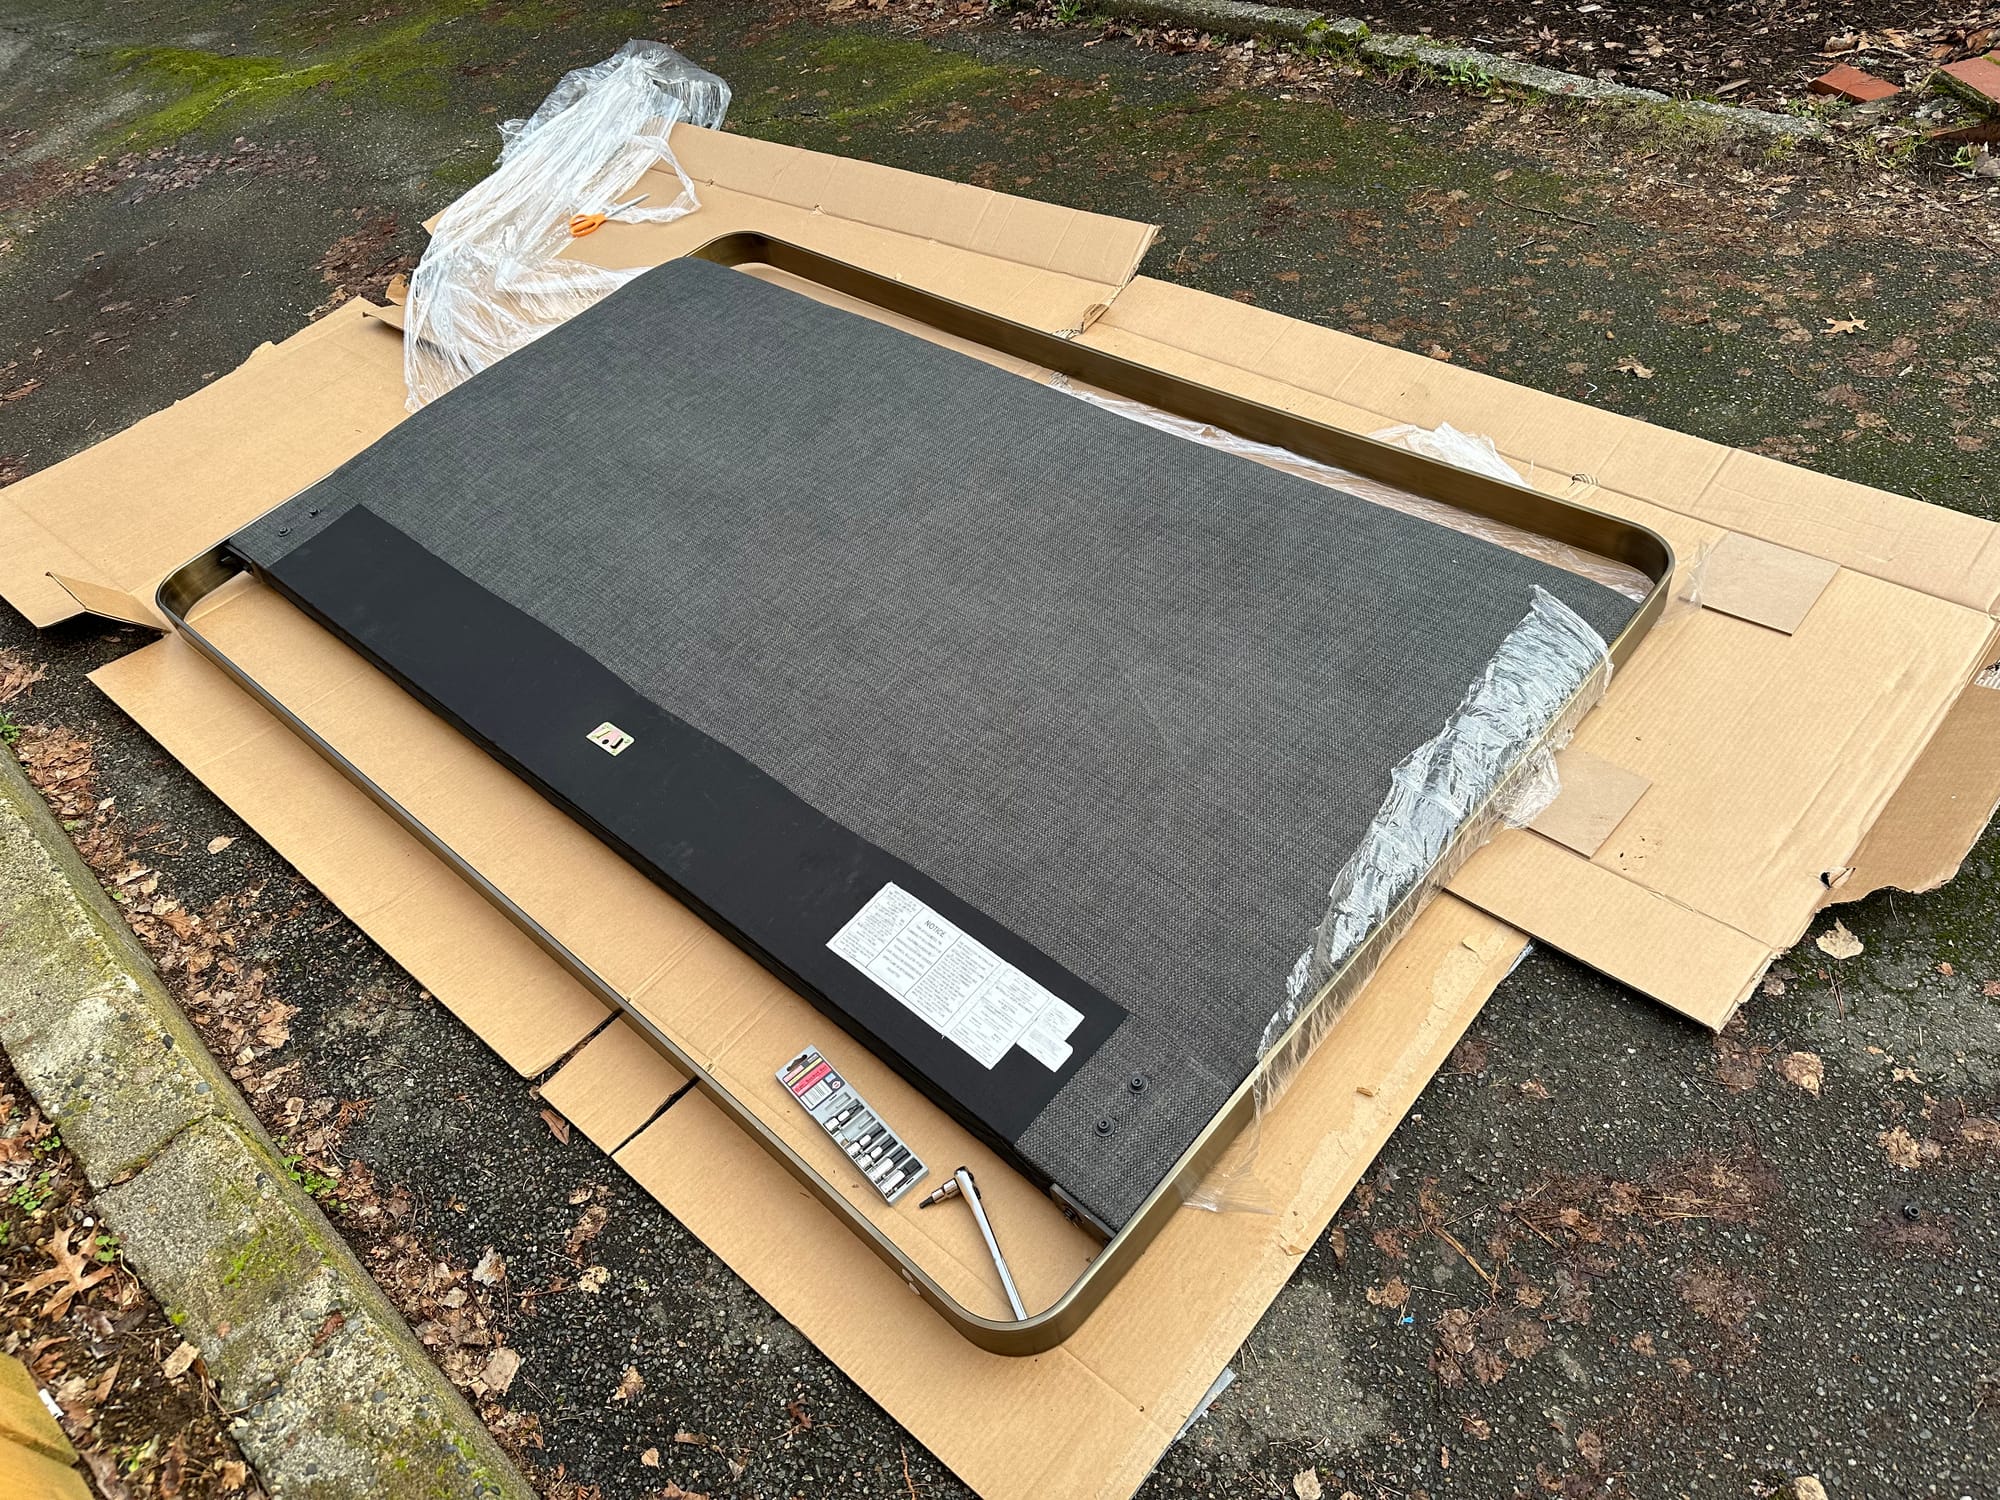
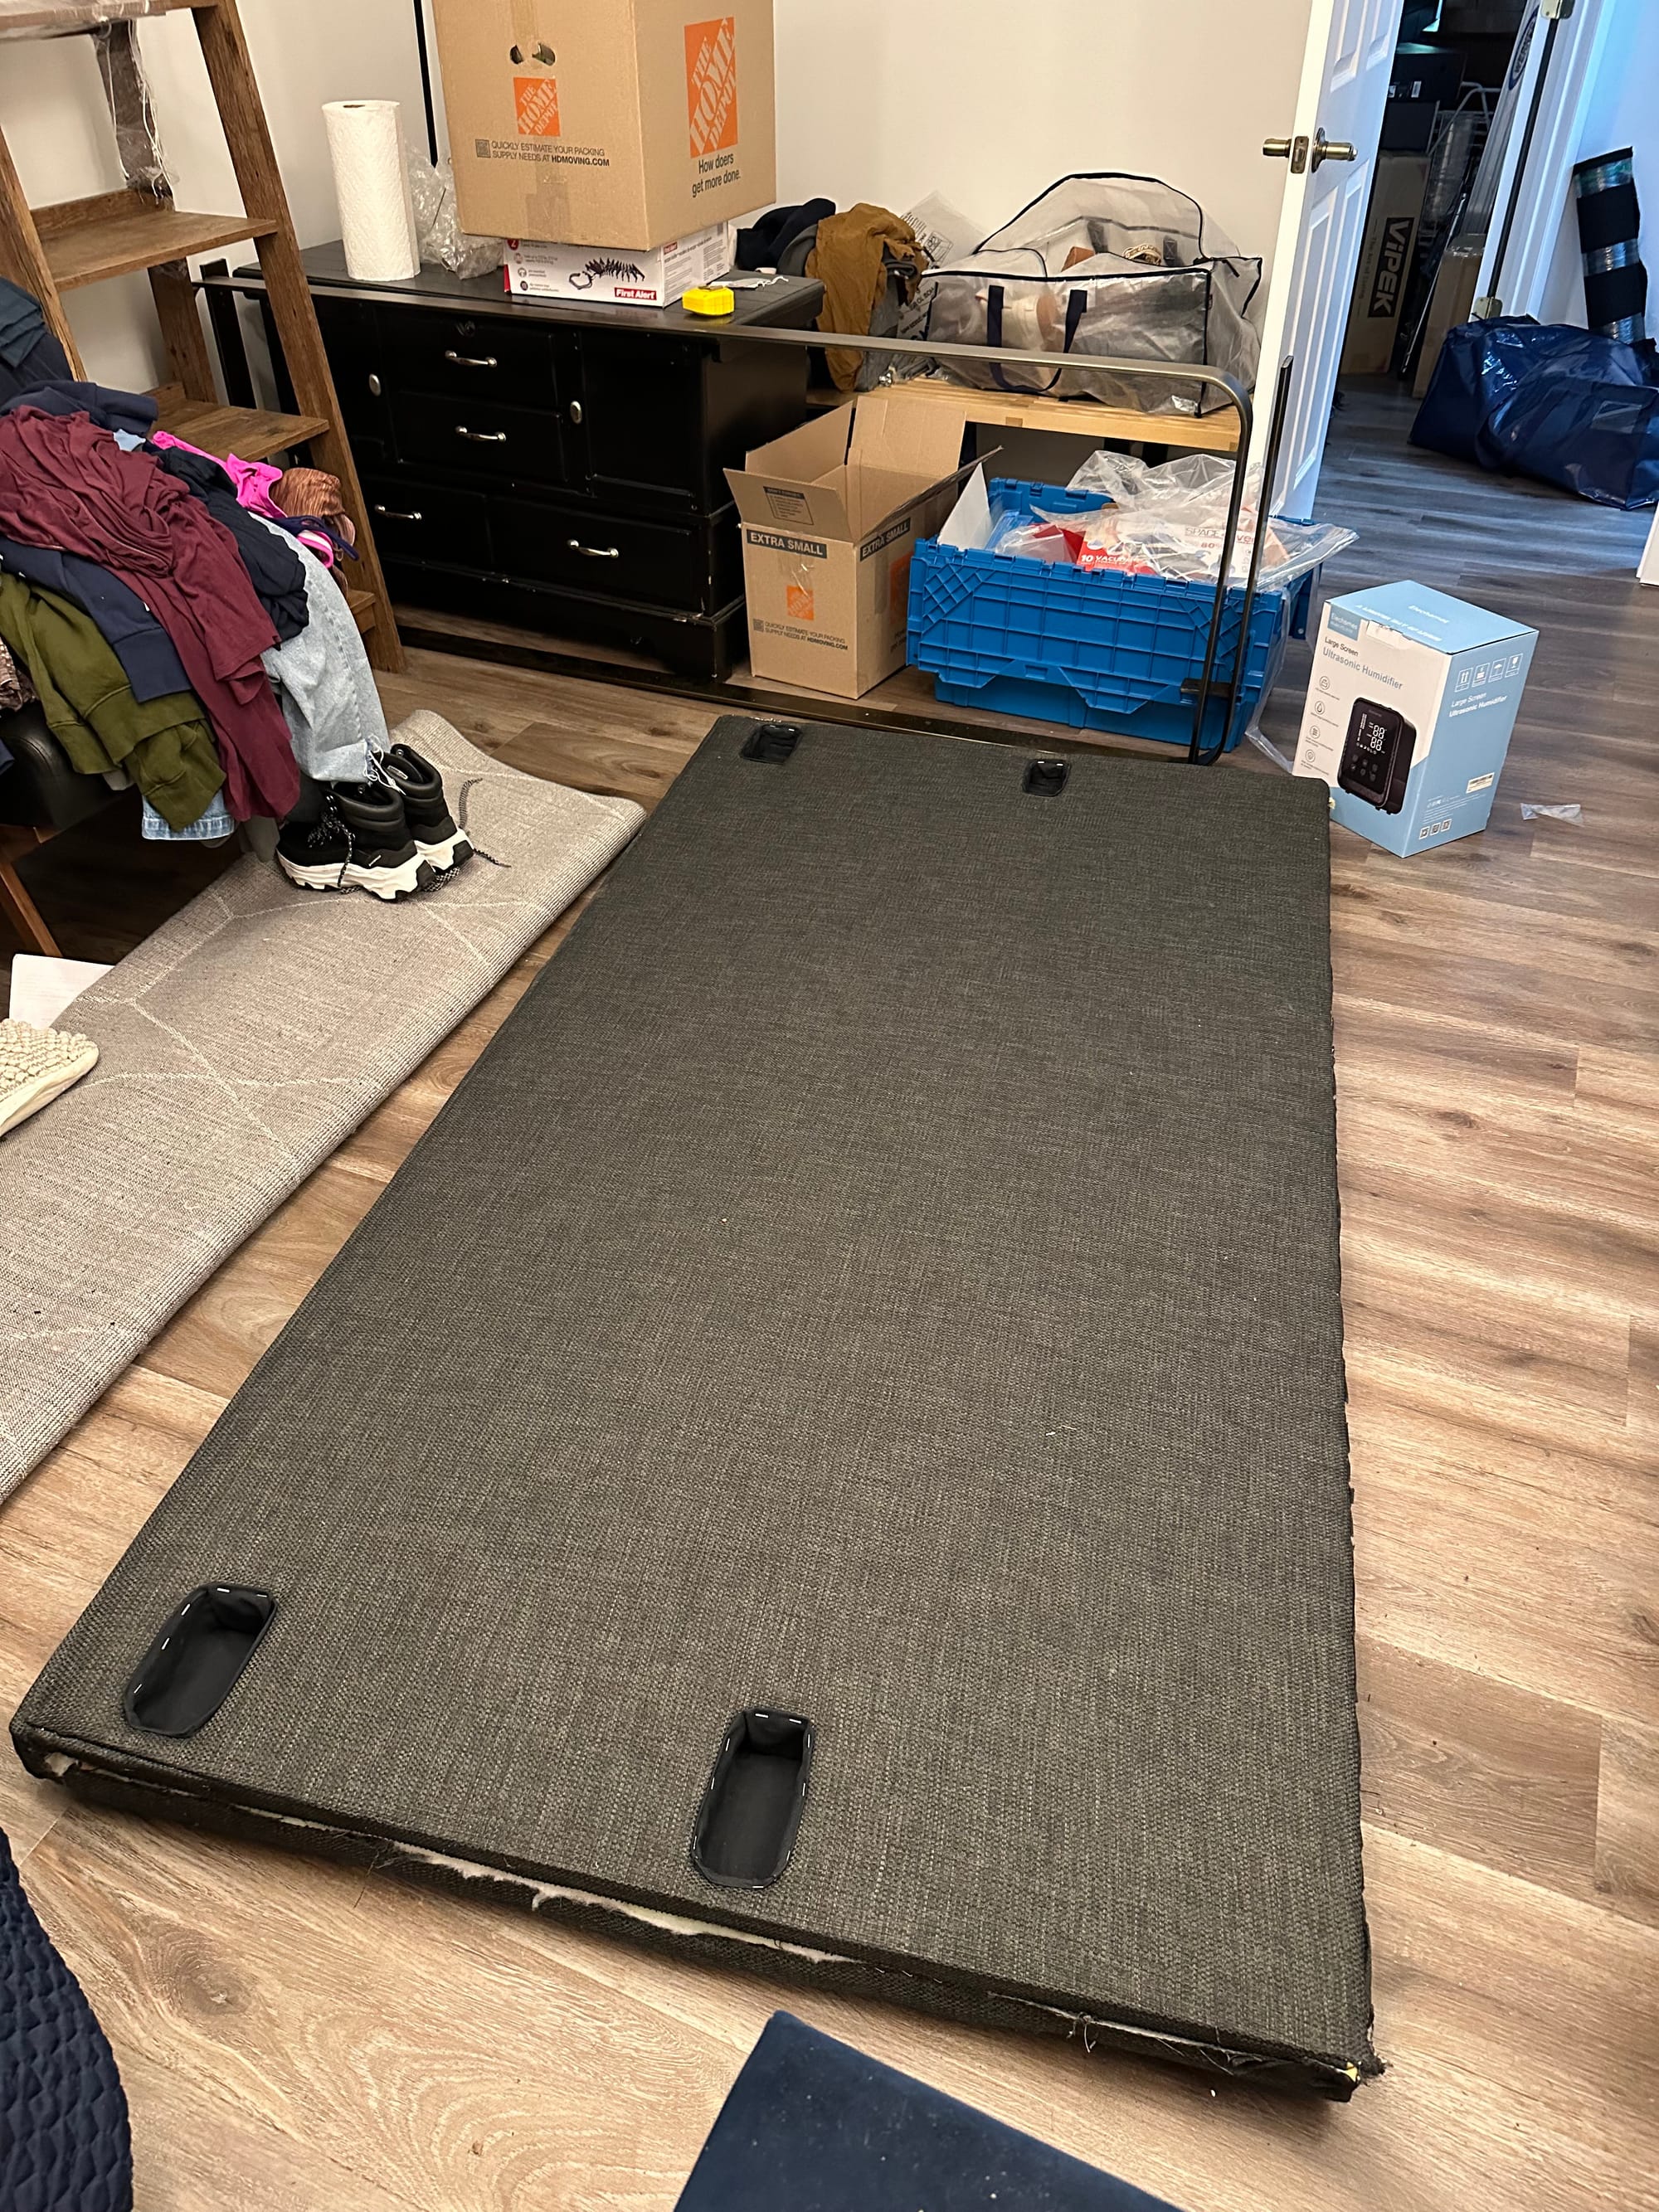
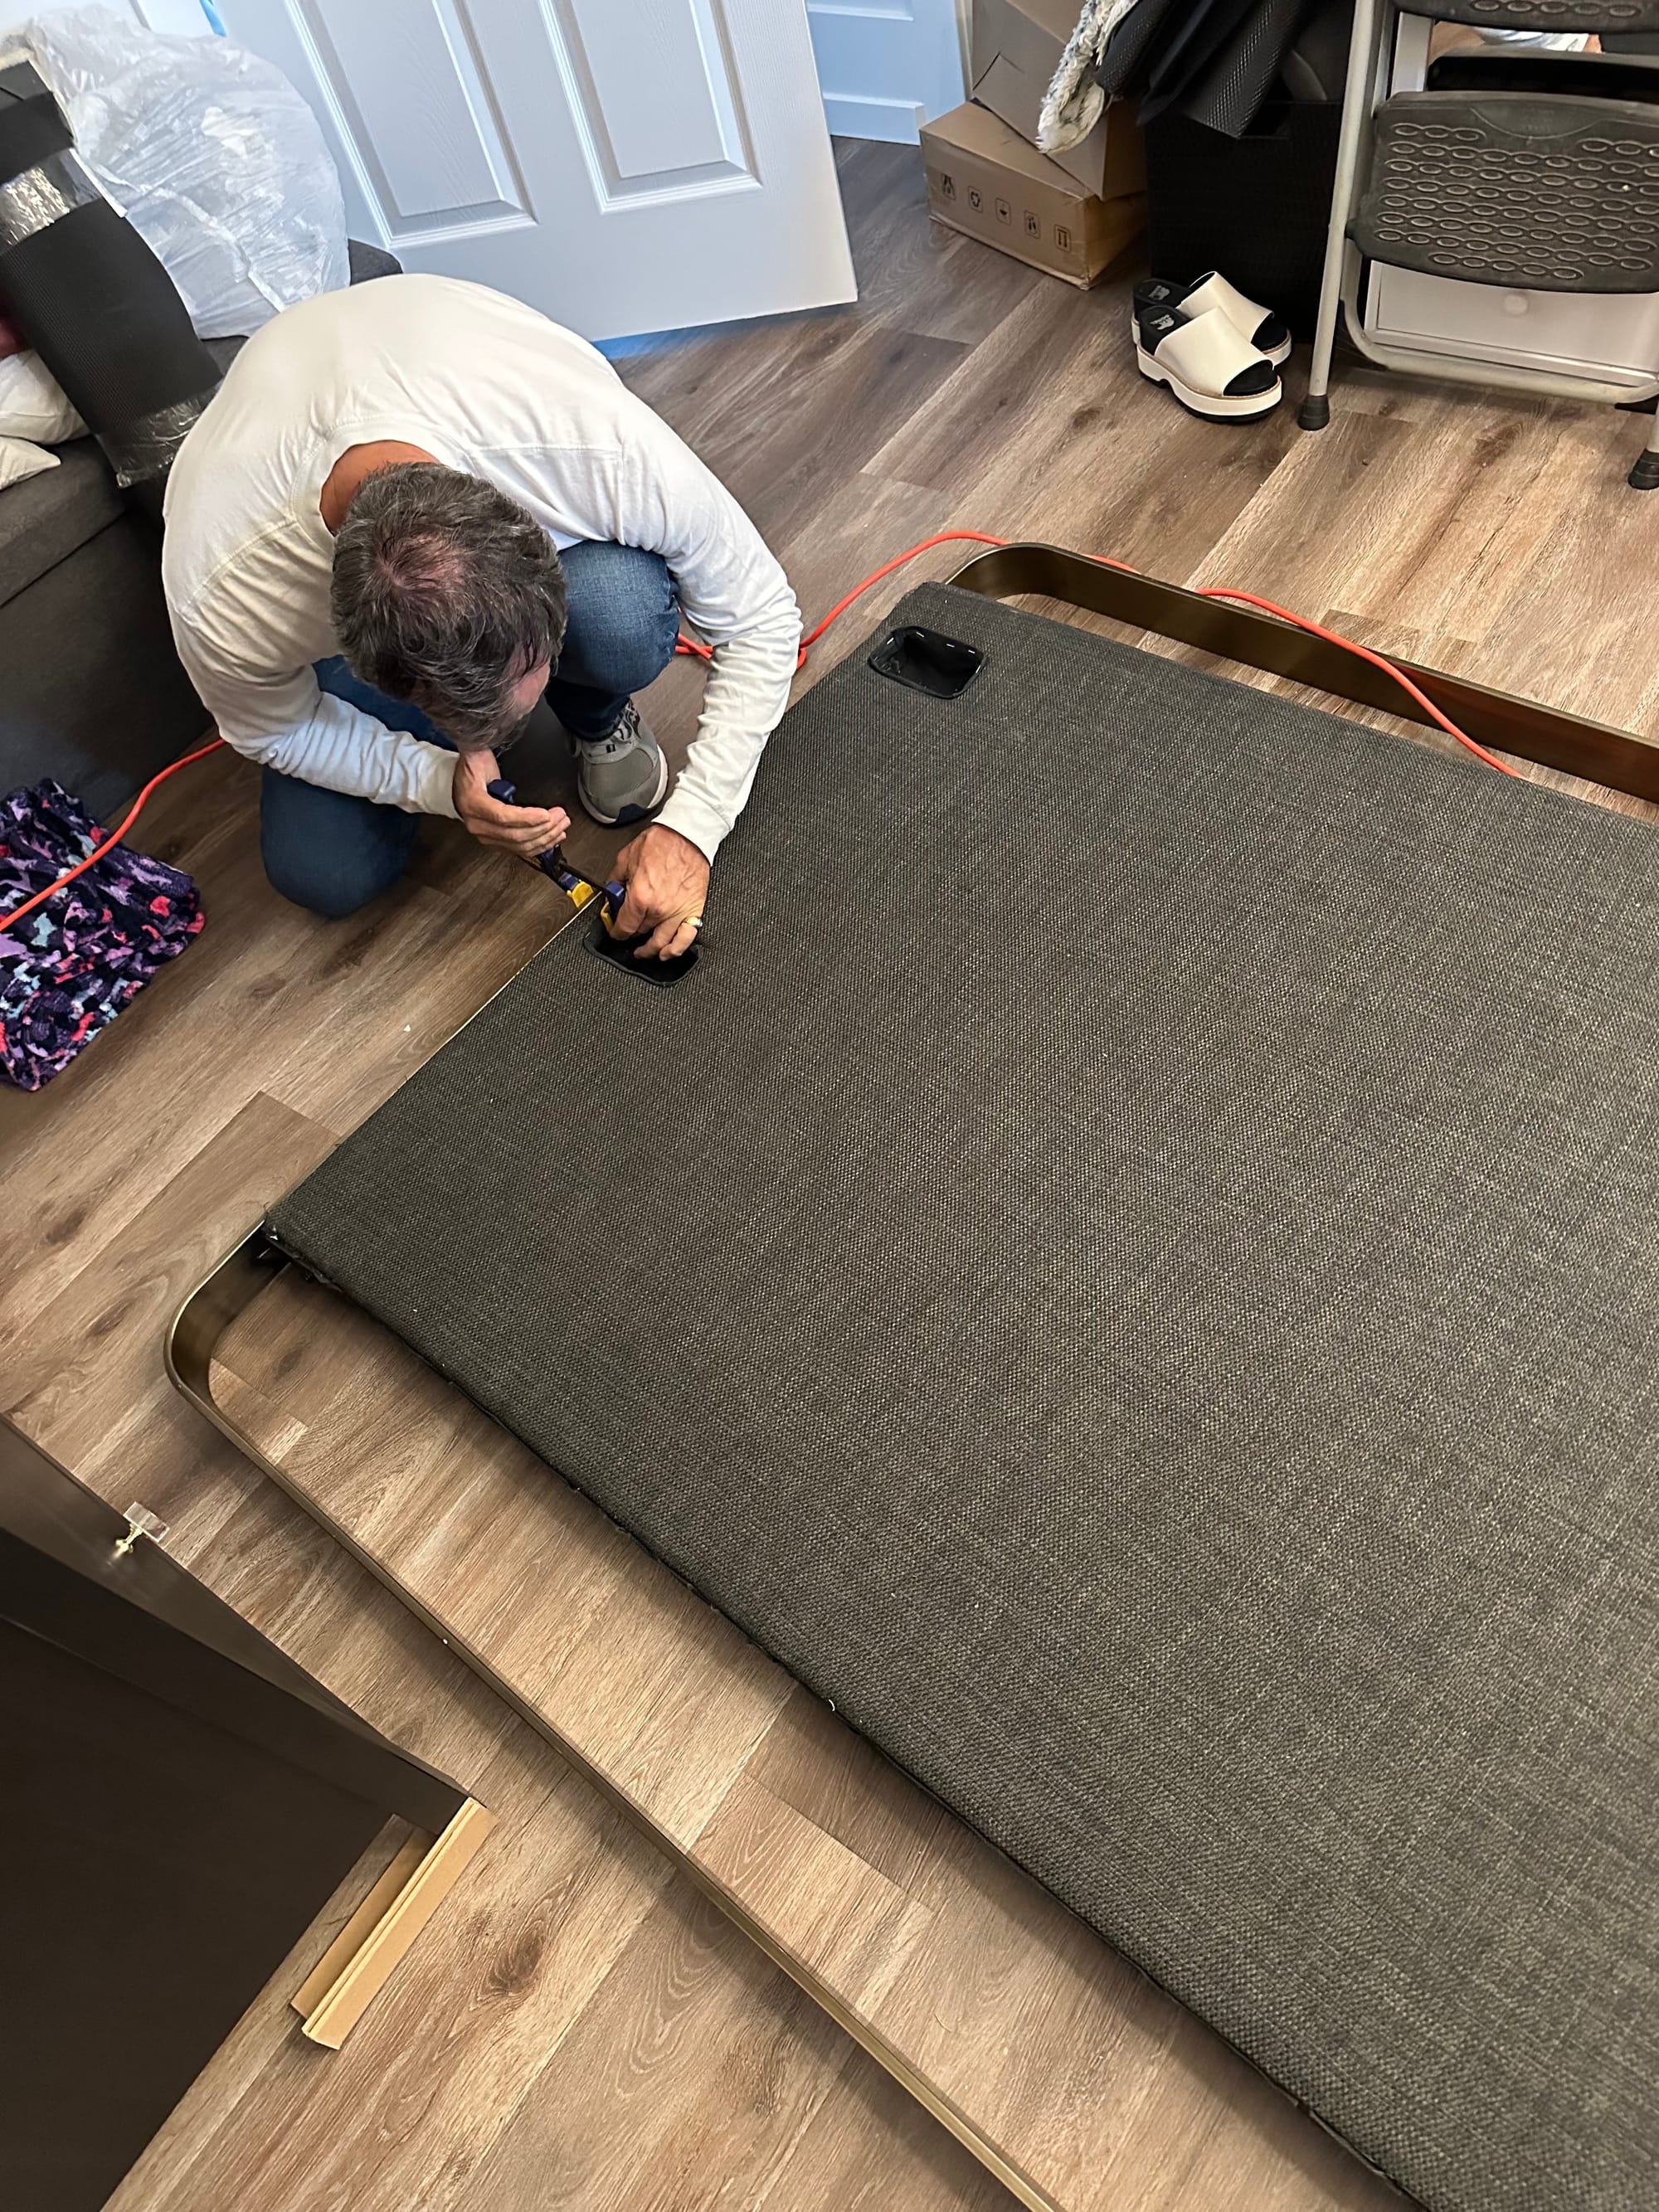
We laid it on cardboard in the driveway to protect it as I took the first step. I needed to figure out how to separate the upholstered middle section from the metal frame. I had noted that there were two hex bolts attached to supports under the upholstered section, so I thought I'd start there.
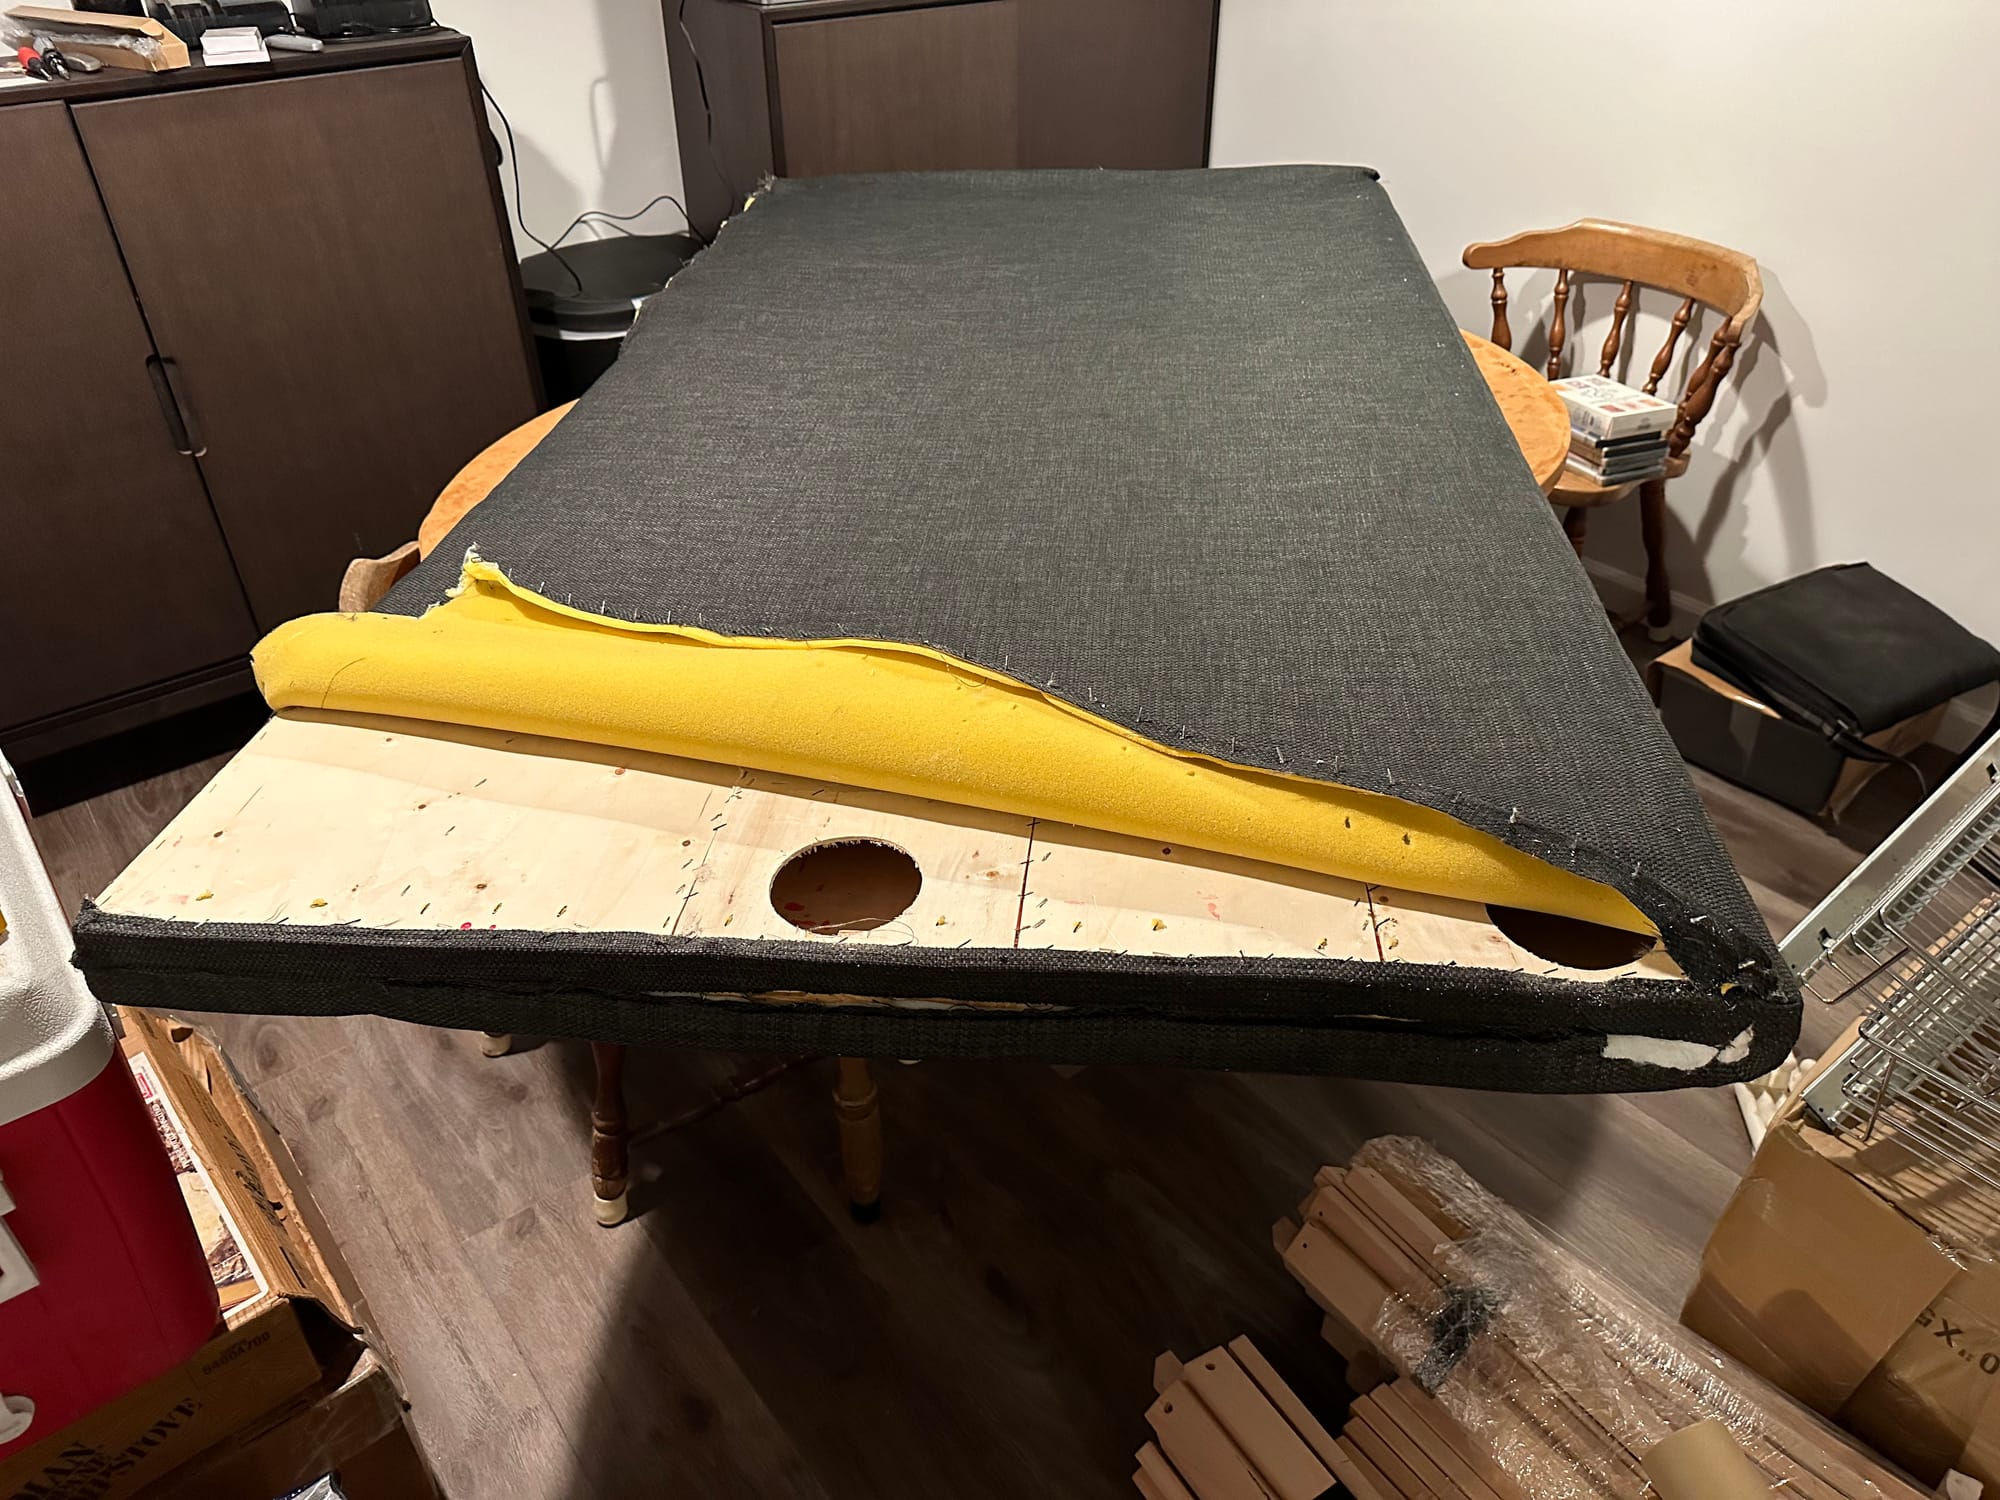
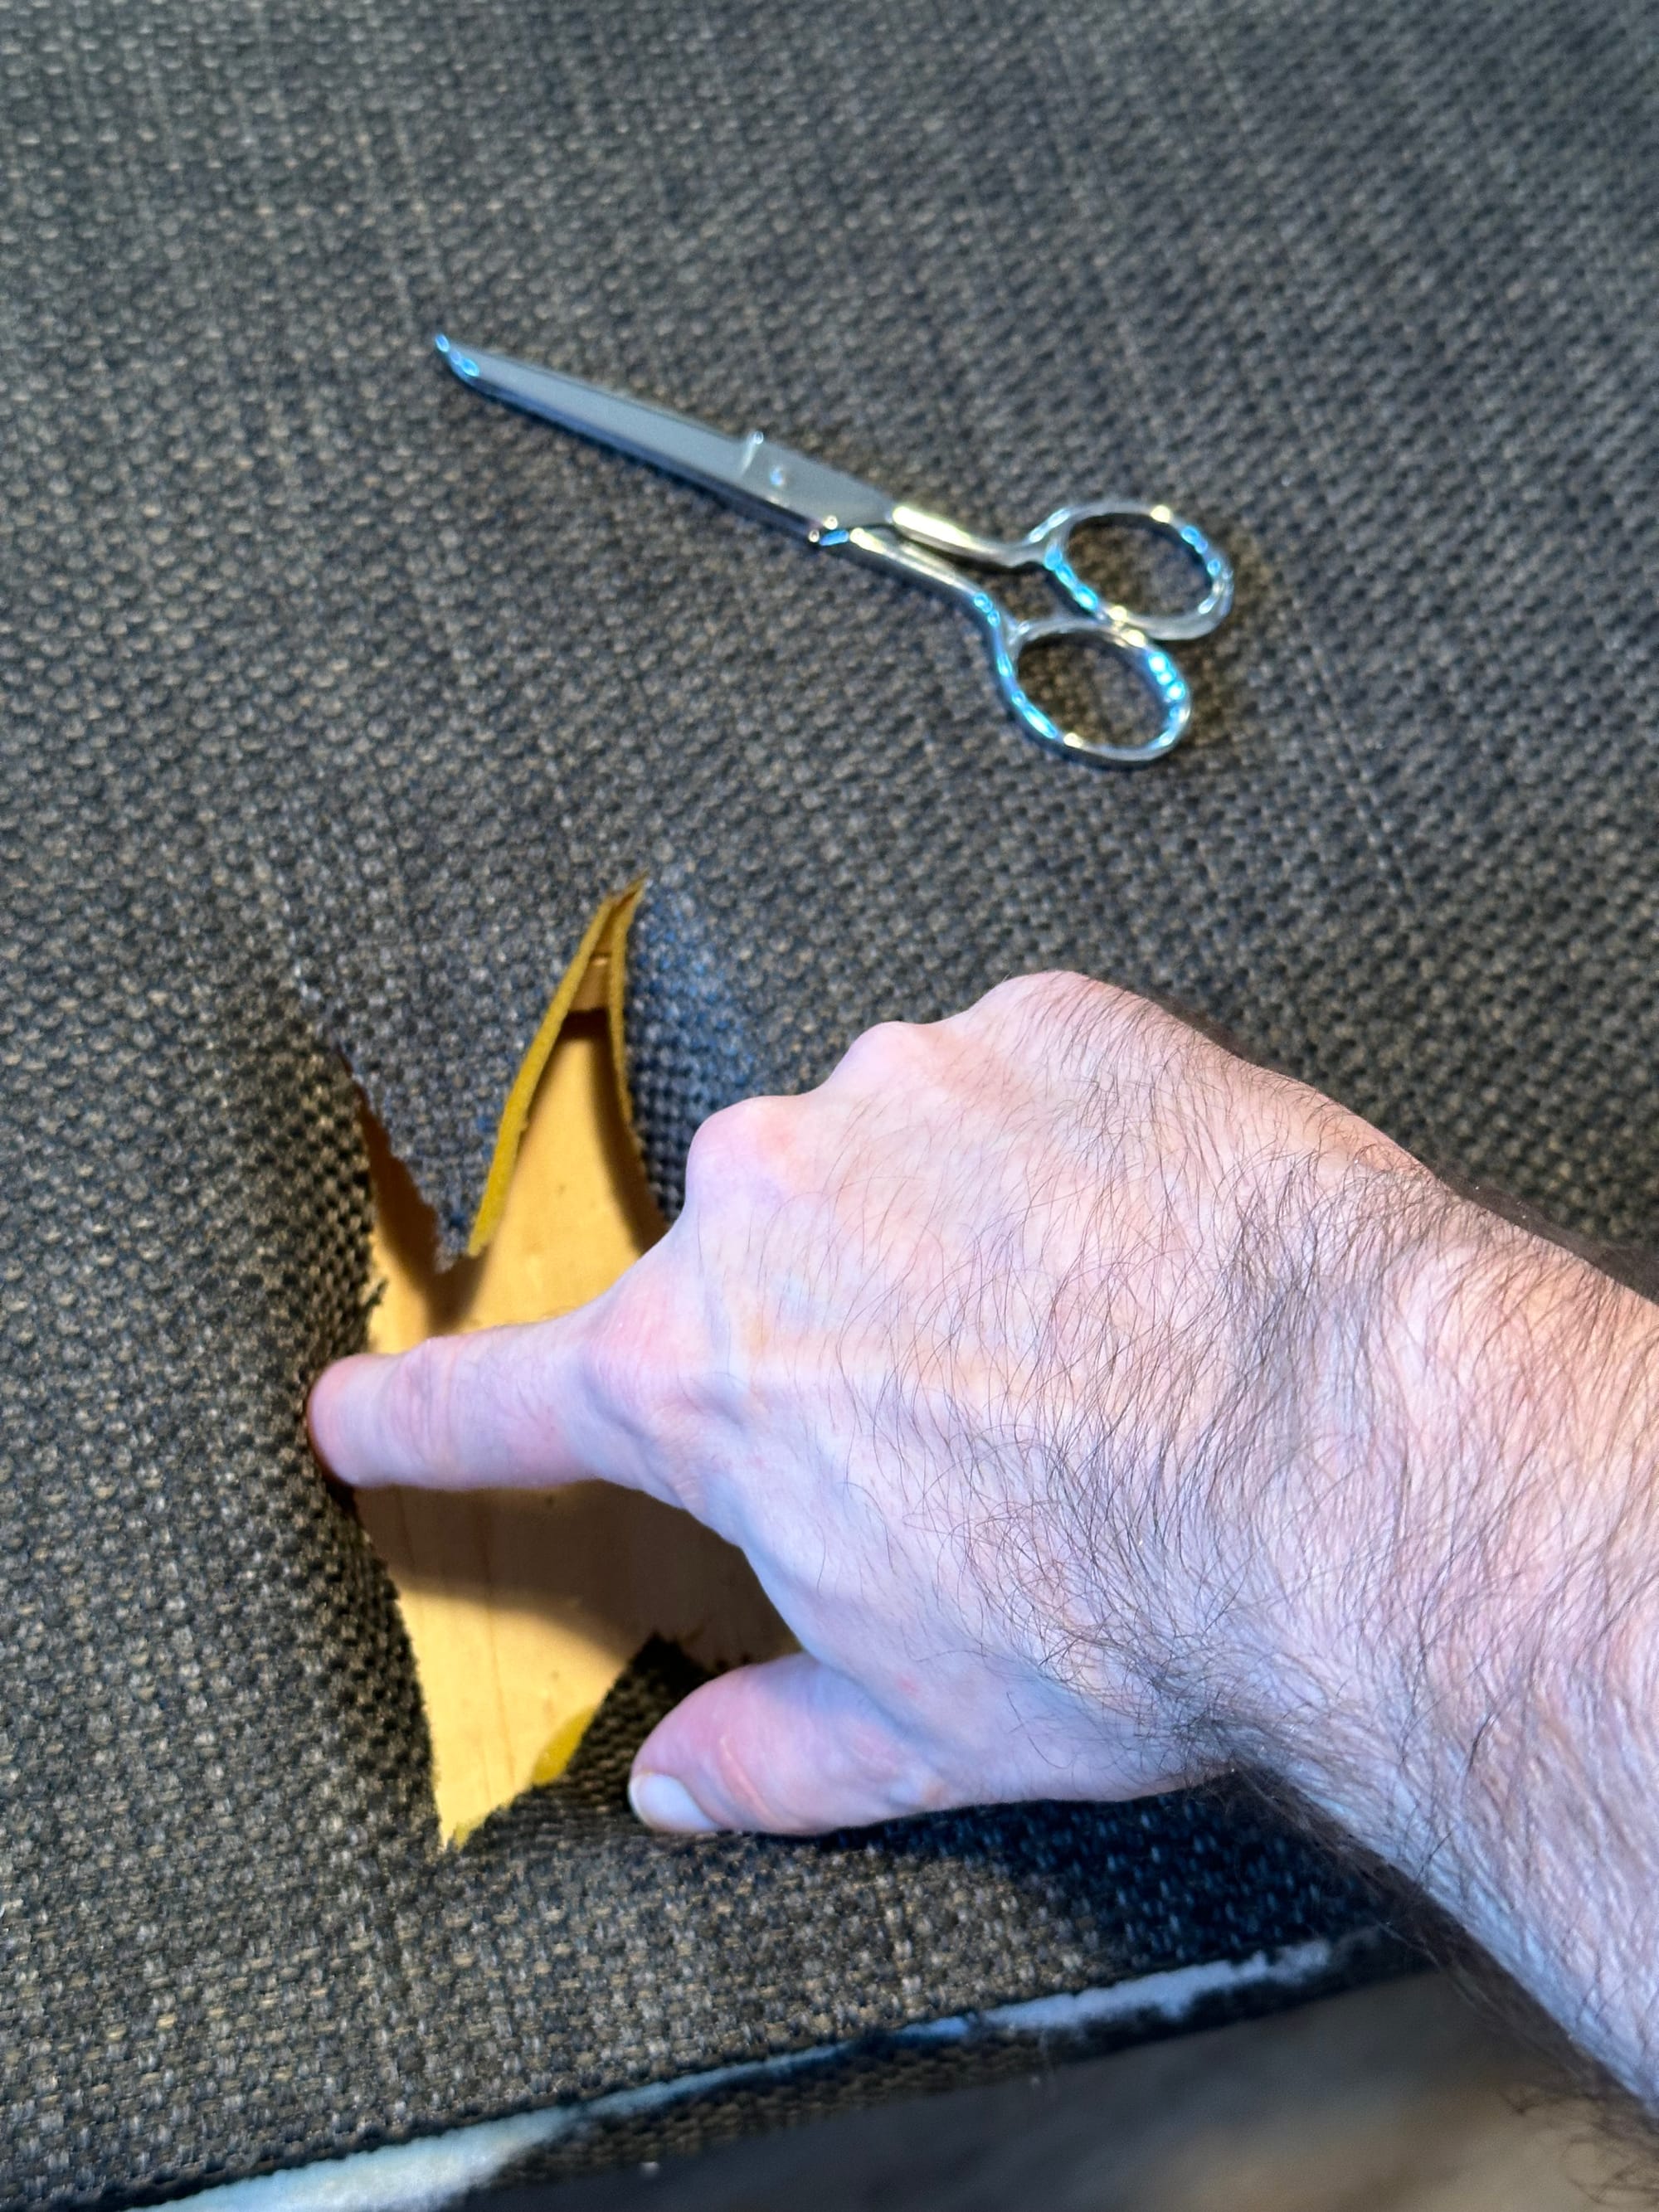
I removed those bolts... and the upholstered section would not budge. It was still very much attached. I got a thin putty knife and started running it between the metal frame and the middle; I could get it all the way through to the other side, but running it up and down found two distinct spots on both sides that something blocked the knife. Without knowing exactly what was underneath the upholstery, it seemed like the next step. I was able to pry up a tack strip and, with a good deal of effort, removed enough staples to access a corner and see what was going on.
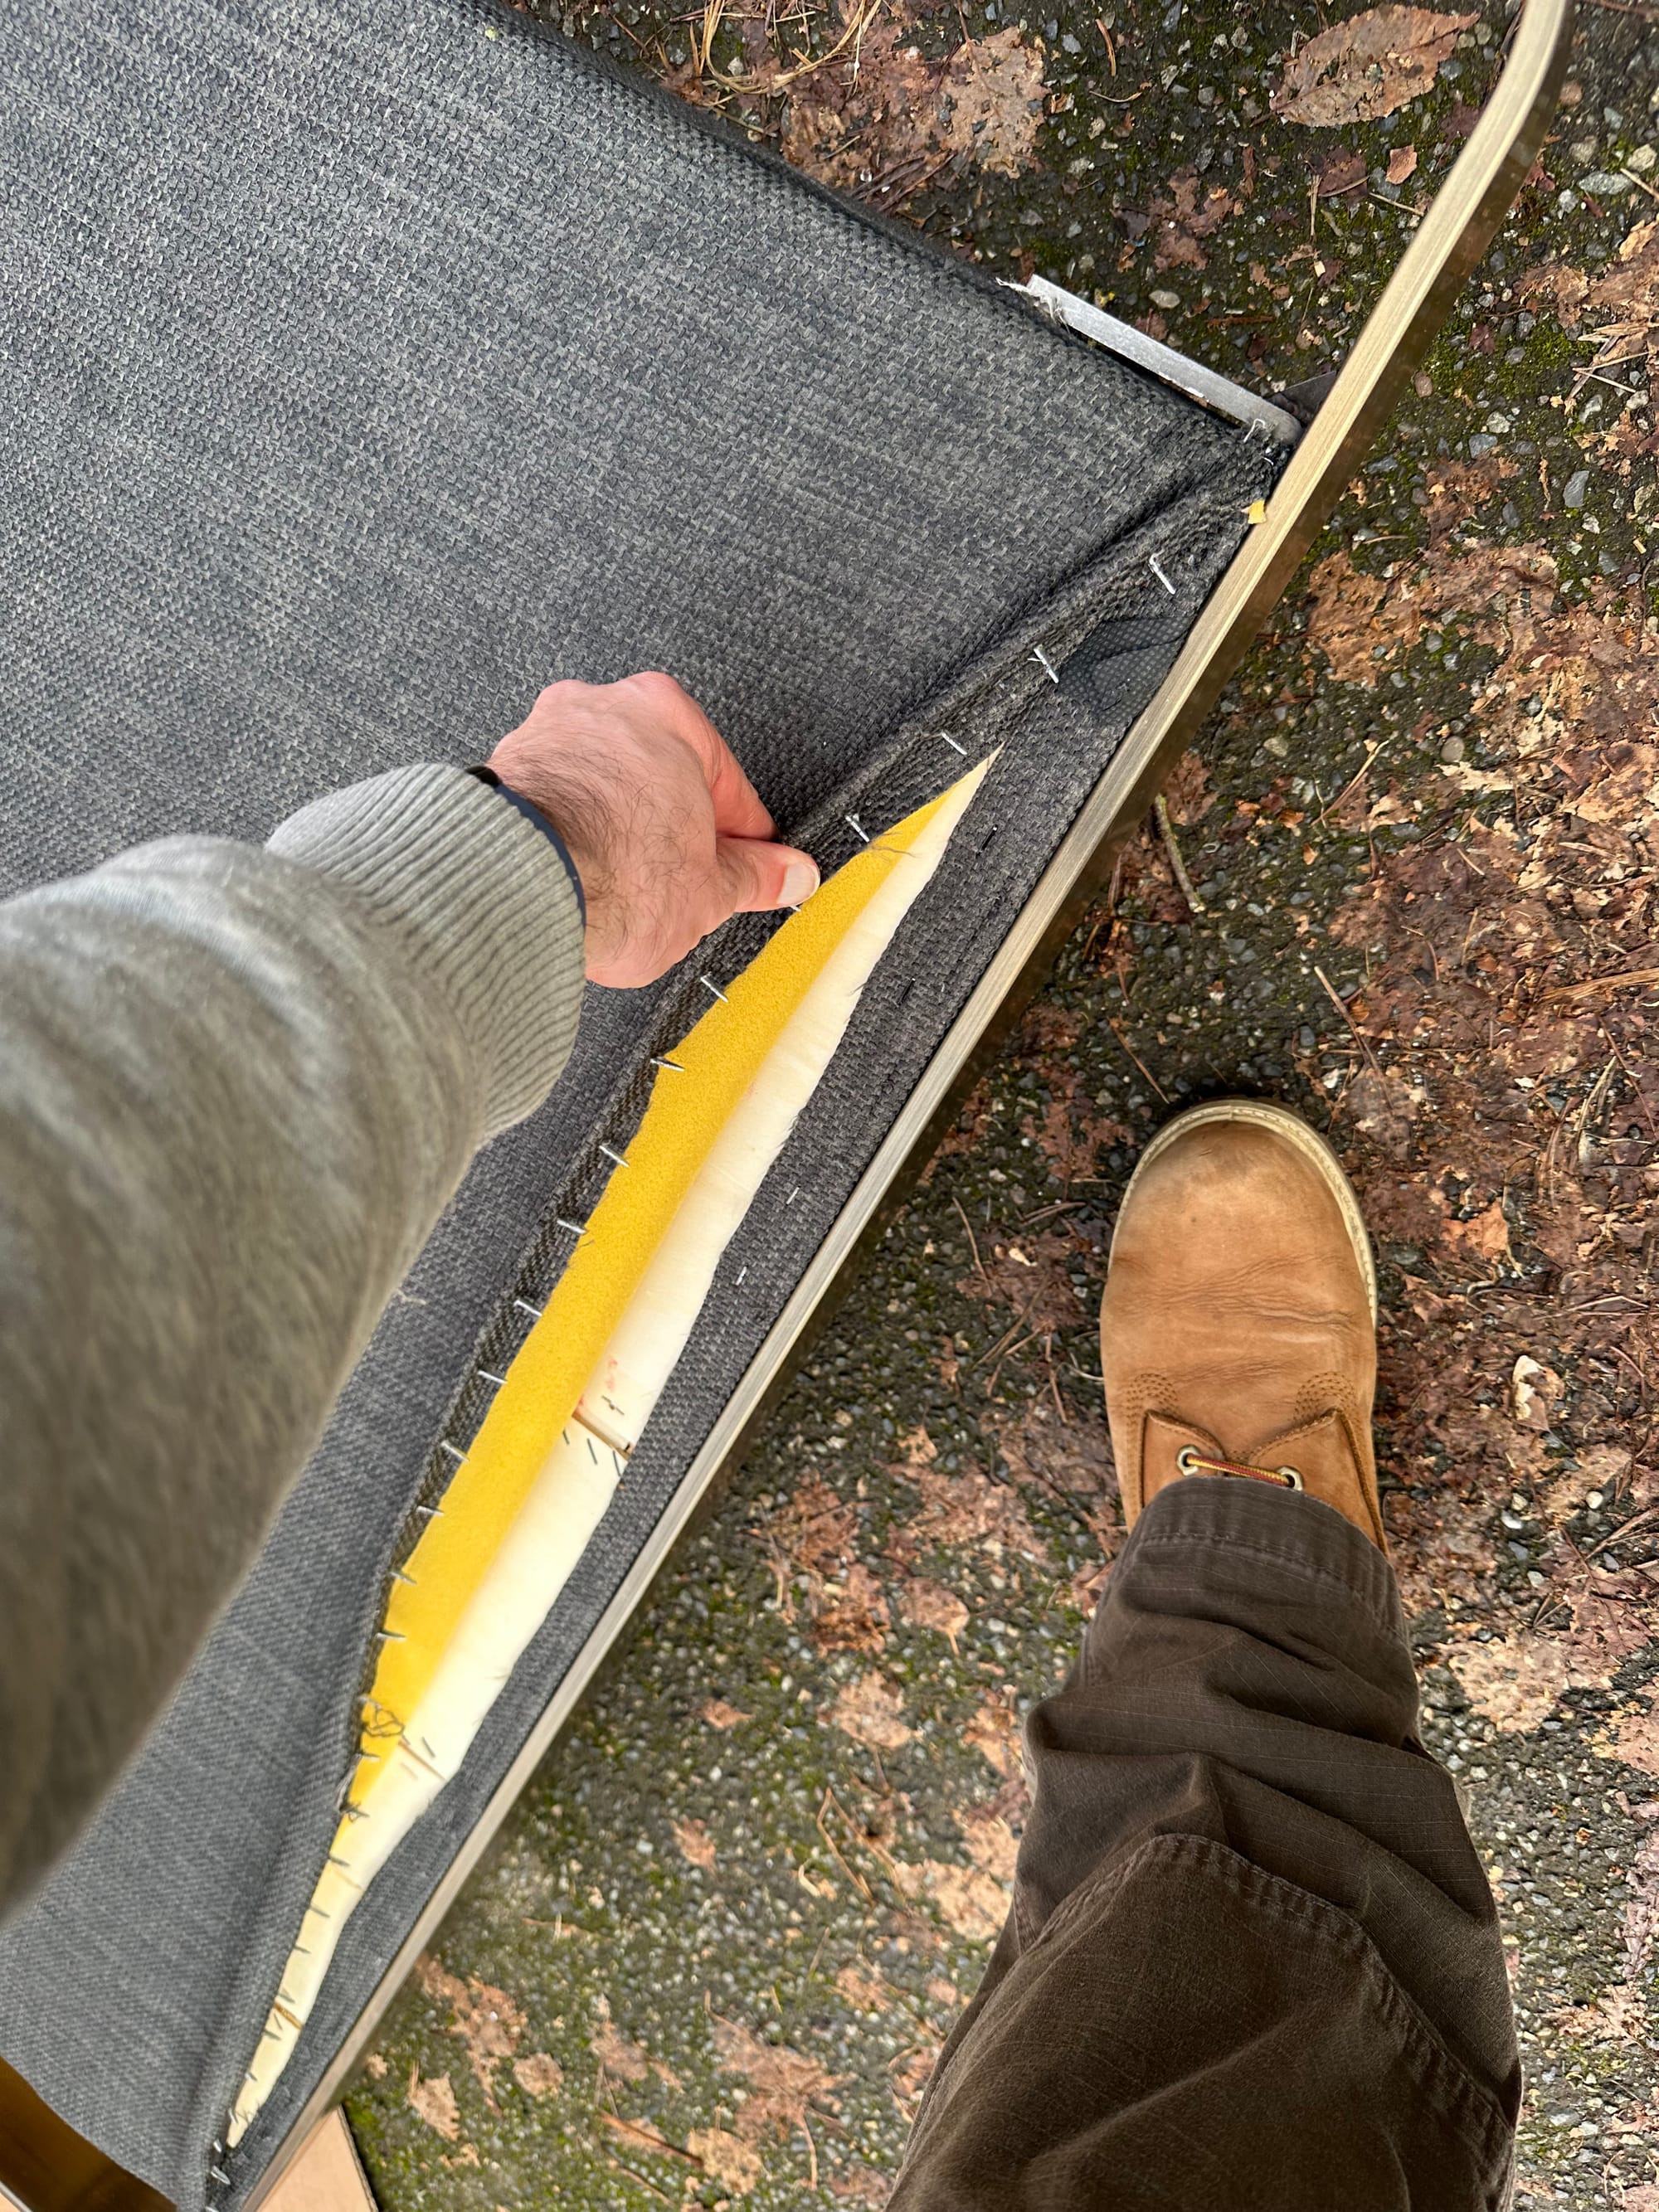
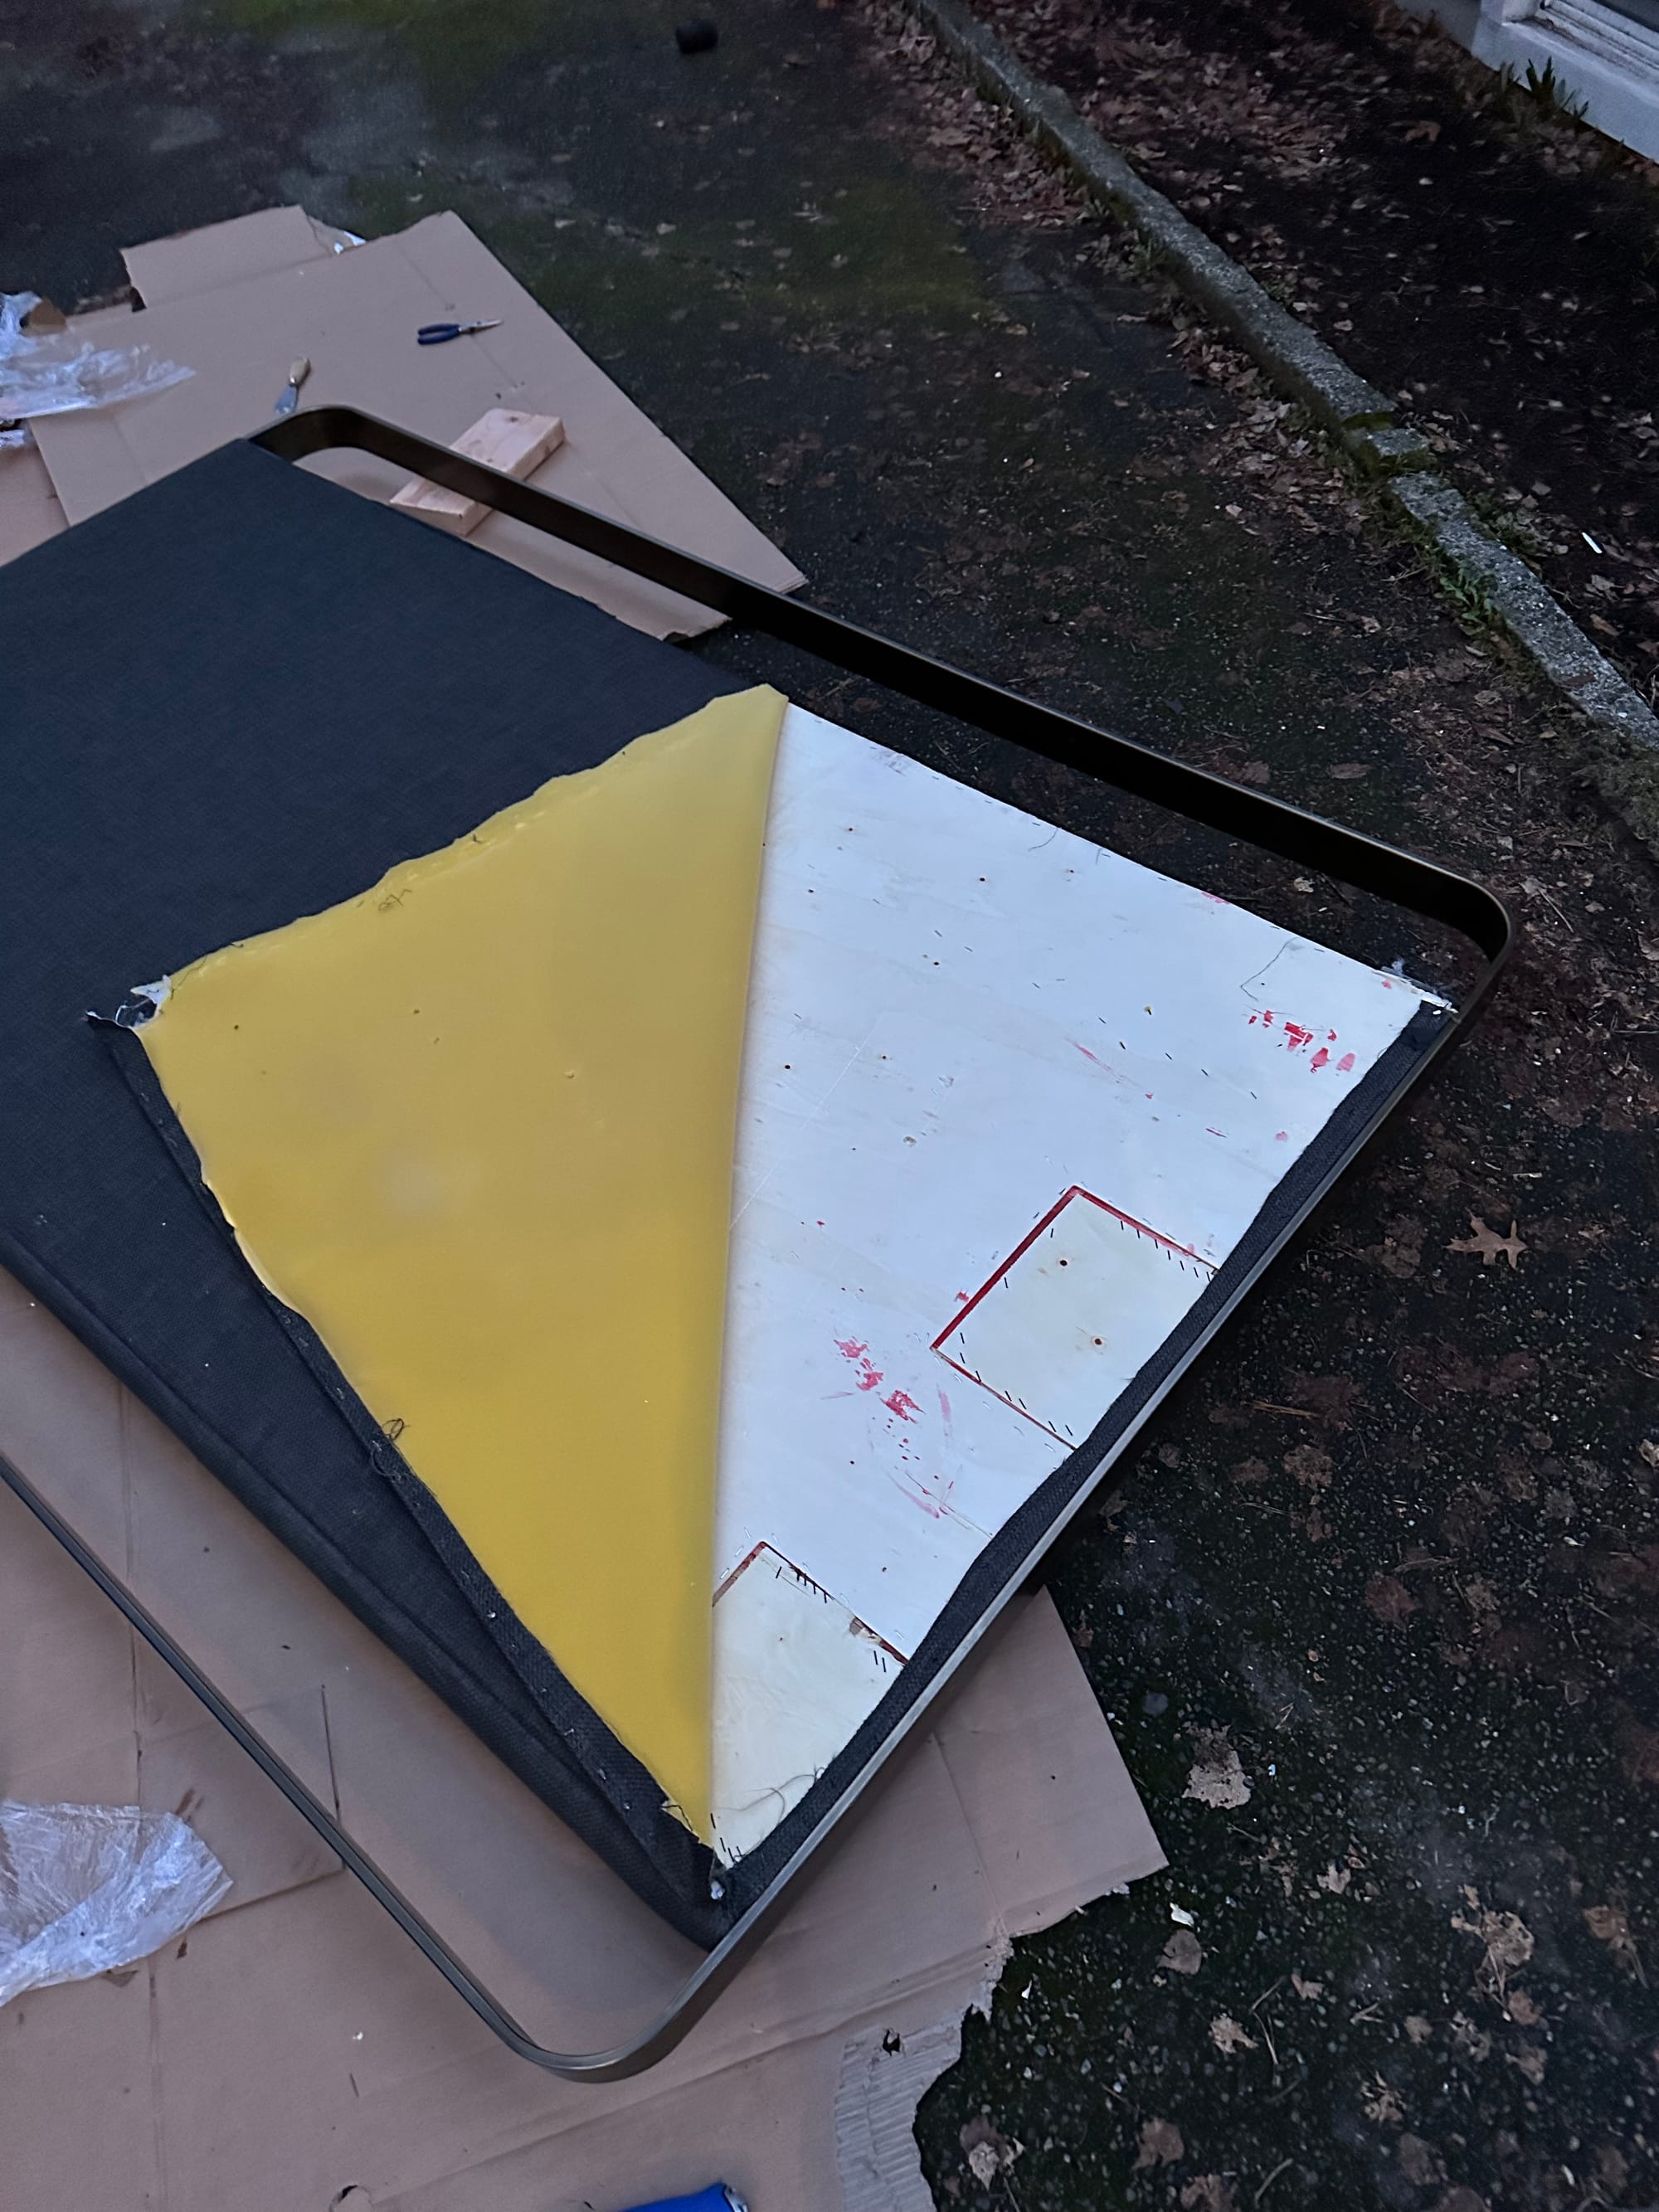
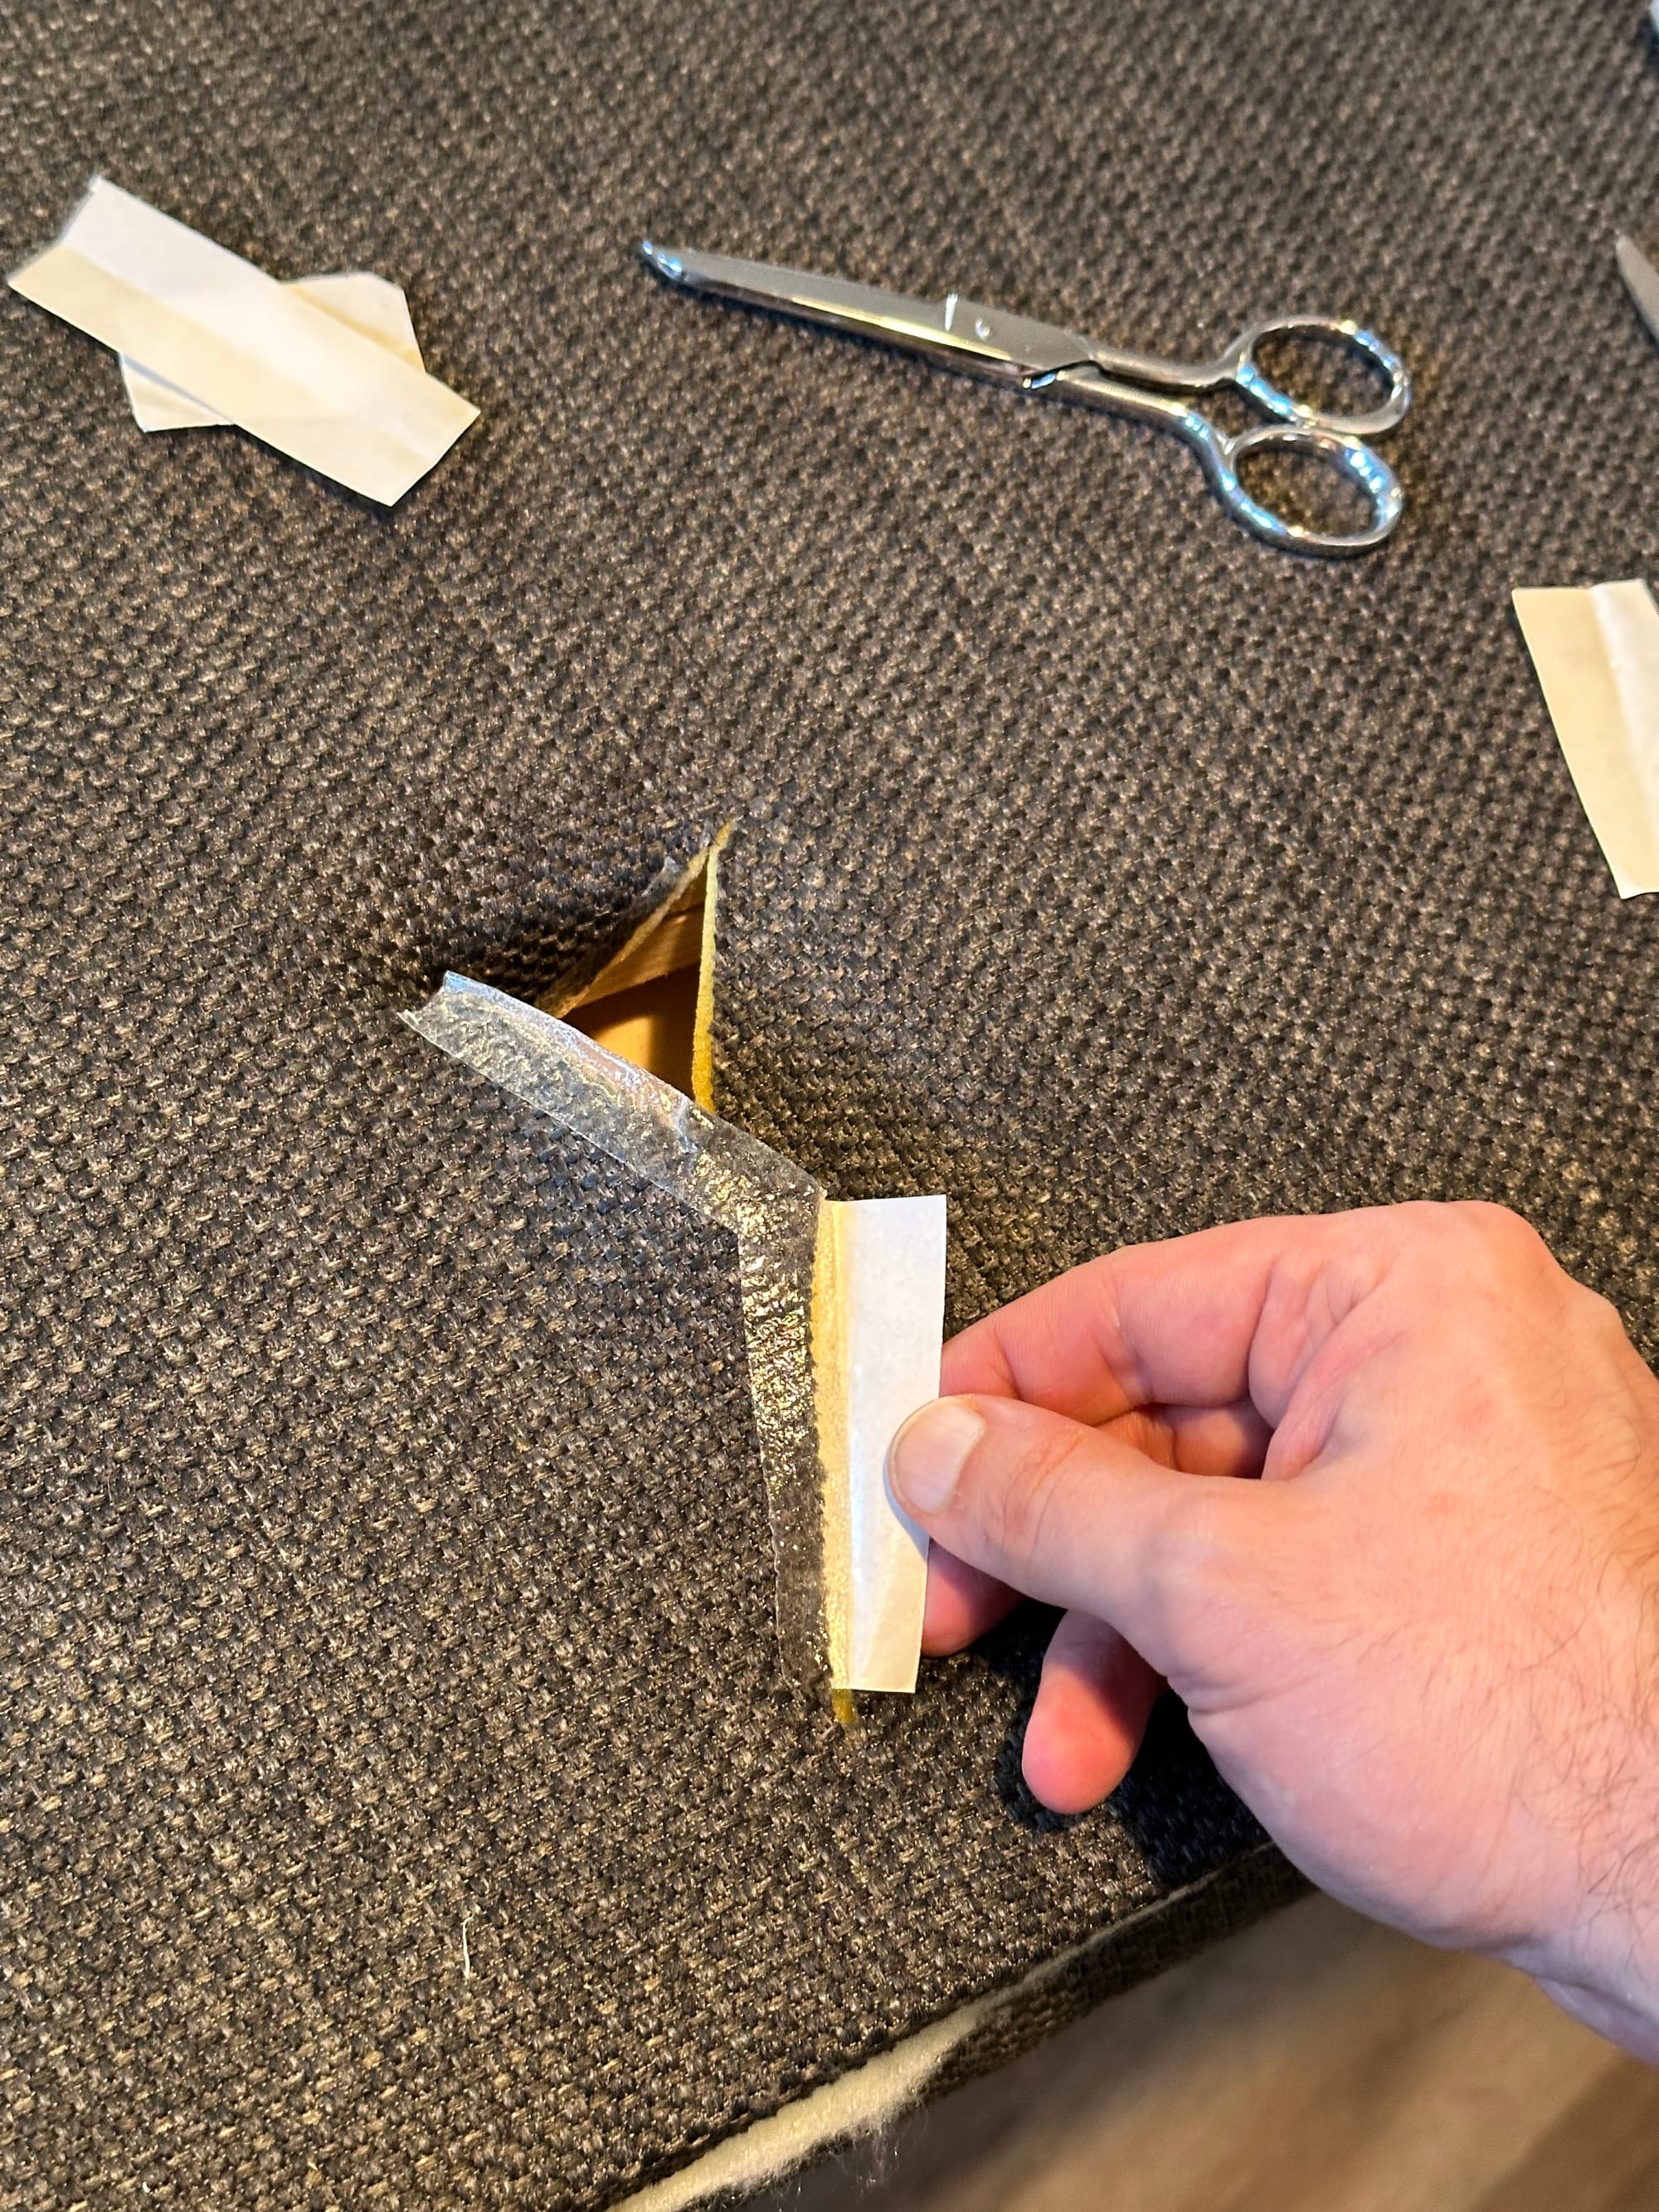
I could tell the upholstered section was a wooden construction underneath, with a fairly thin ply surface. I noted that there were two rectangles visible on the side which had separate bits of ply covering them, glued and stapled into place. They corresponded with the places where the frame and middle appeared to be joined, so it was time to open one up and see what was going on.
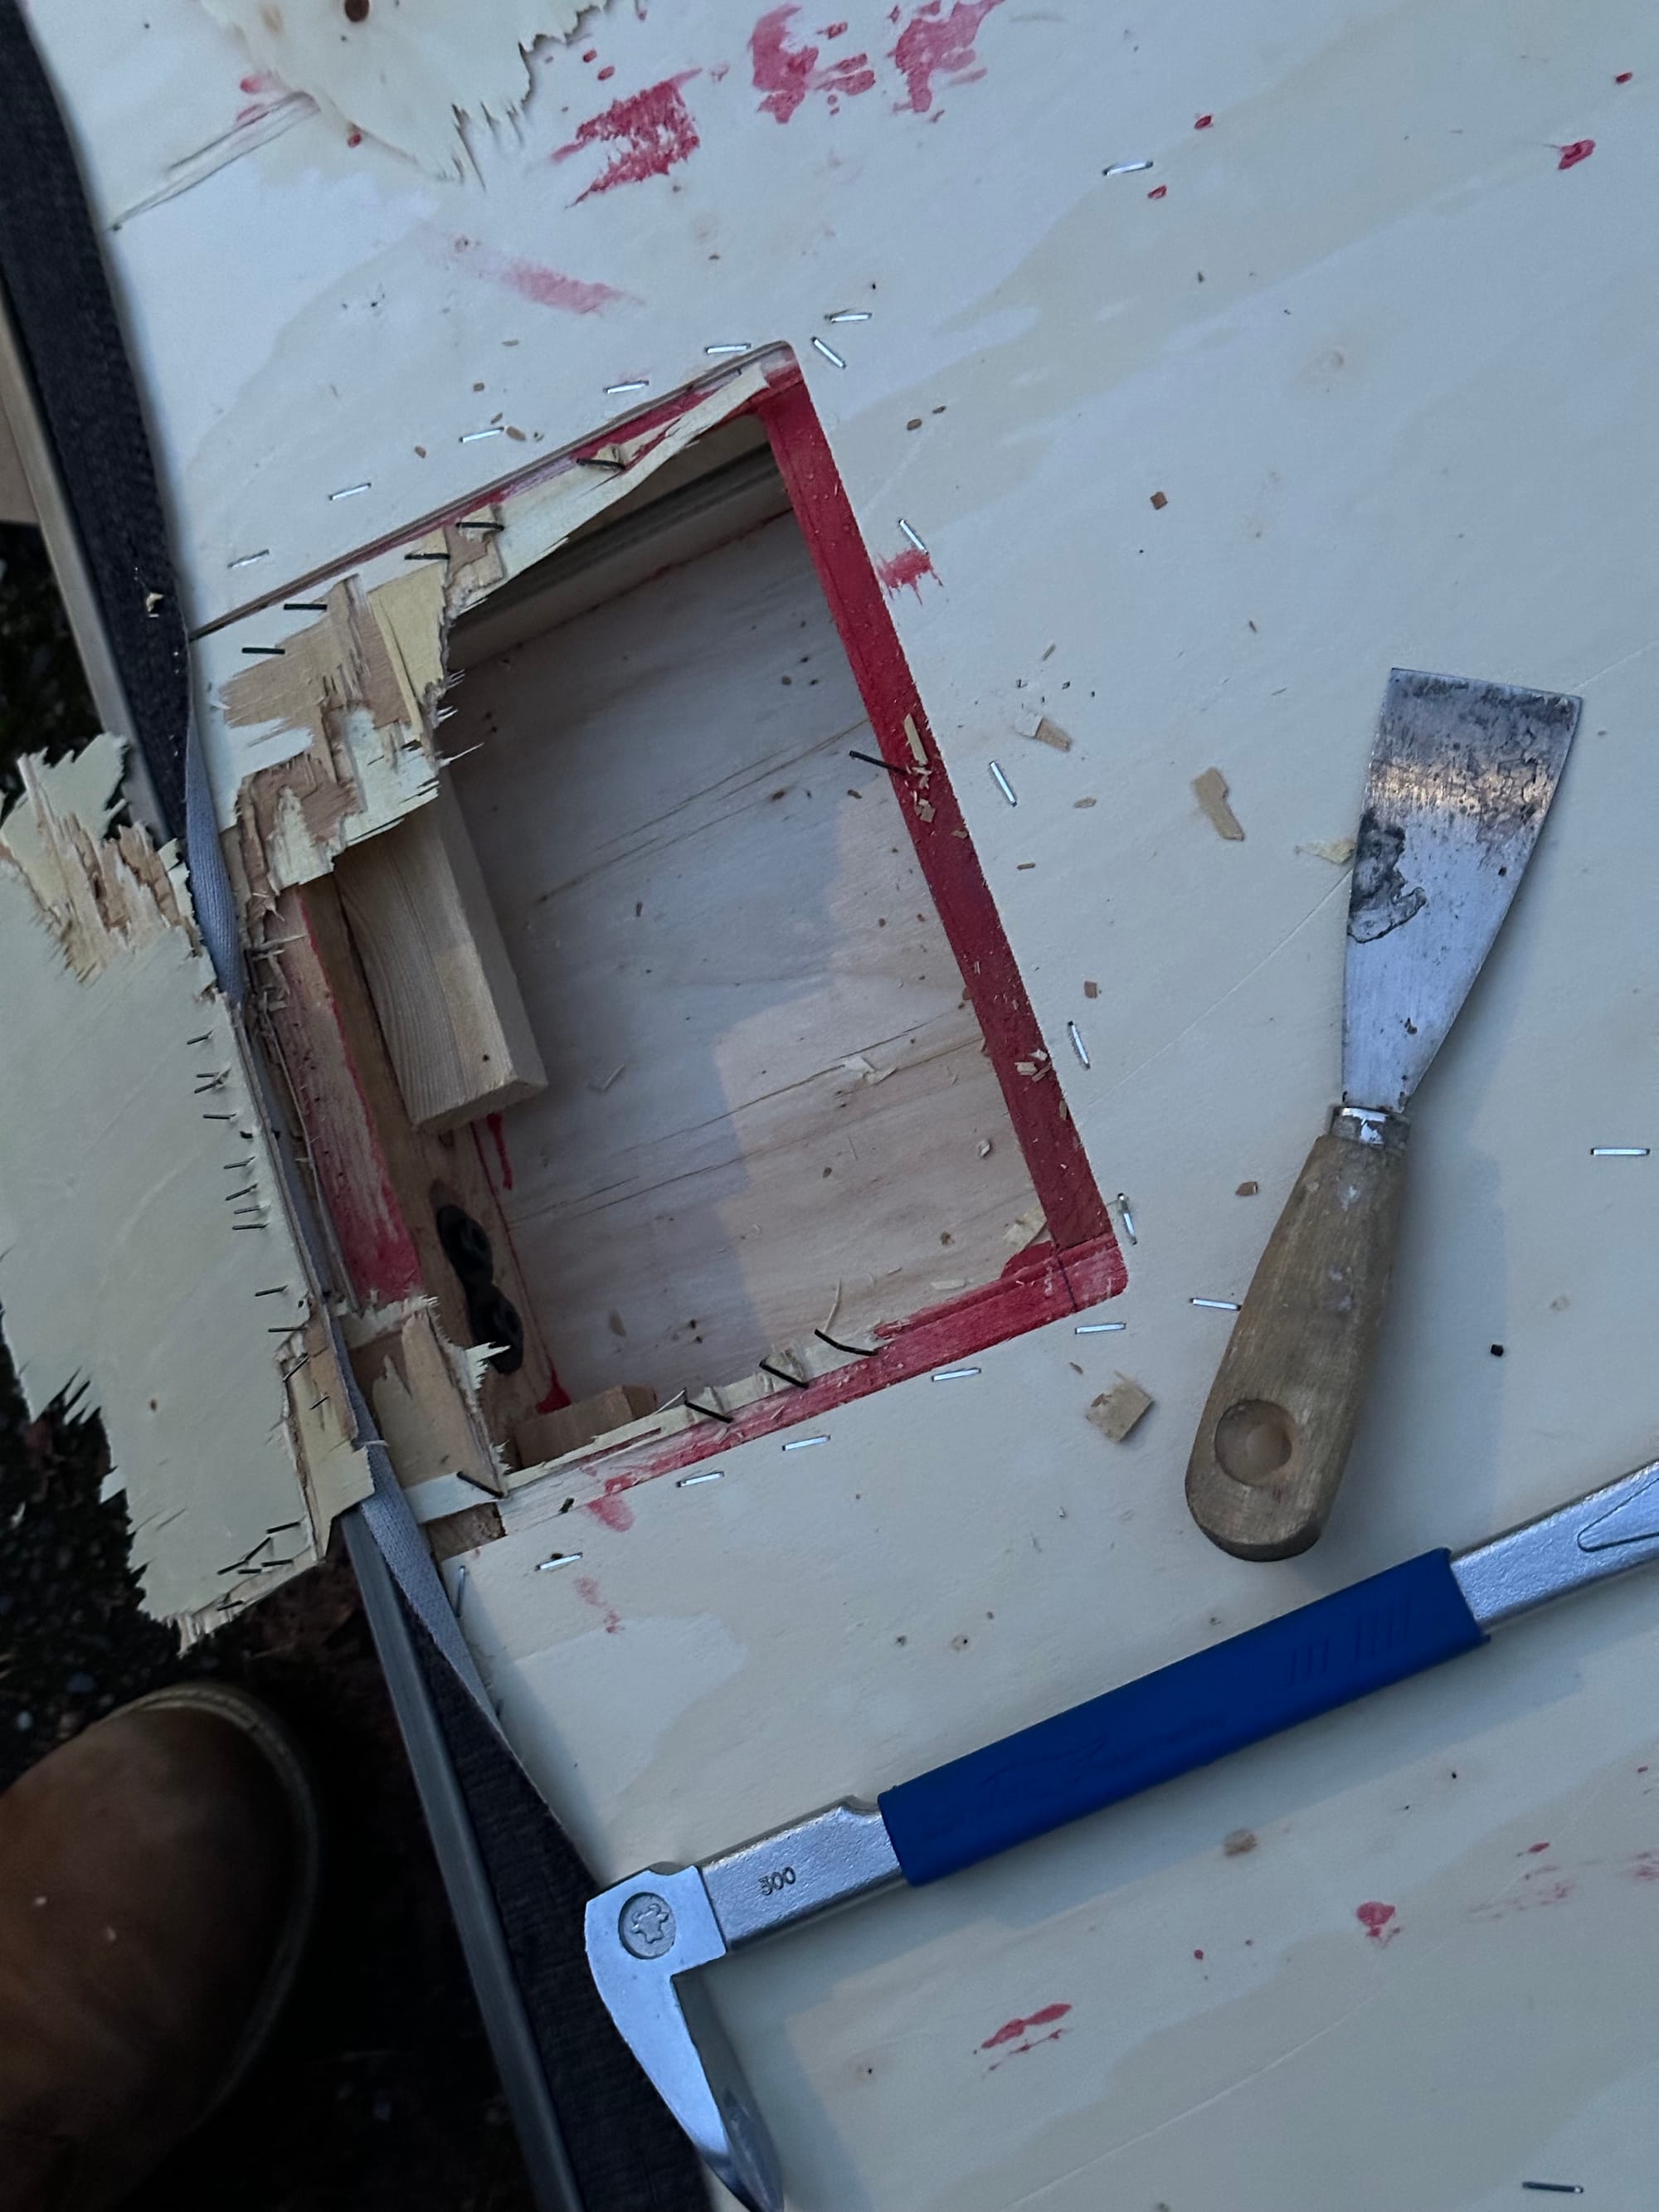
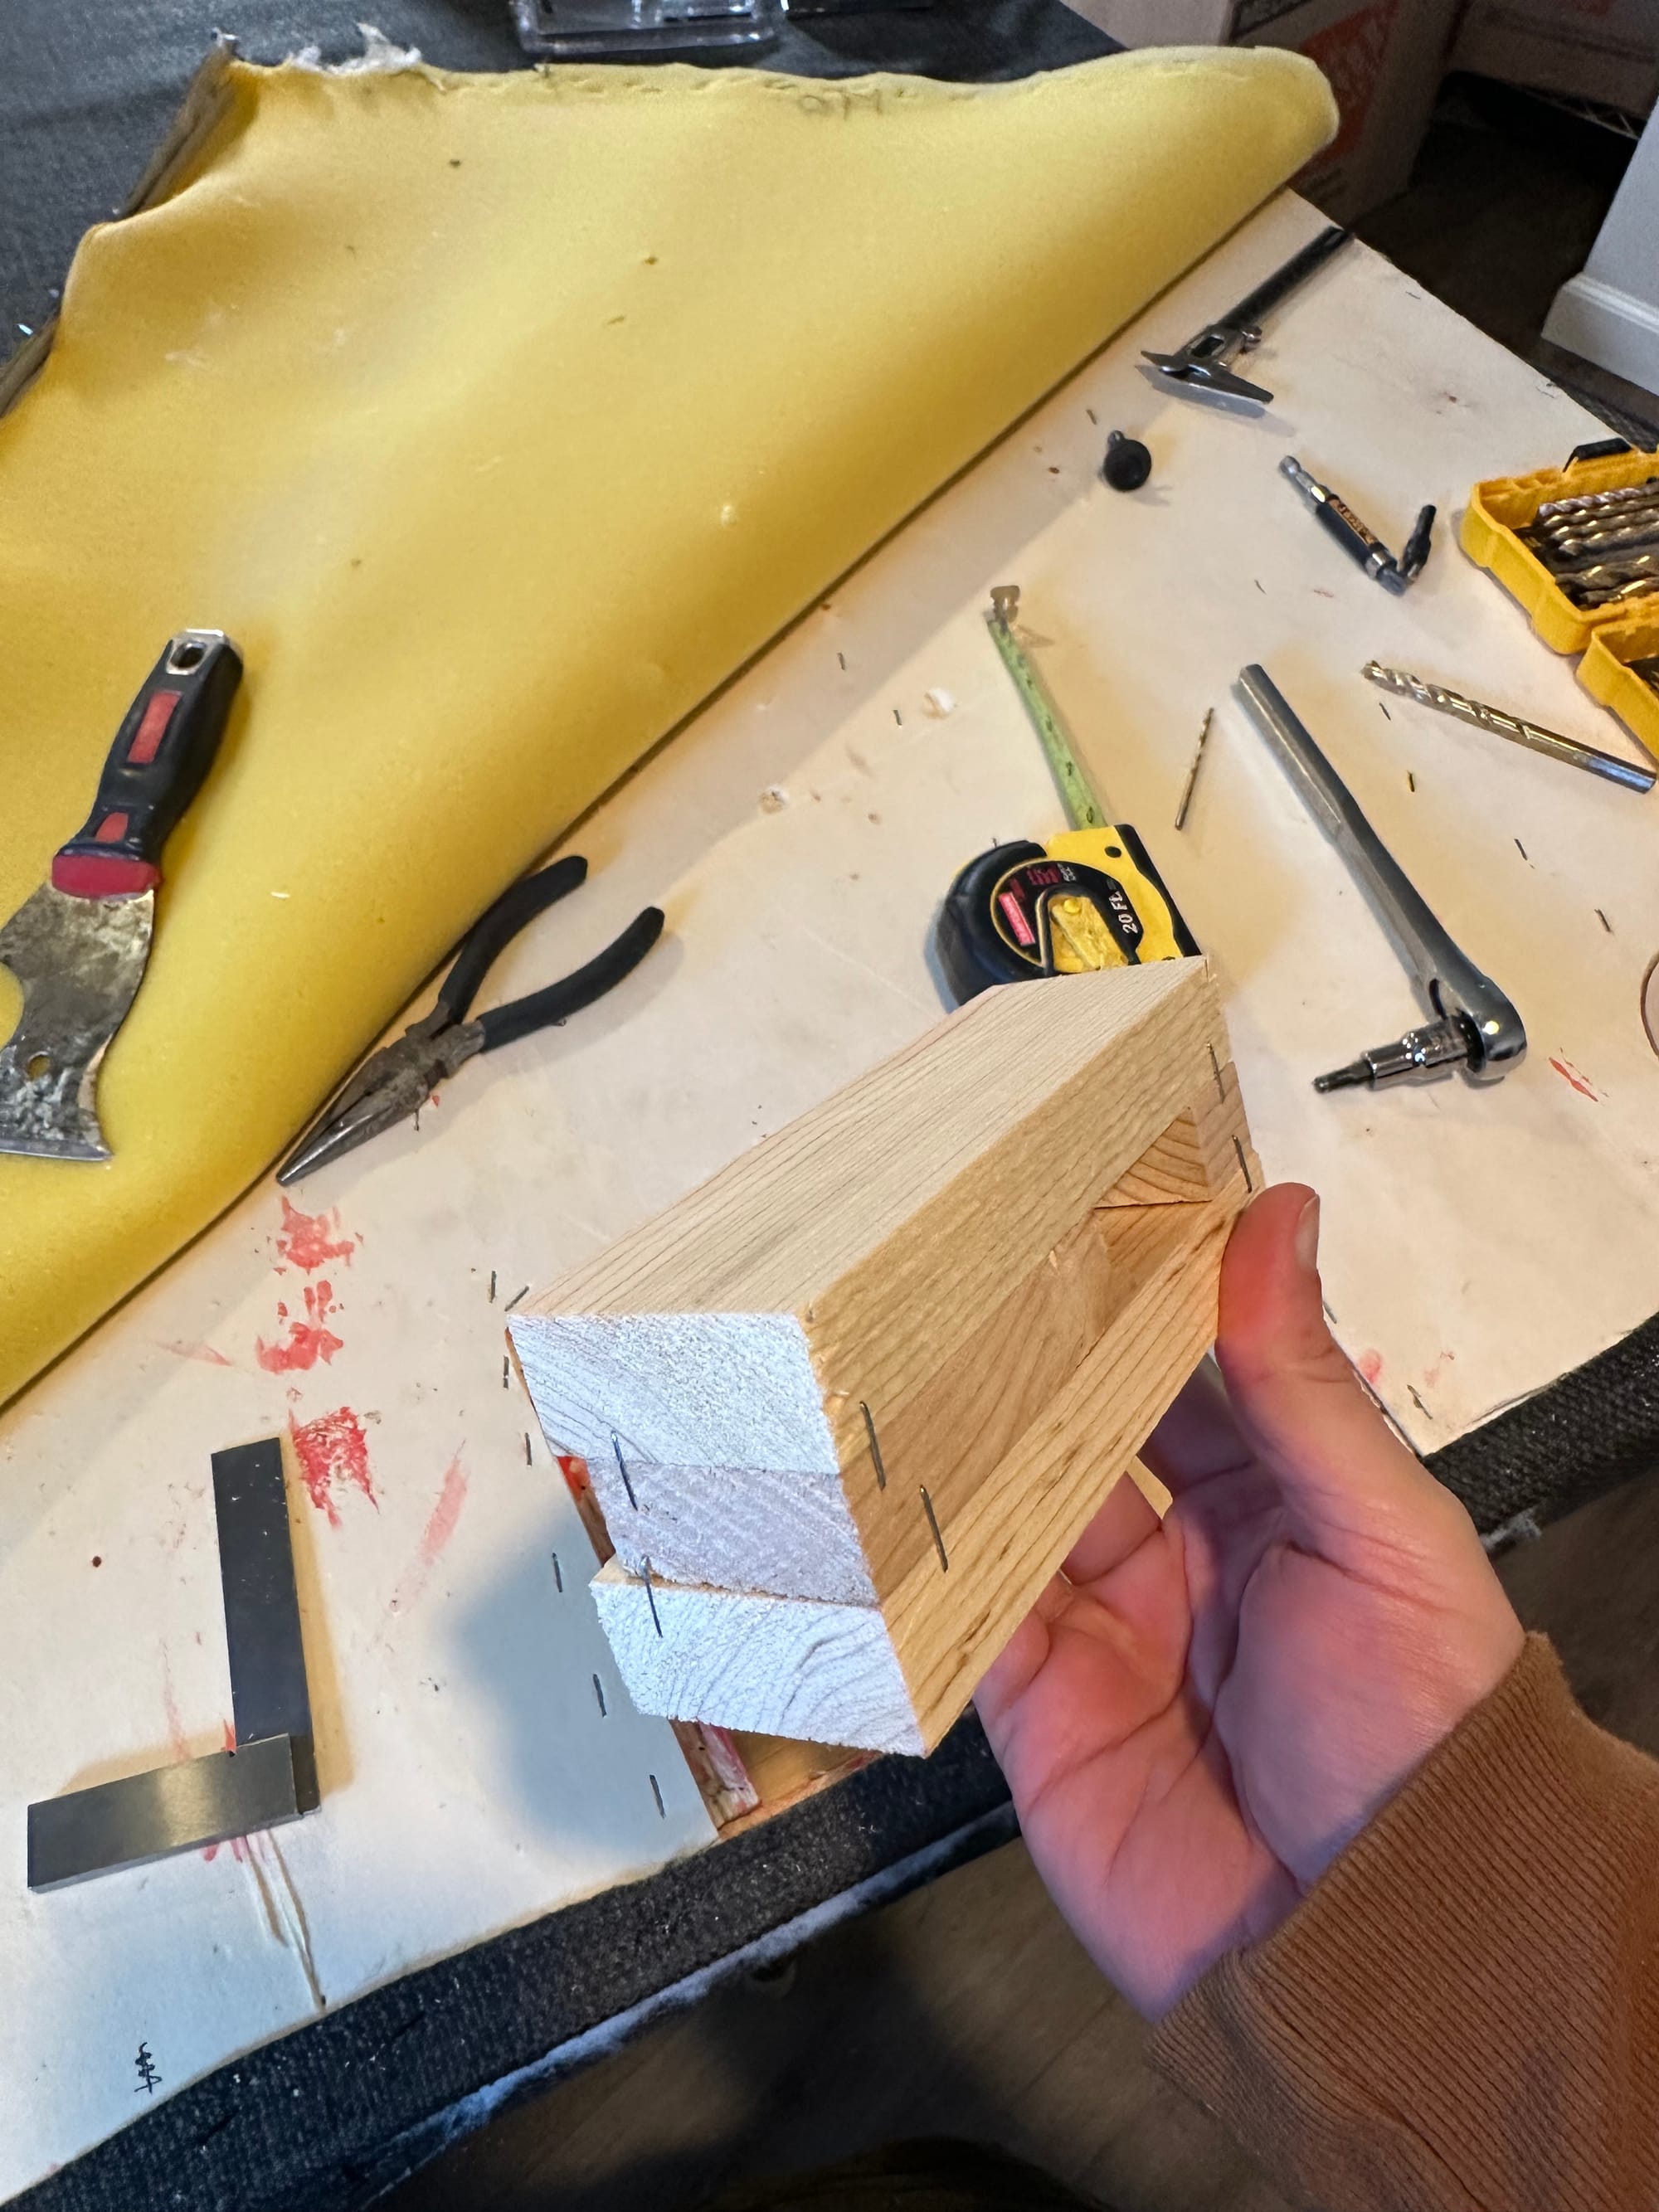
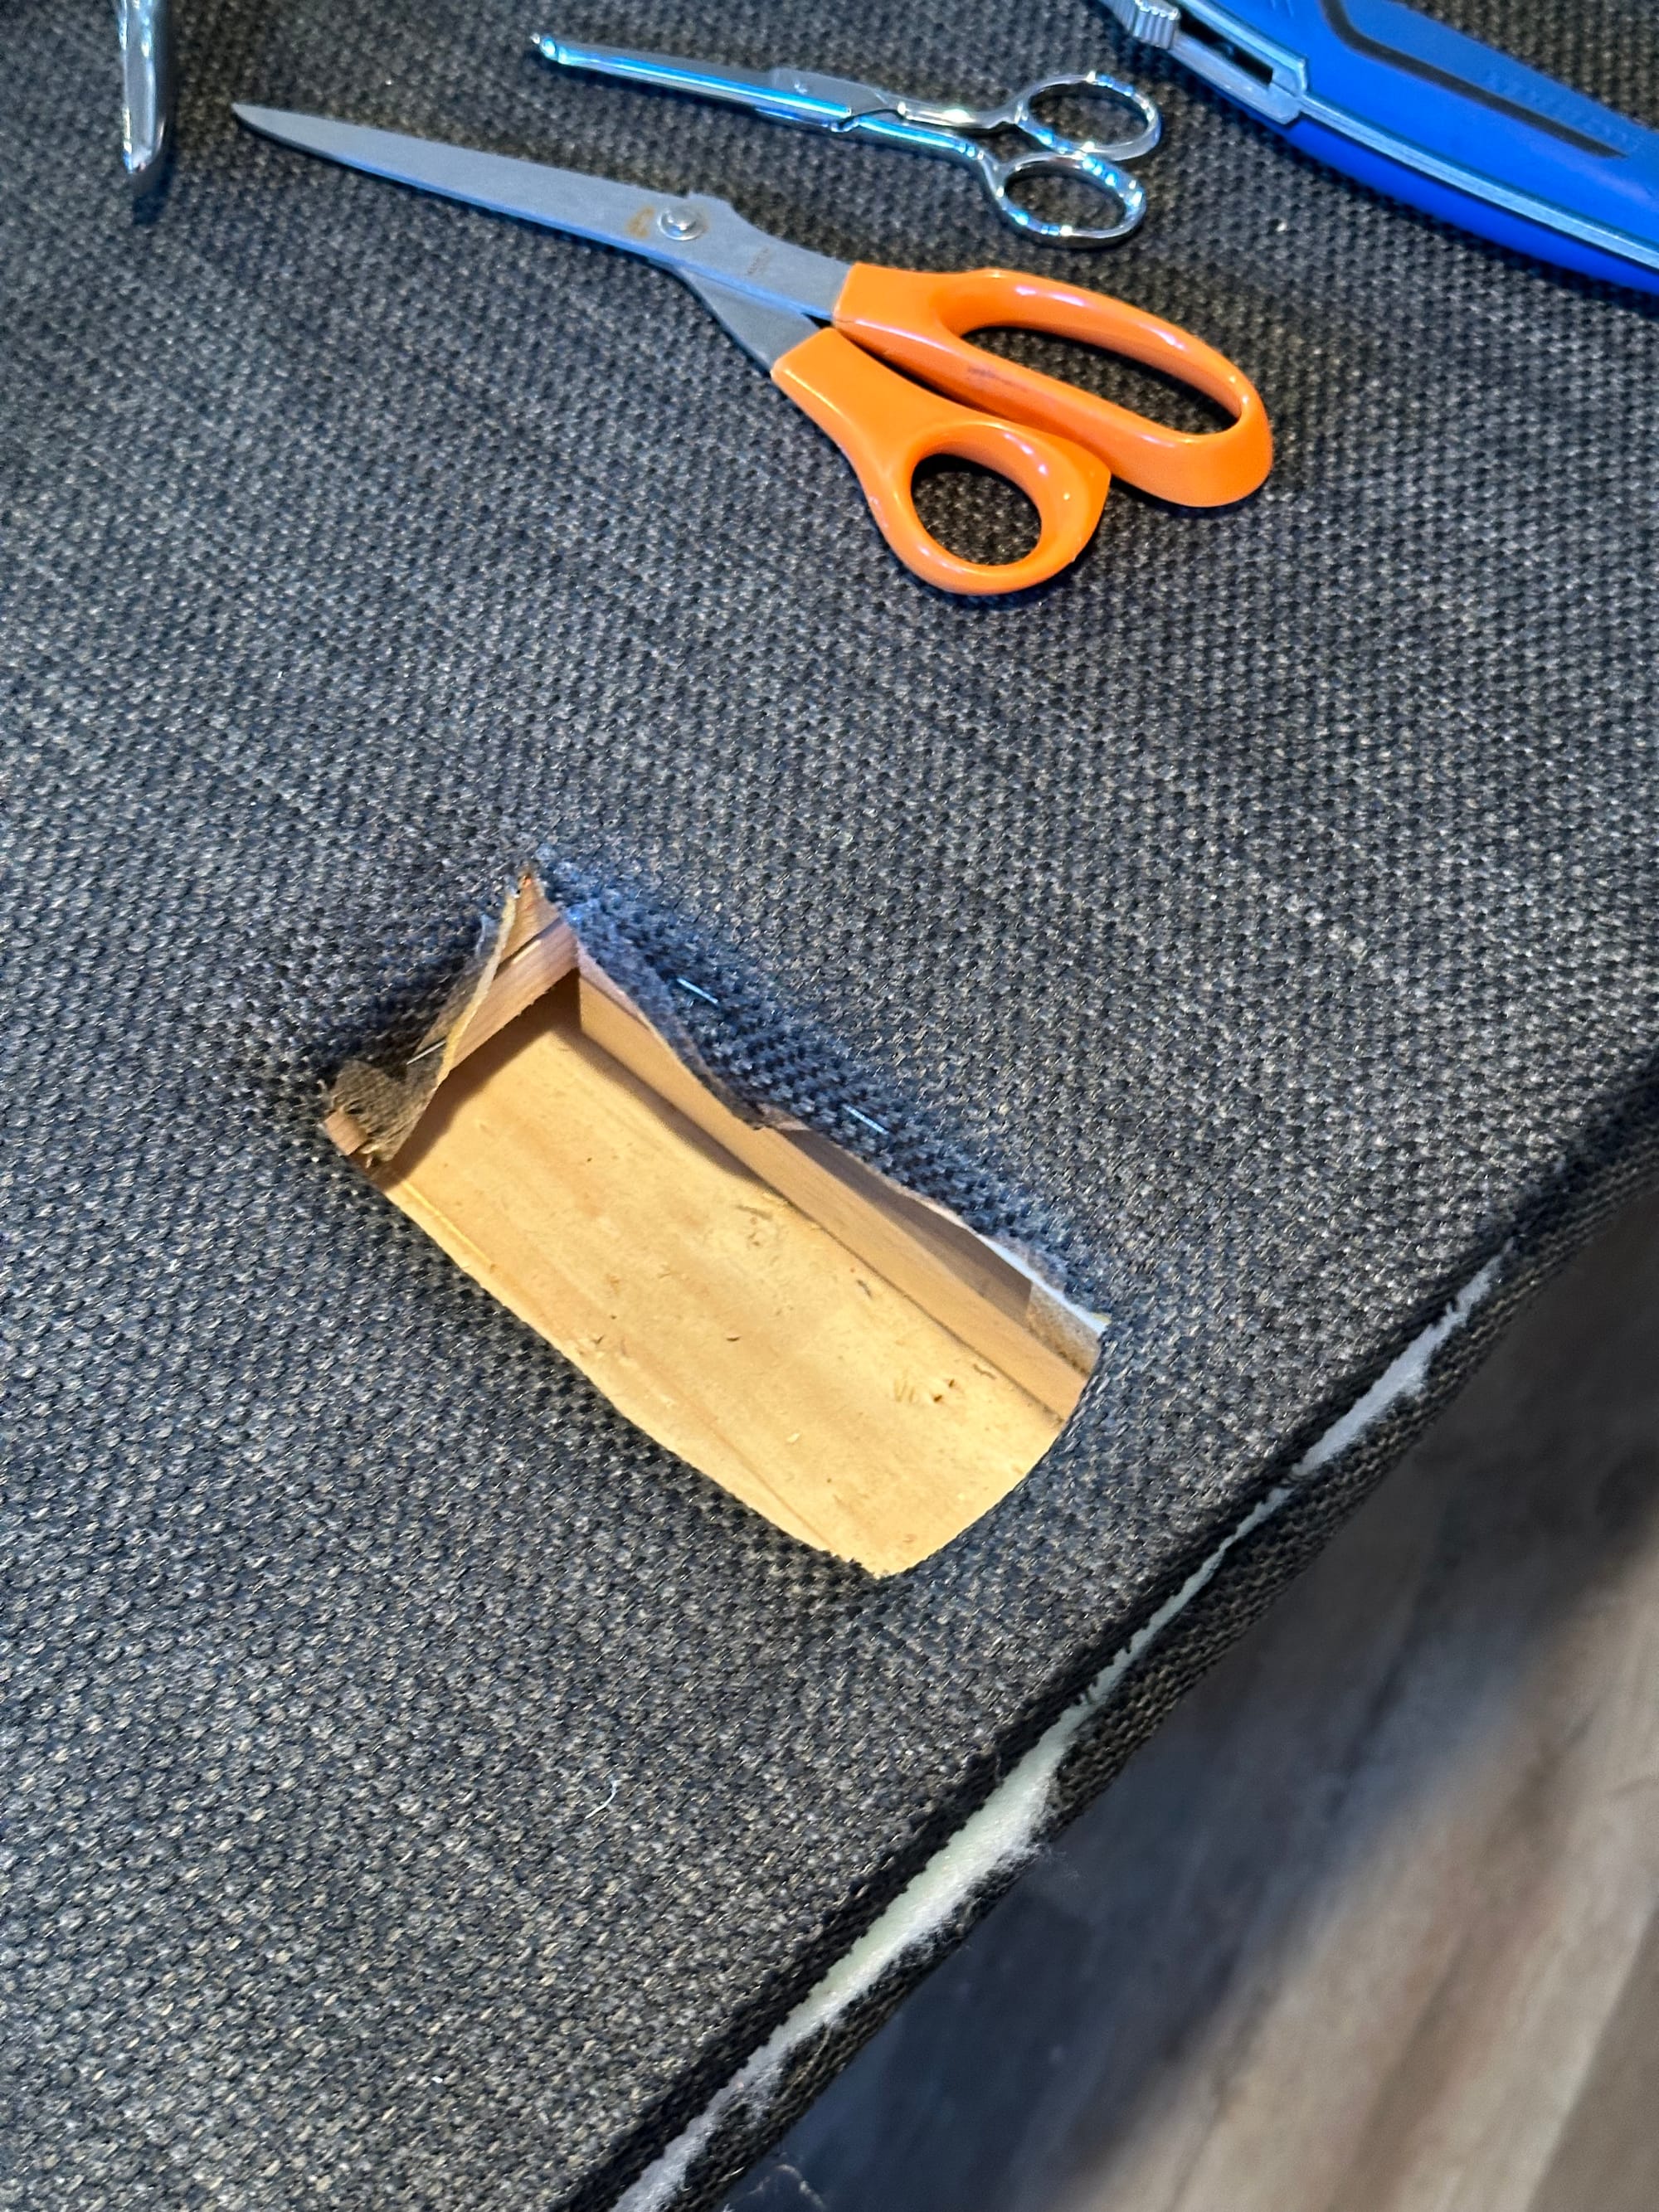
Success! Well, tentative success. Inside that section, there were two hex bolts, slotted through the wooden construction and threaded into the metal frame. Based on that, I assumed that if there were 3 other rectangular holes with 2 bolts each, and that if I removed all of those, I'd be able to remove the upholstered middle from the metal frame.
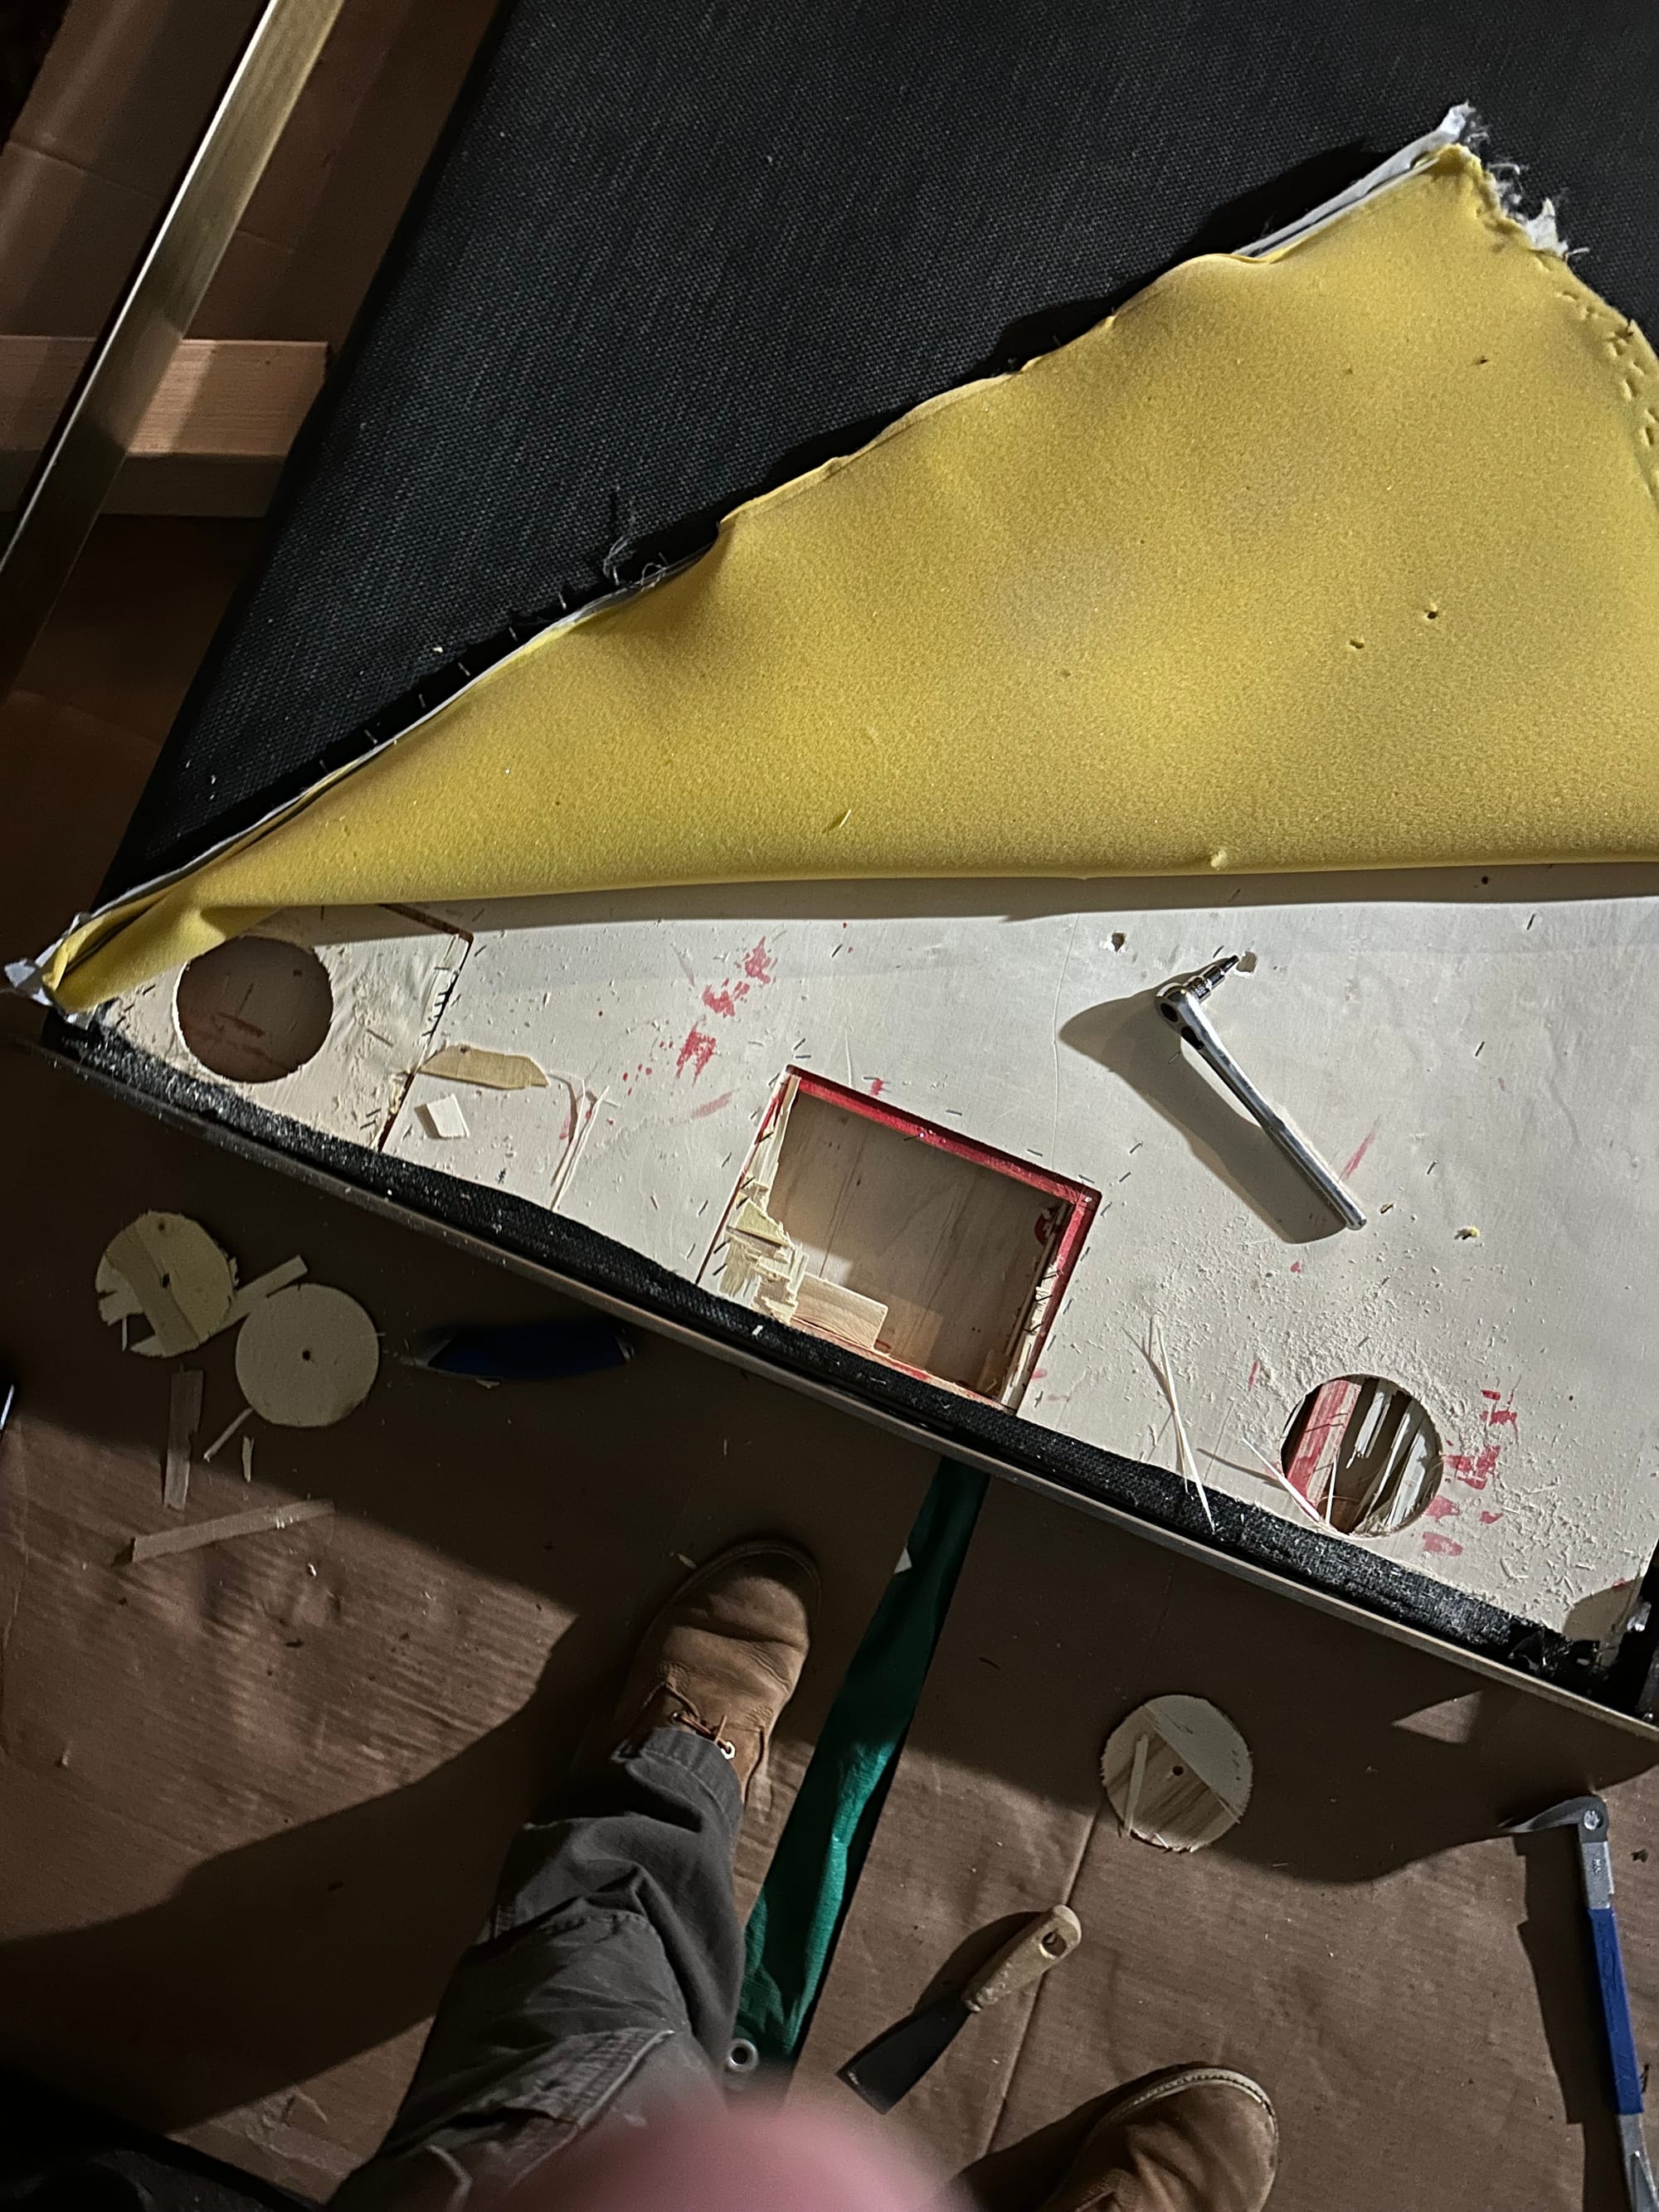
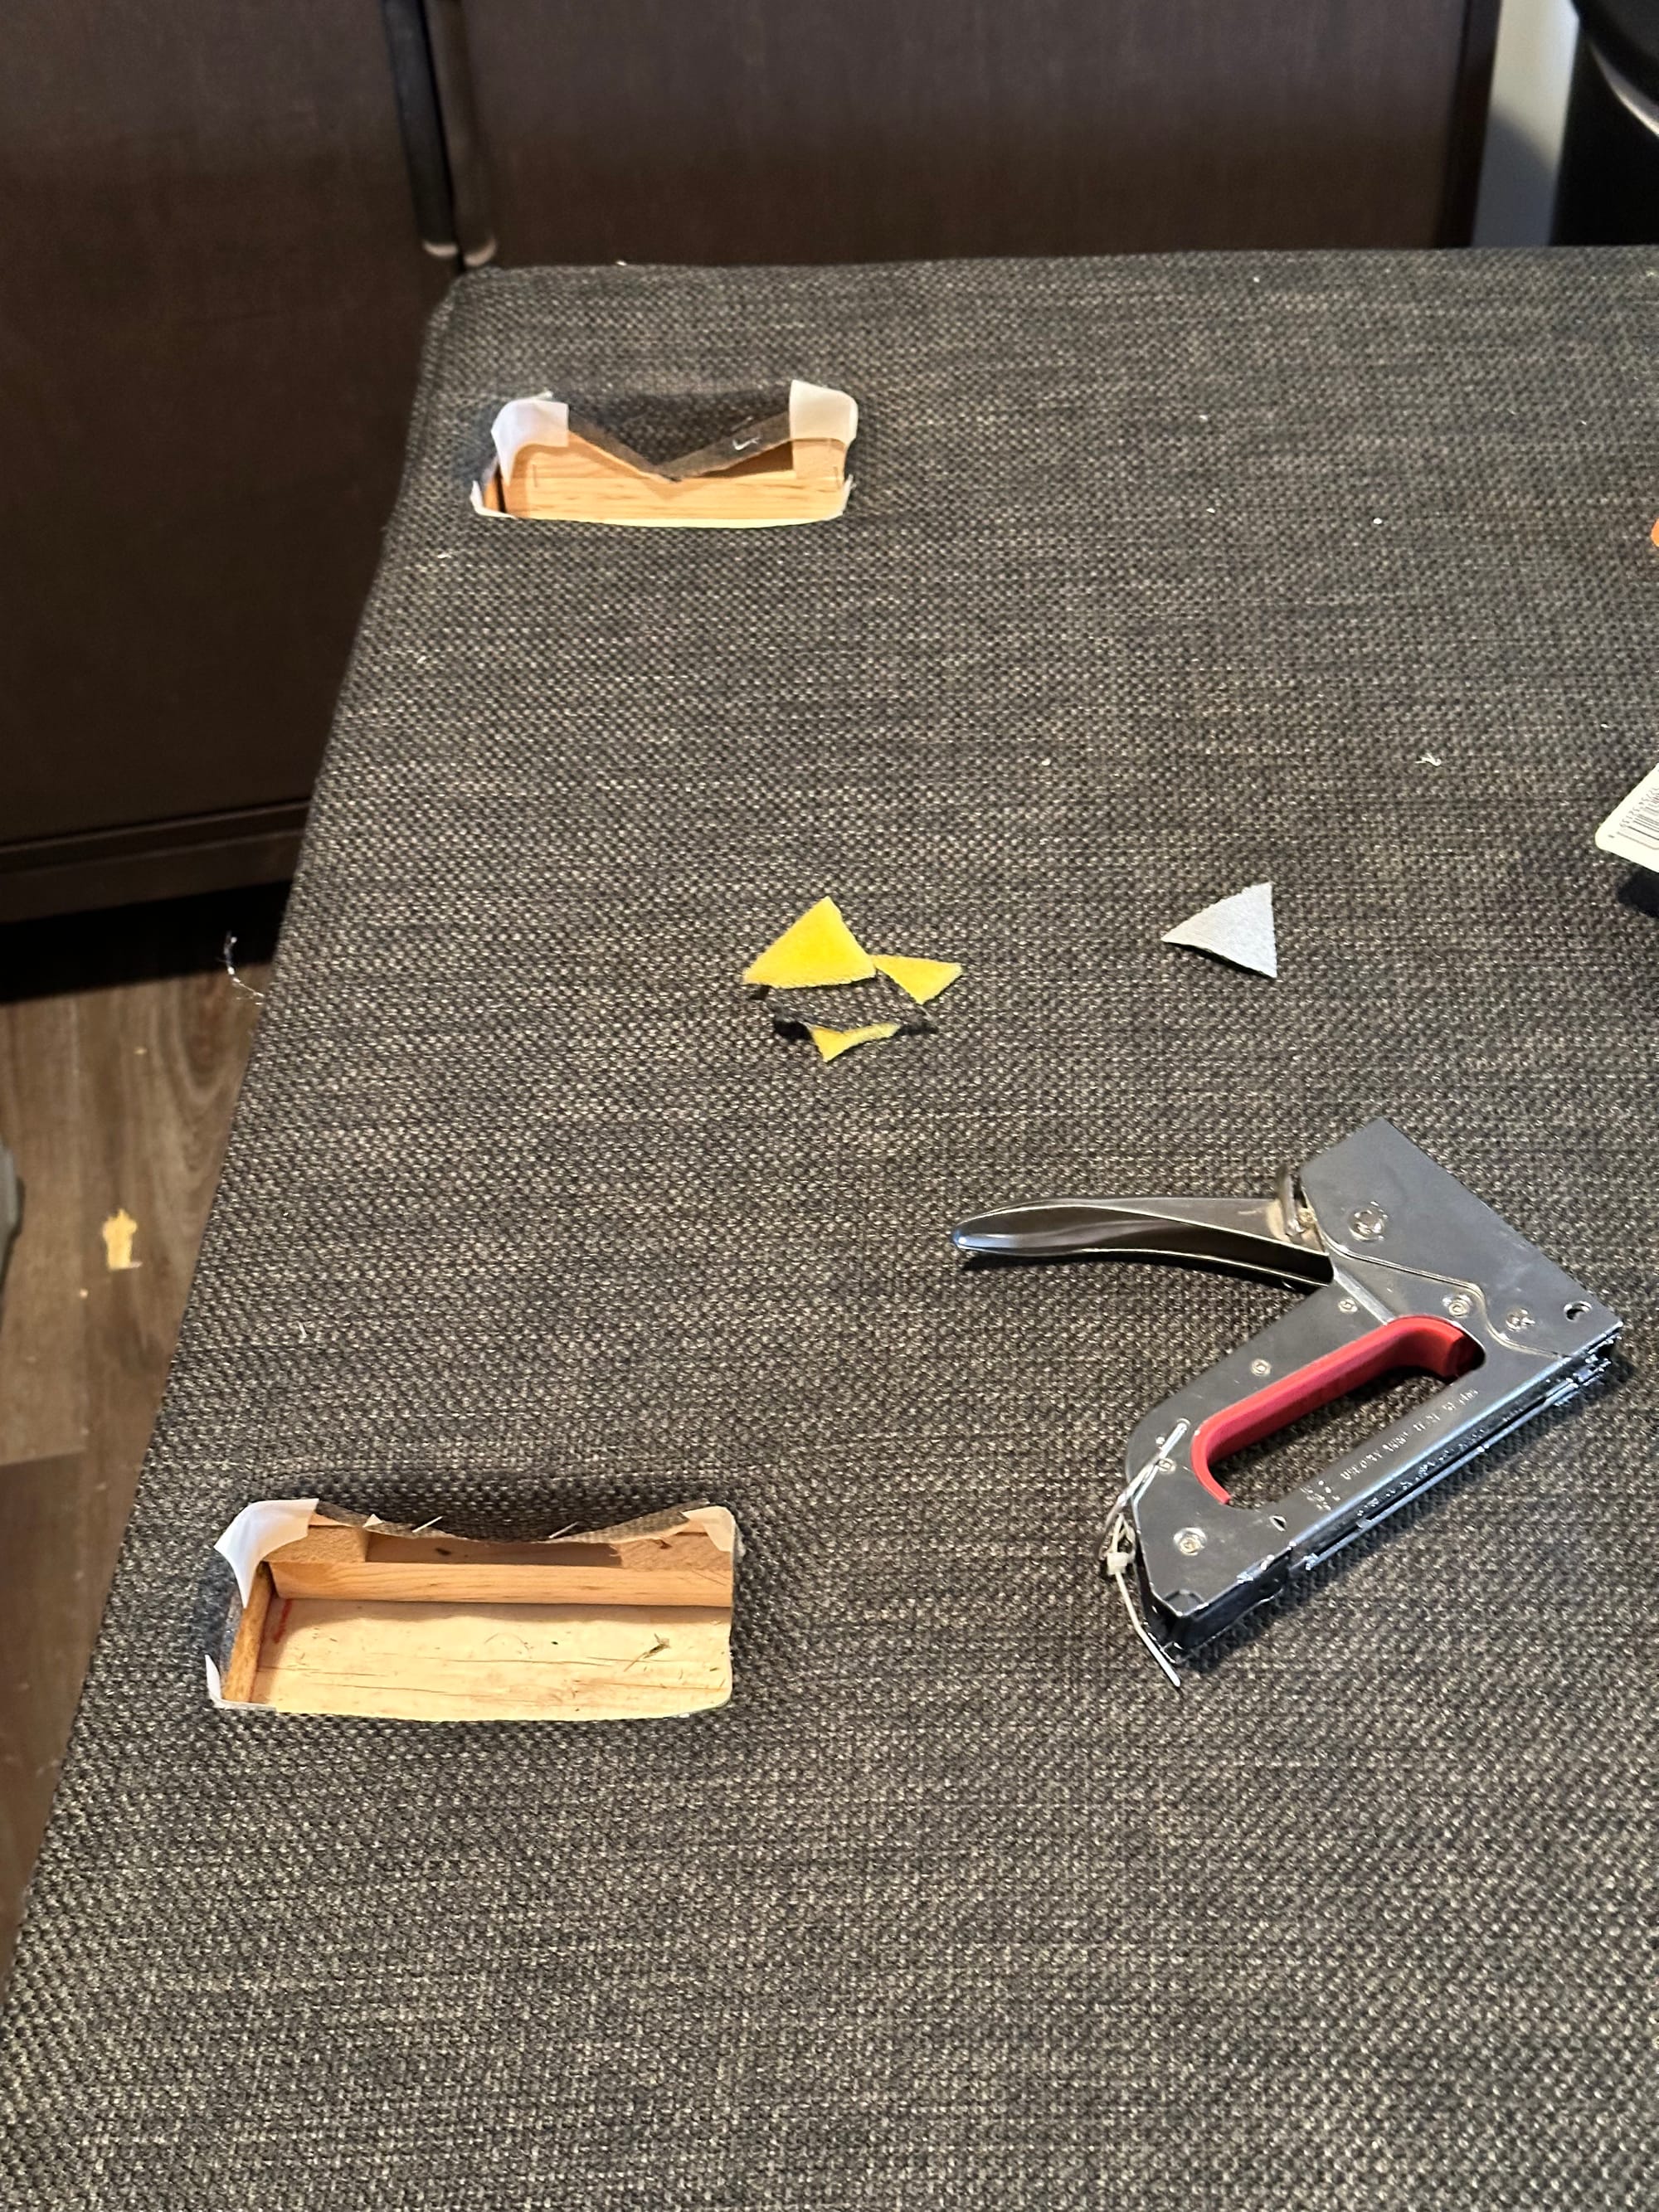
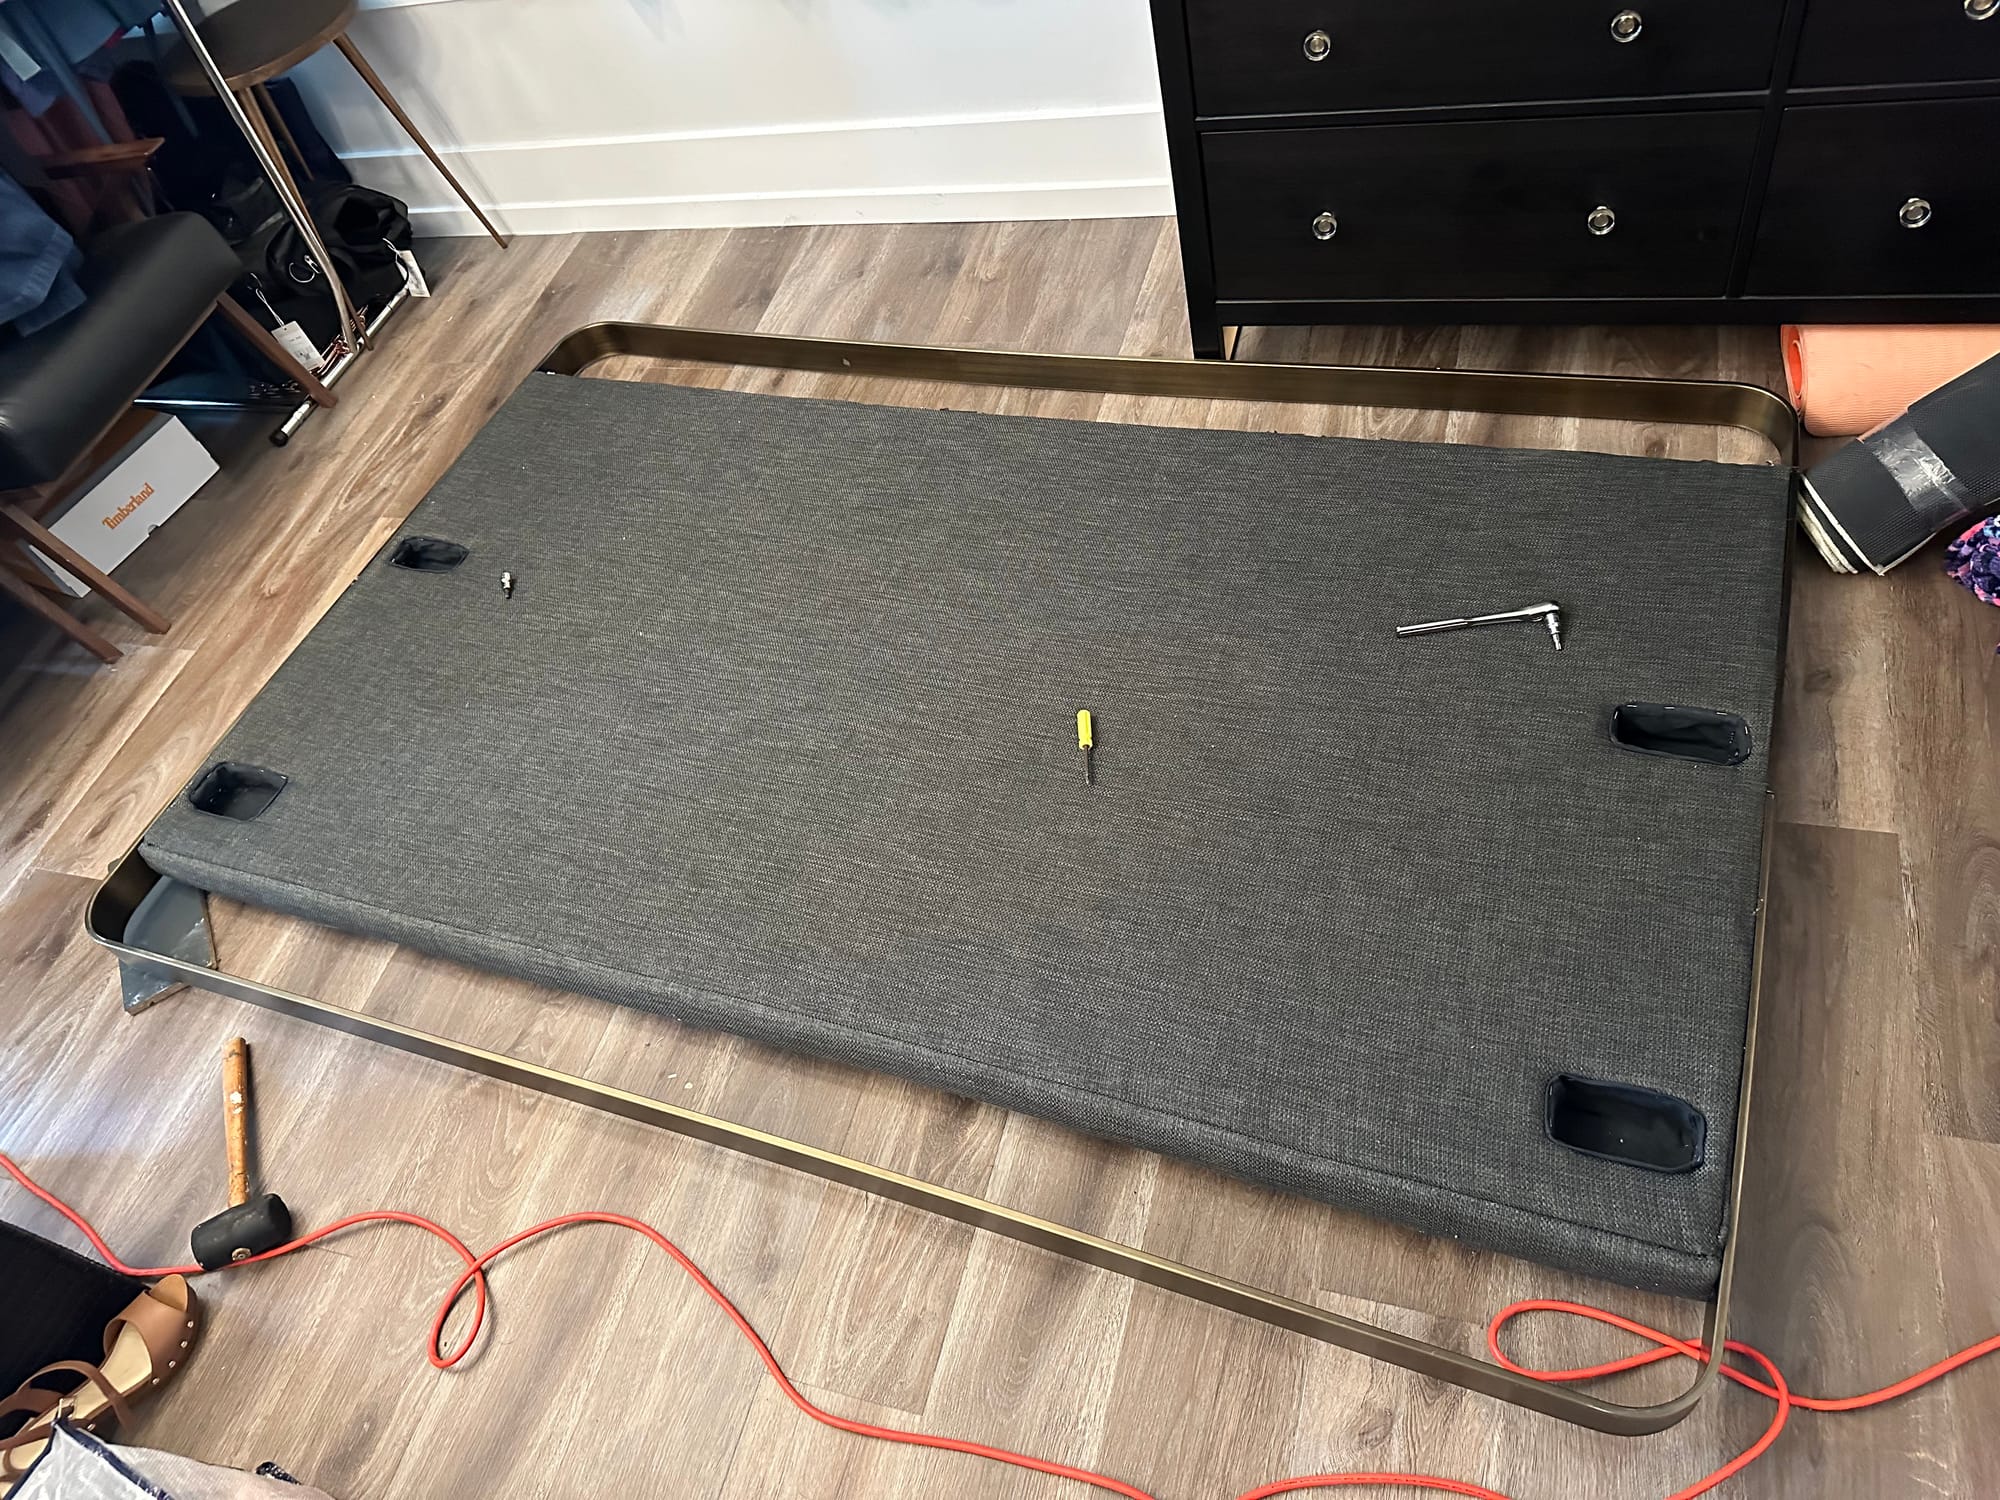
Several hours later, primarily due to the difficulty of removing upholstery staples, I'd gotten access to all 4 spots. For a moment, I thought there might be bolts in another part of the frame, but after cutting a hole with a hole saw, I discovered that I was mistaken. I removed all the bolts, putting them in a magnetic parts tray. And with that, The upholstered middle section could be worked free from its pressure fit.
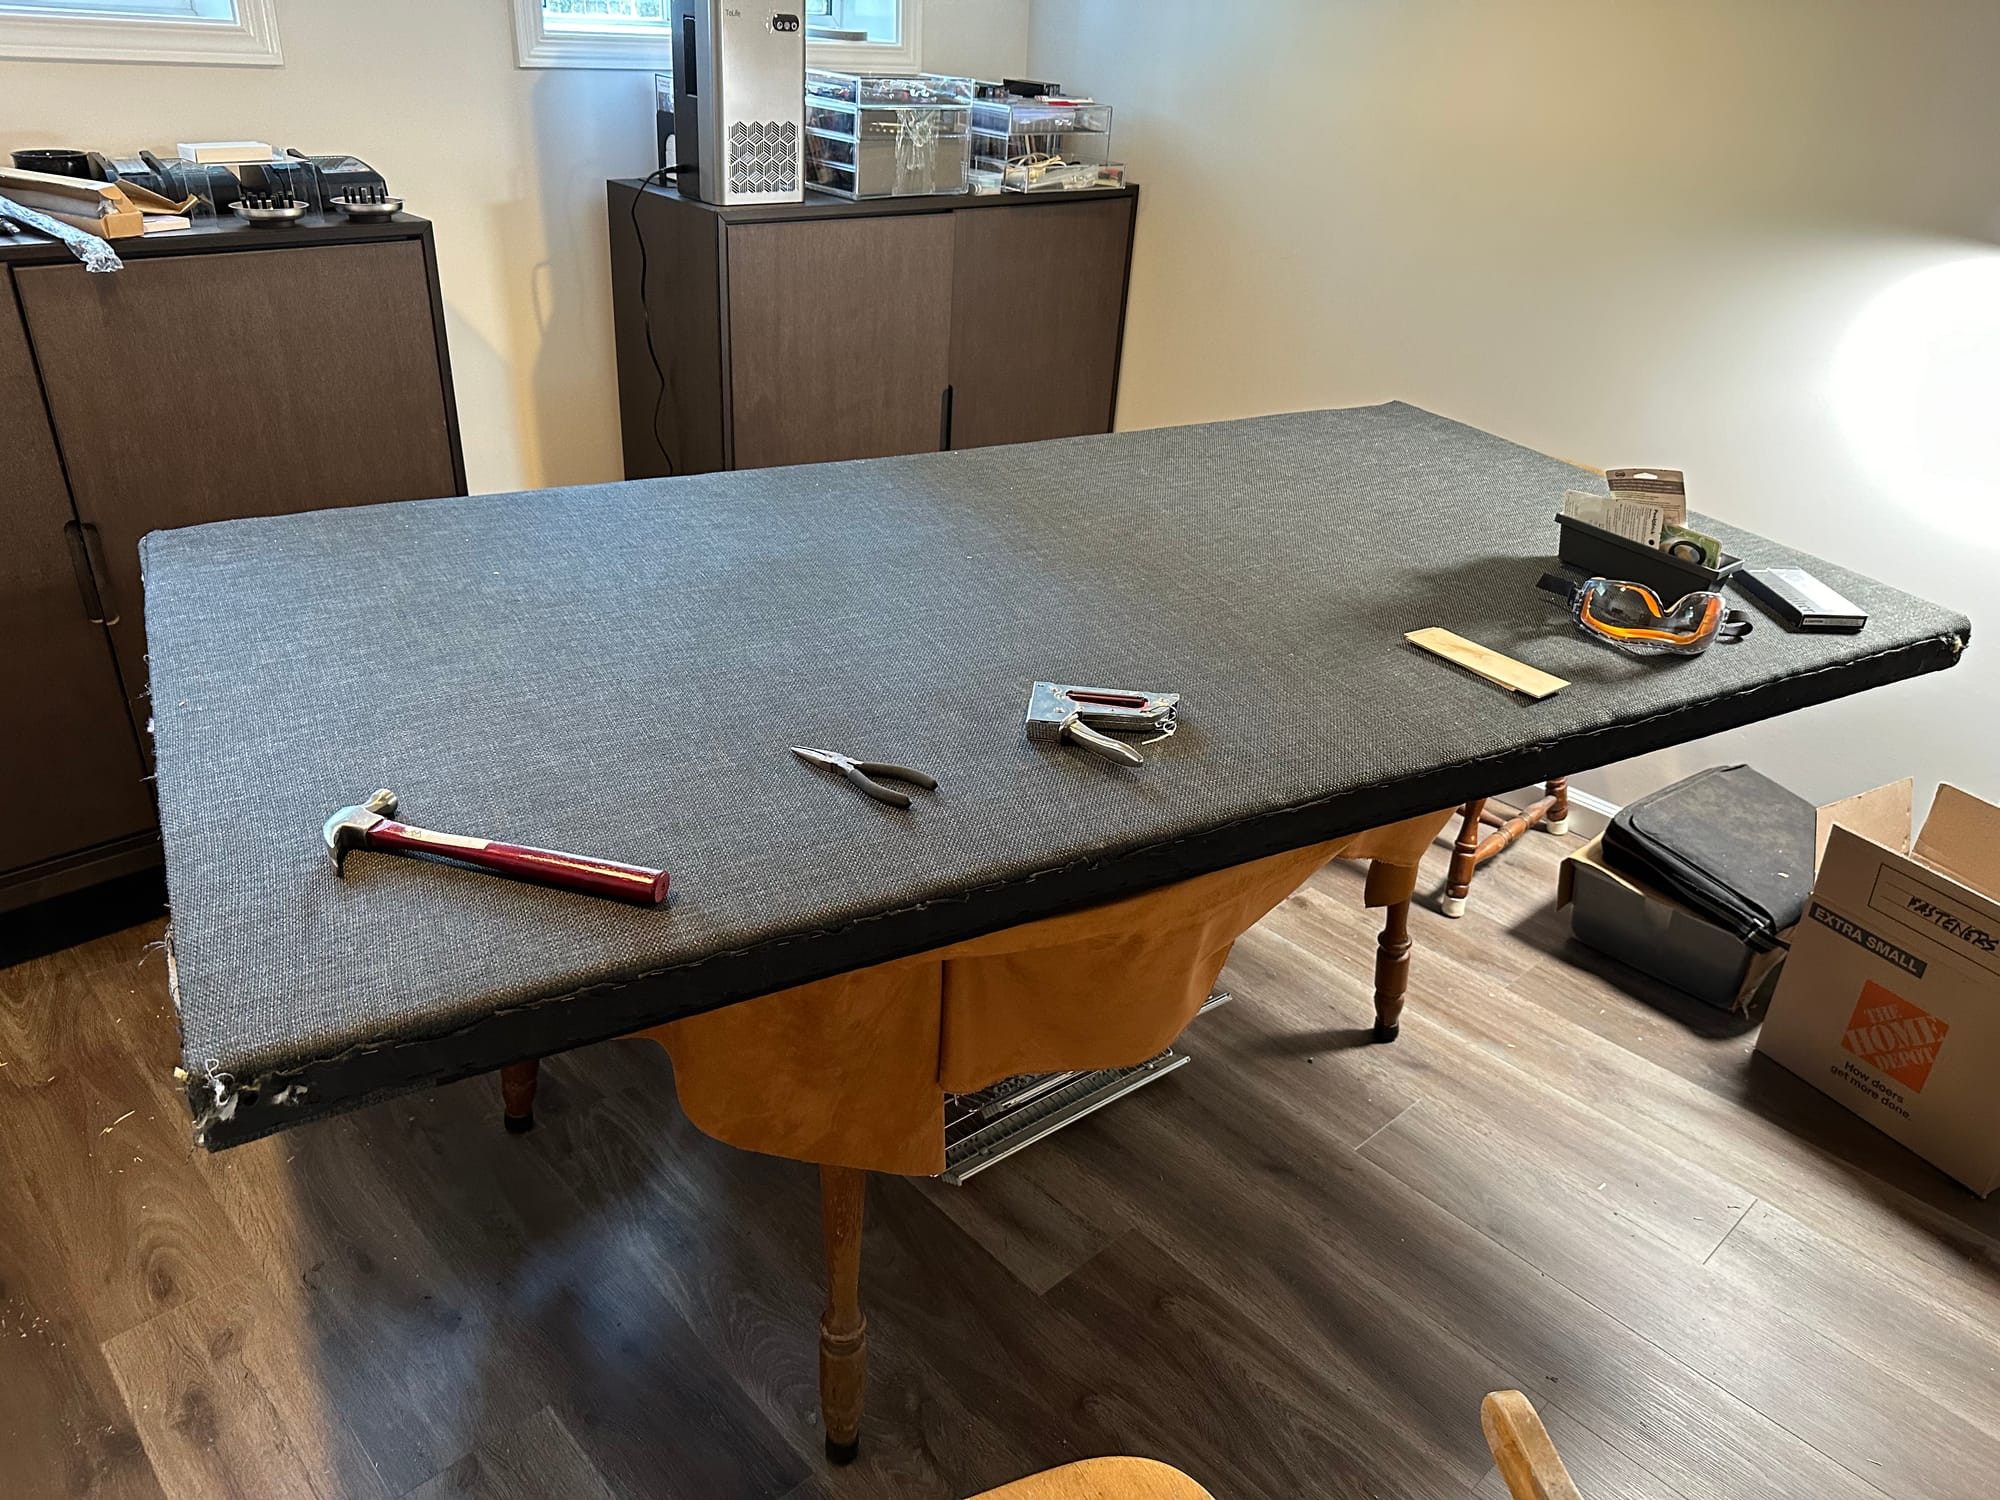
We moved both pieces inside. I had already visualized my next step, but expected it would take a fair amount of effort, so would have to wait a bit before I'd have the time for it.
Late April. Following a vacation to Ireland and more pressing concerns at work and home, it was time to resume.
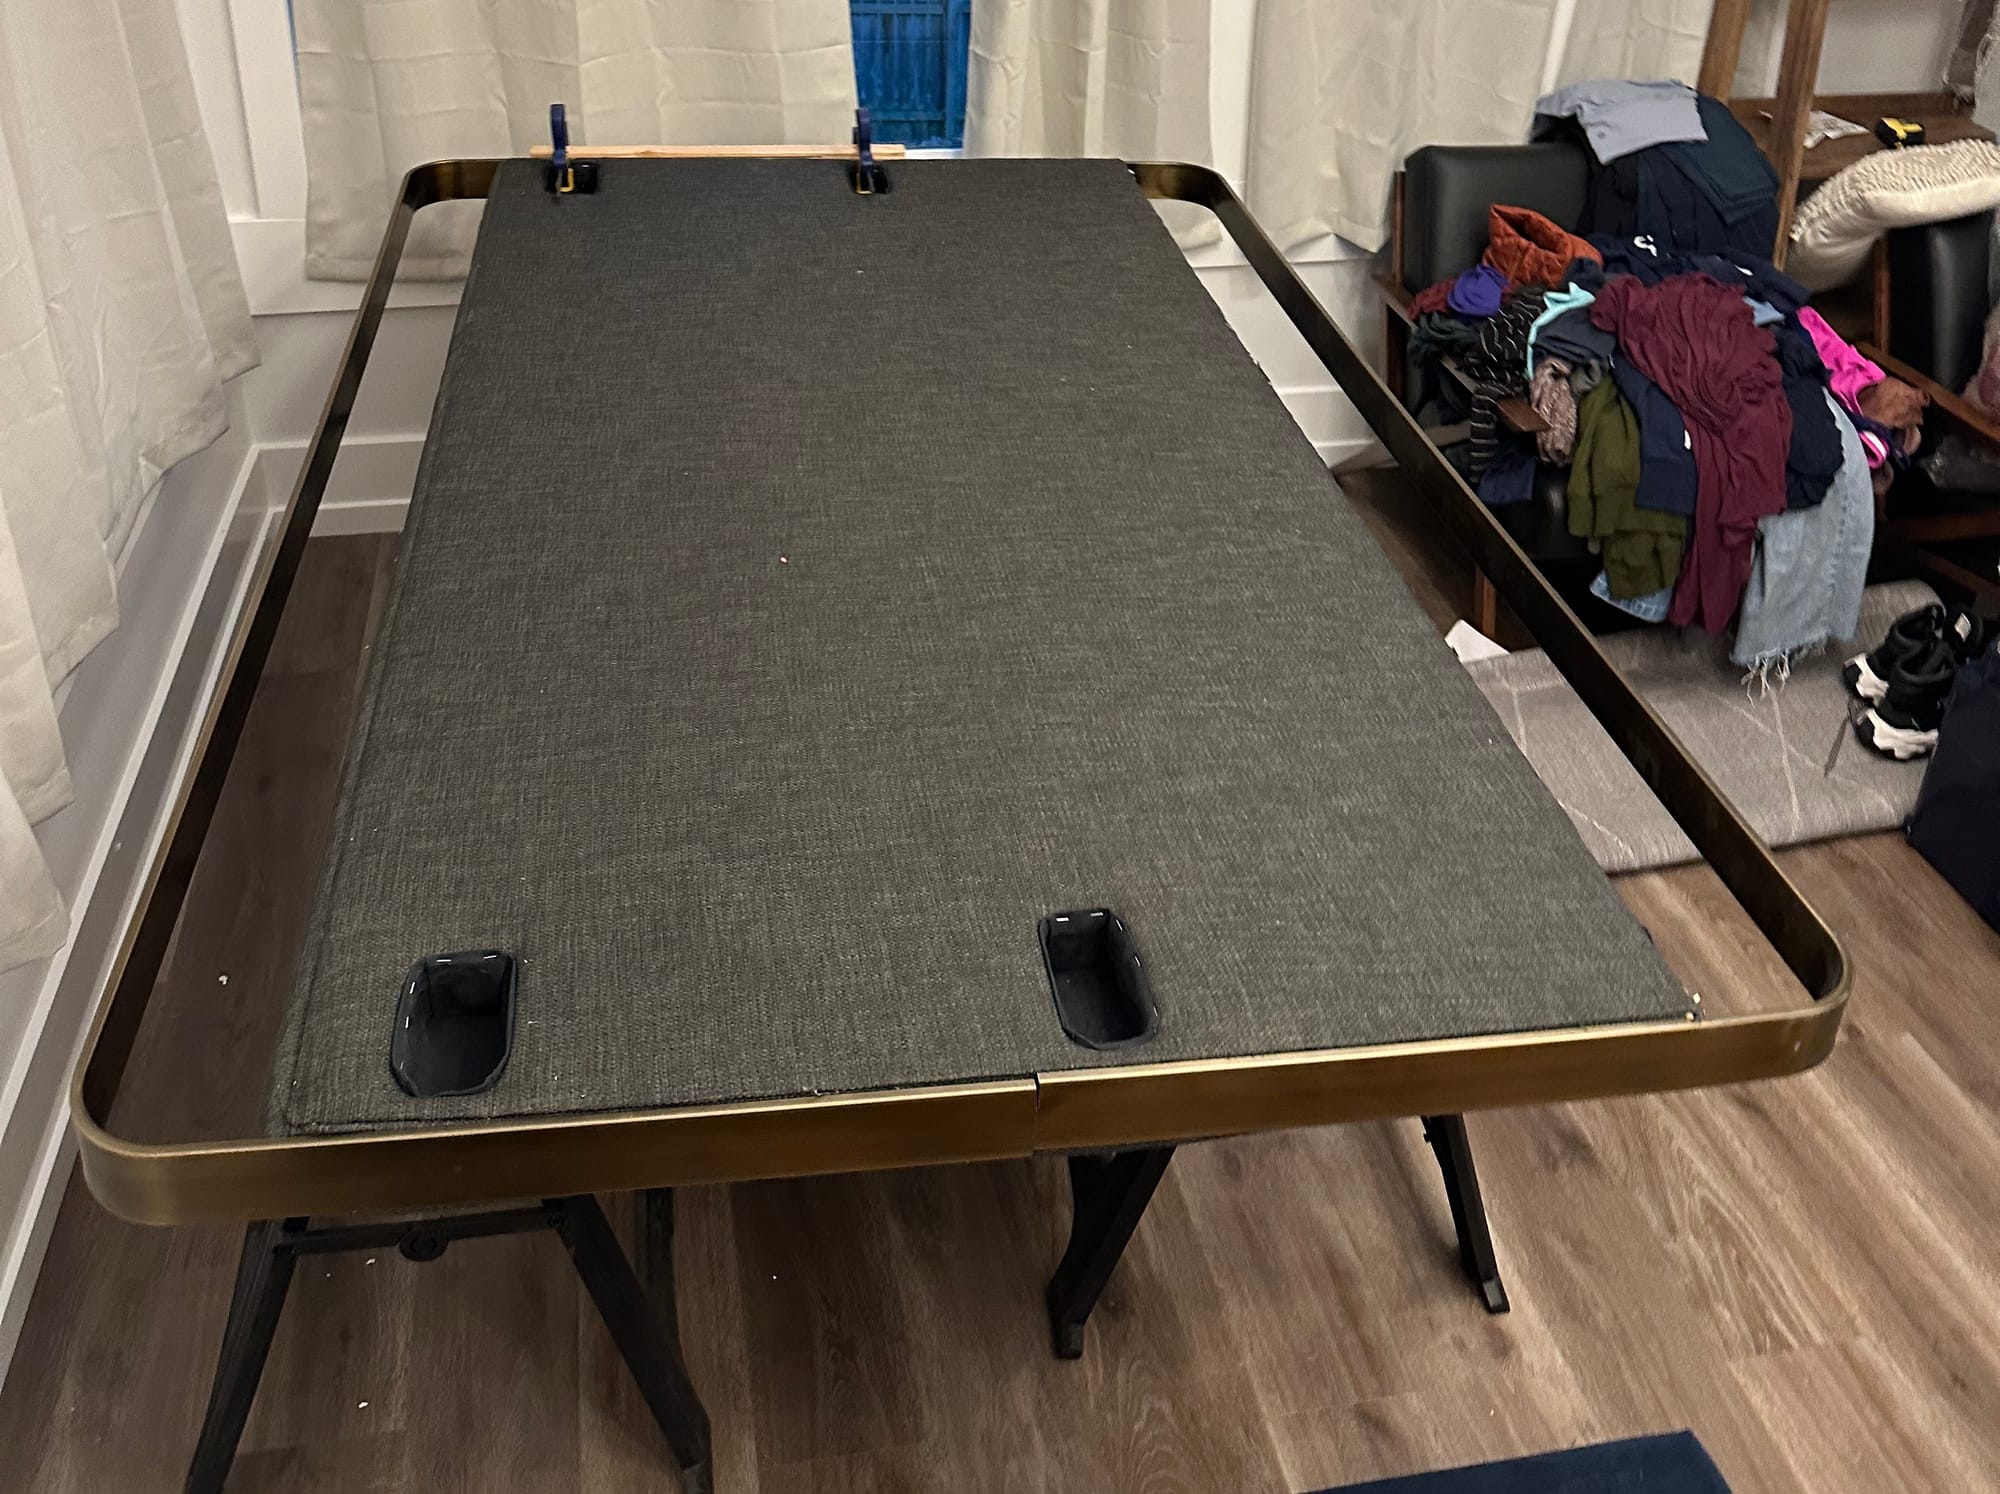
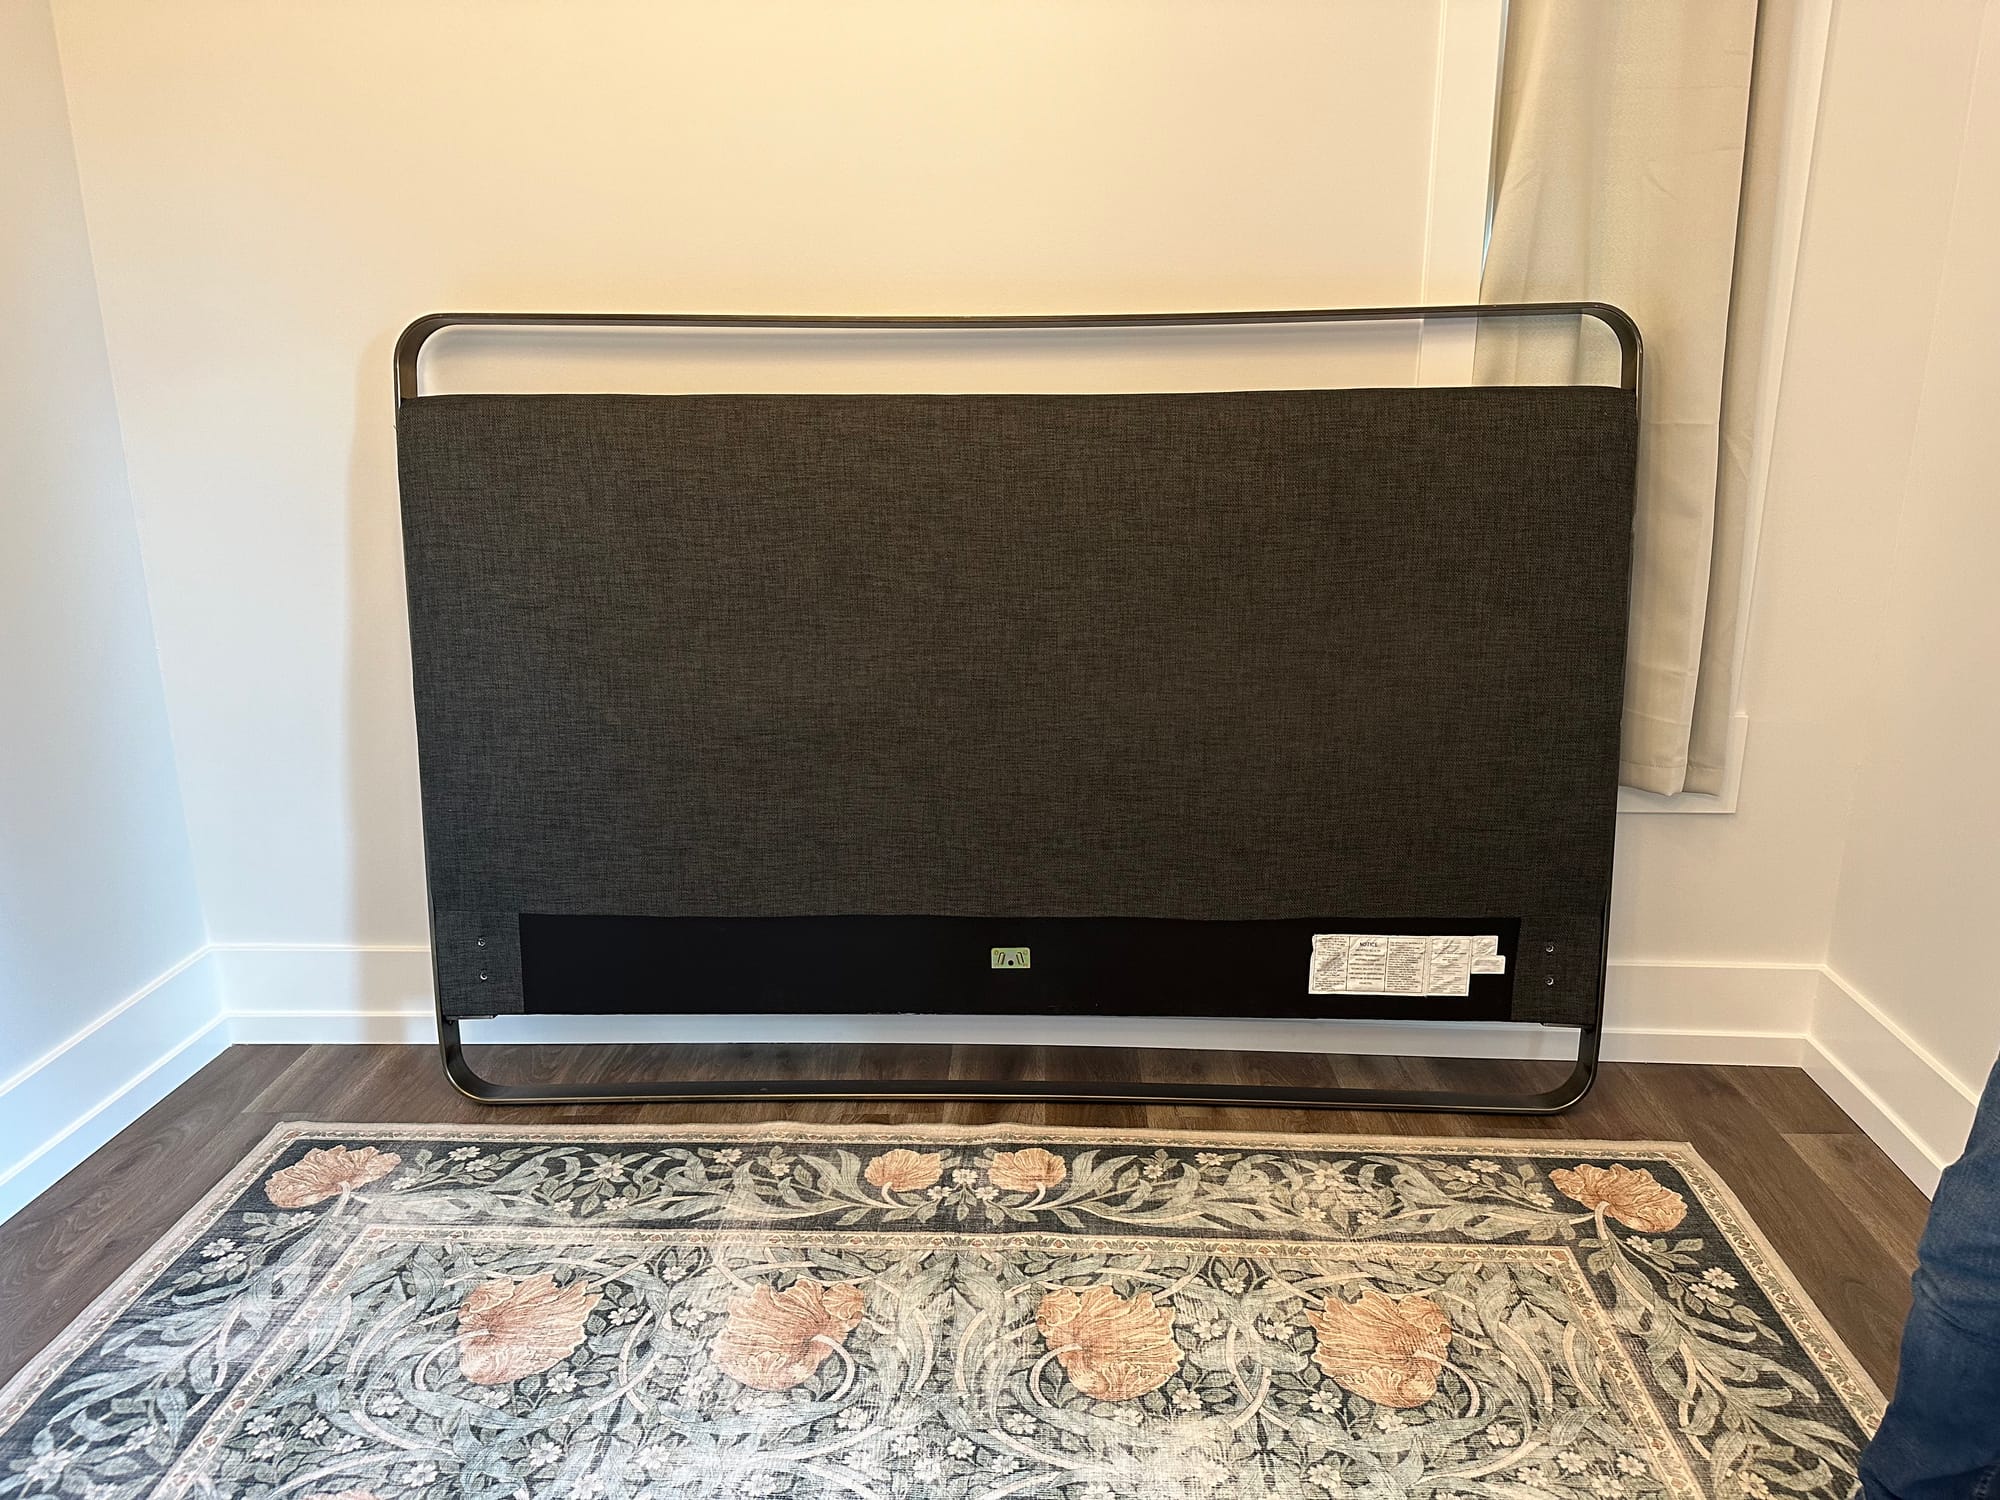
My goal had become modifying the headboard, not just so I could get it upstairs, but that it would be relatively simple to disassemble and potentially reassemble again in the future. To do that, I needed to make all the bolts accessible. Given that we always put our headboard up against a wall, it didn't have to be pretty, but I wanted to create little pockets that were decently finished.
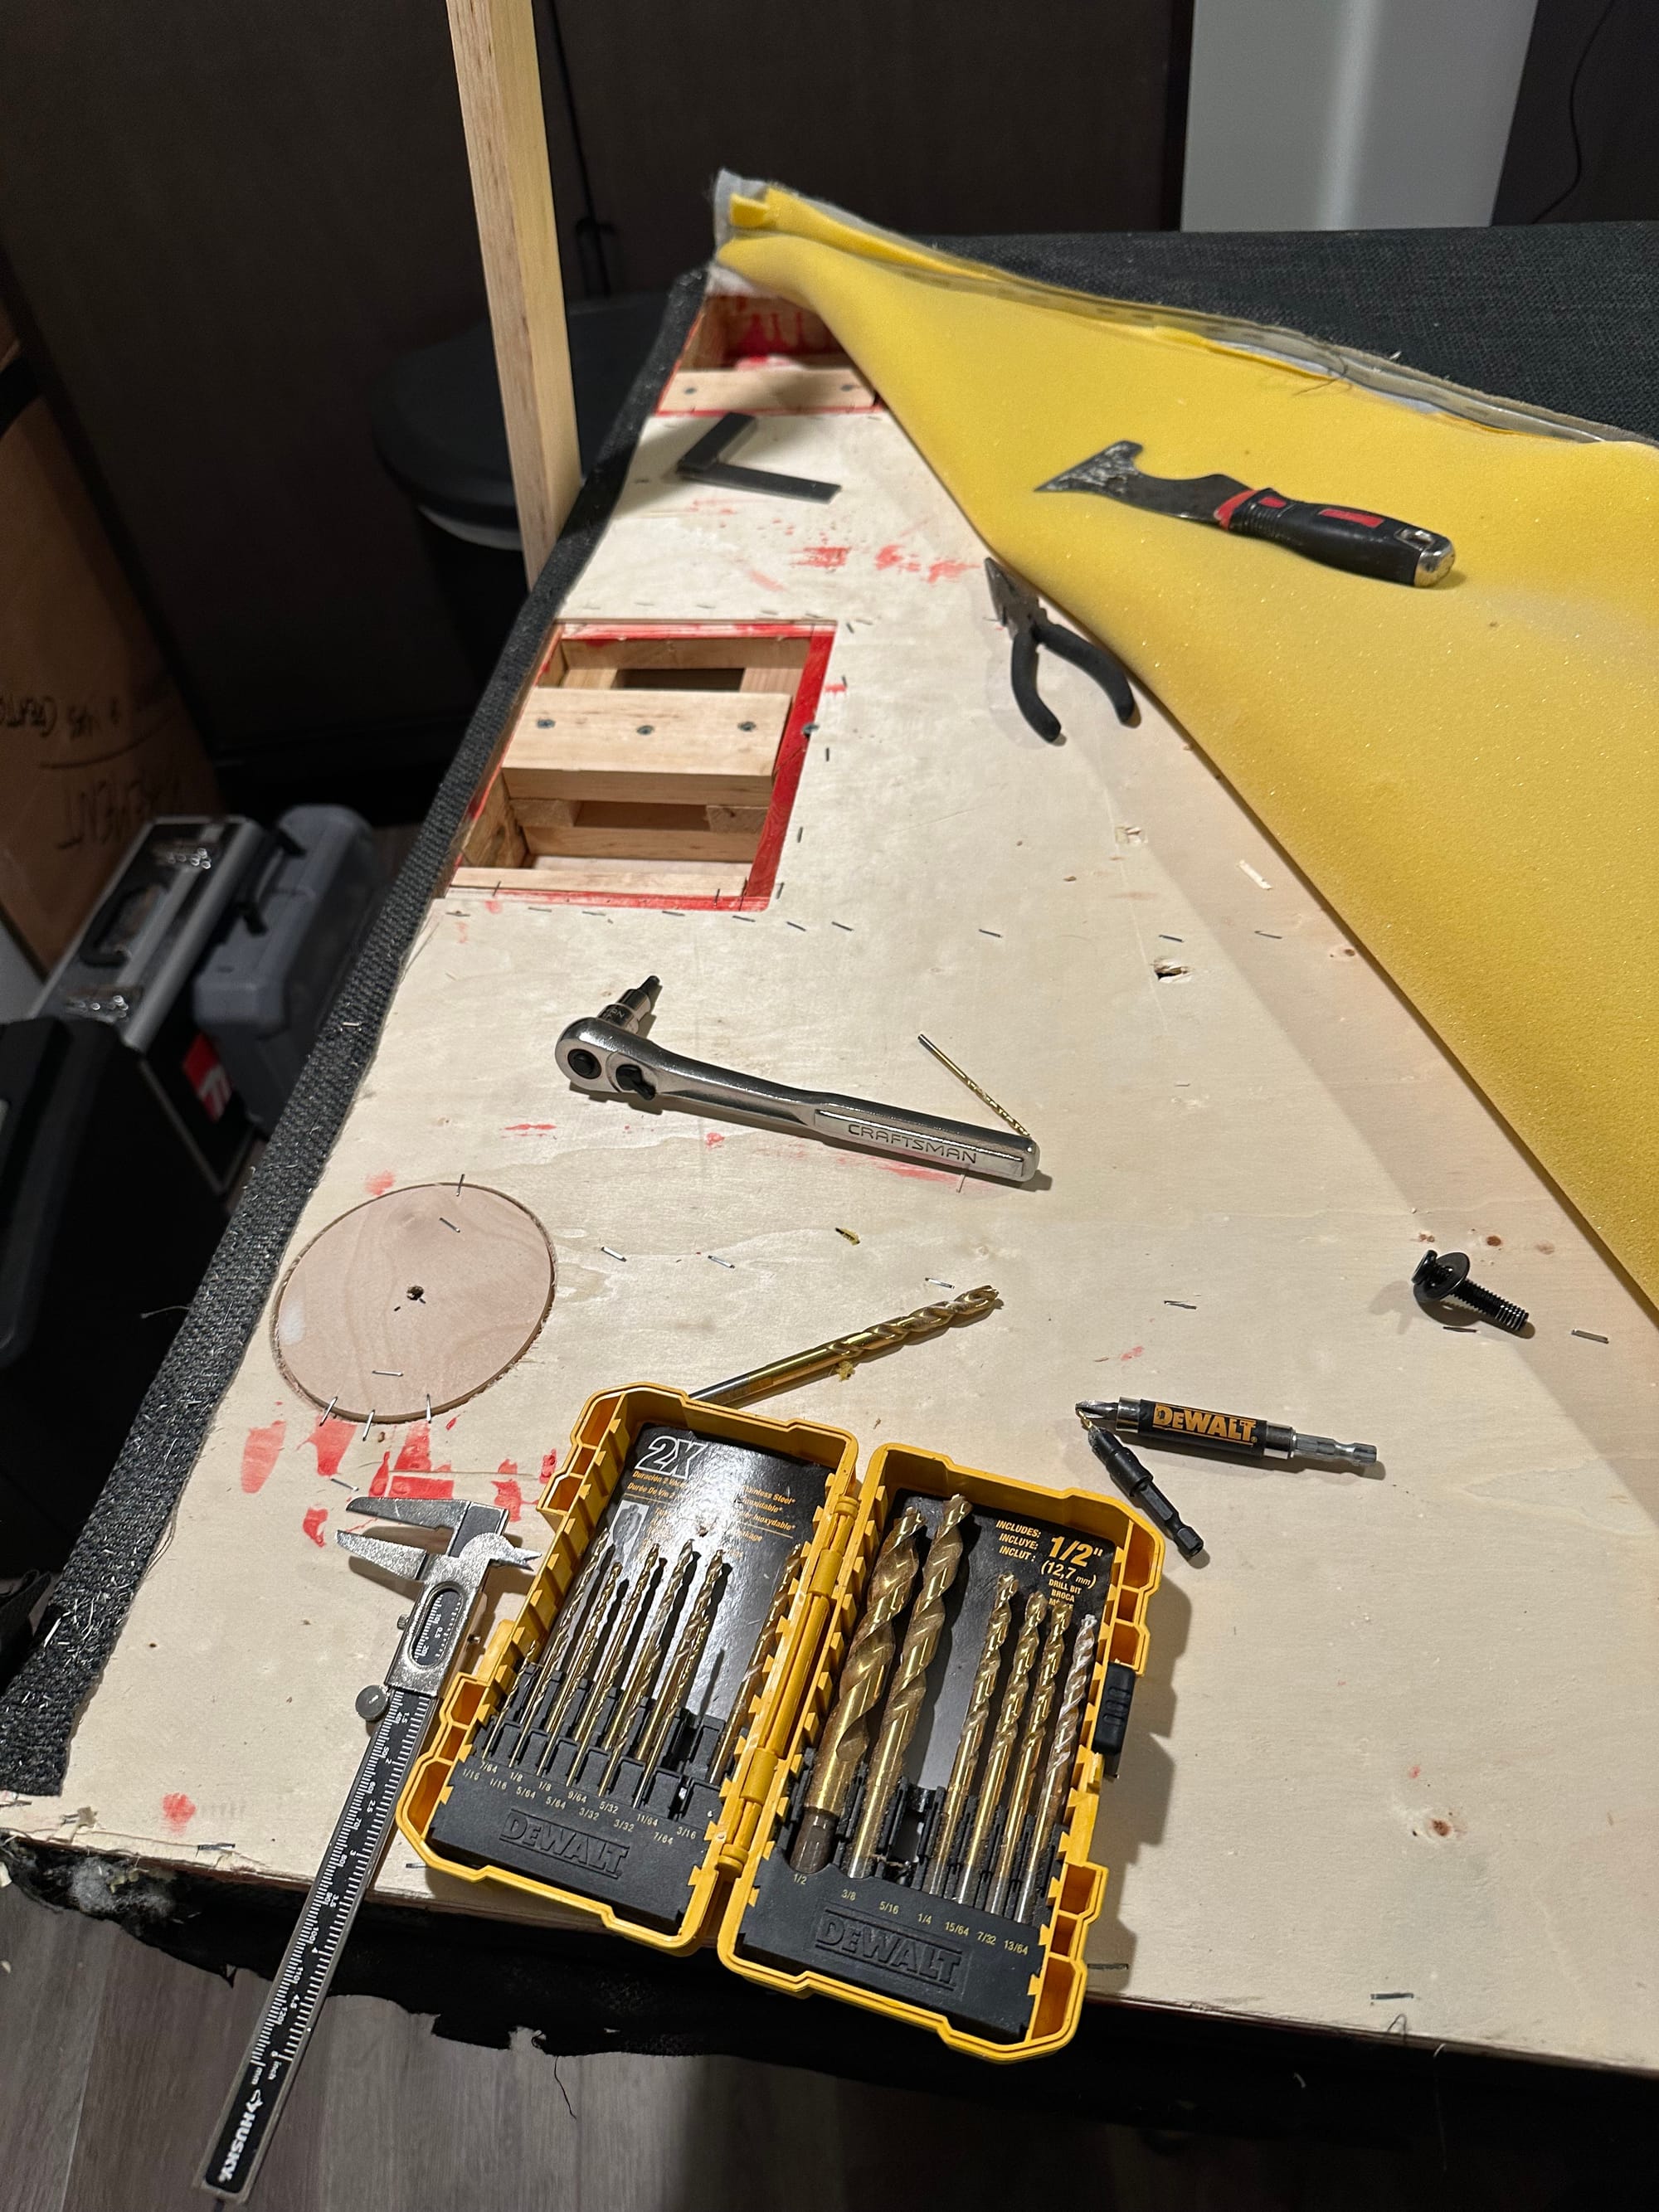
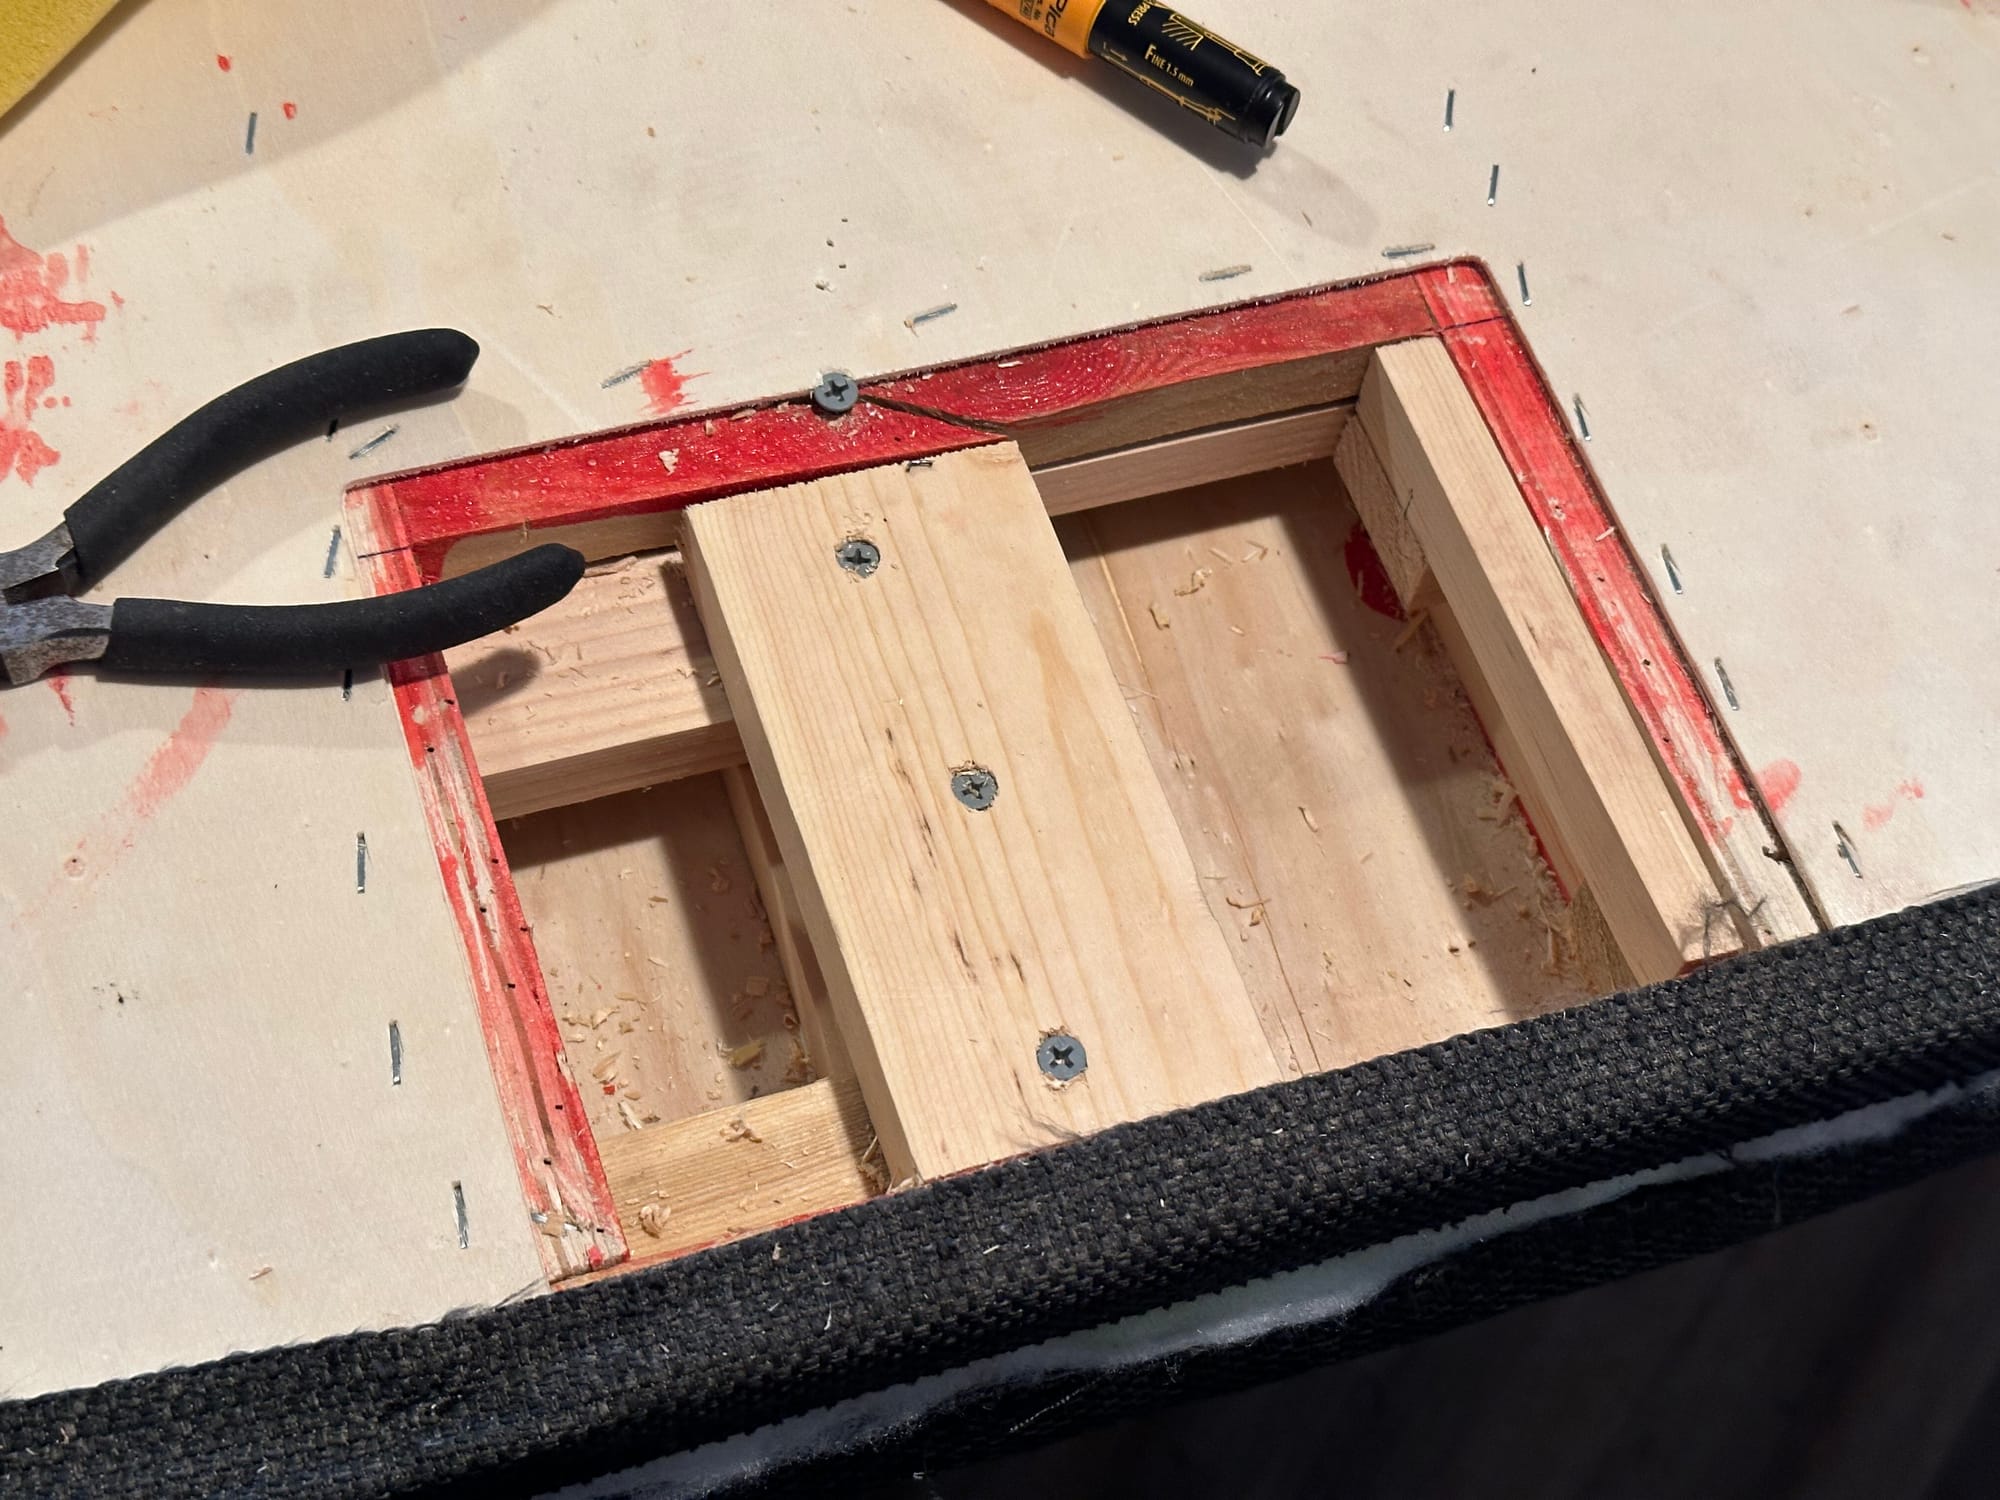
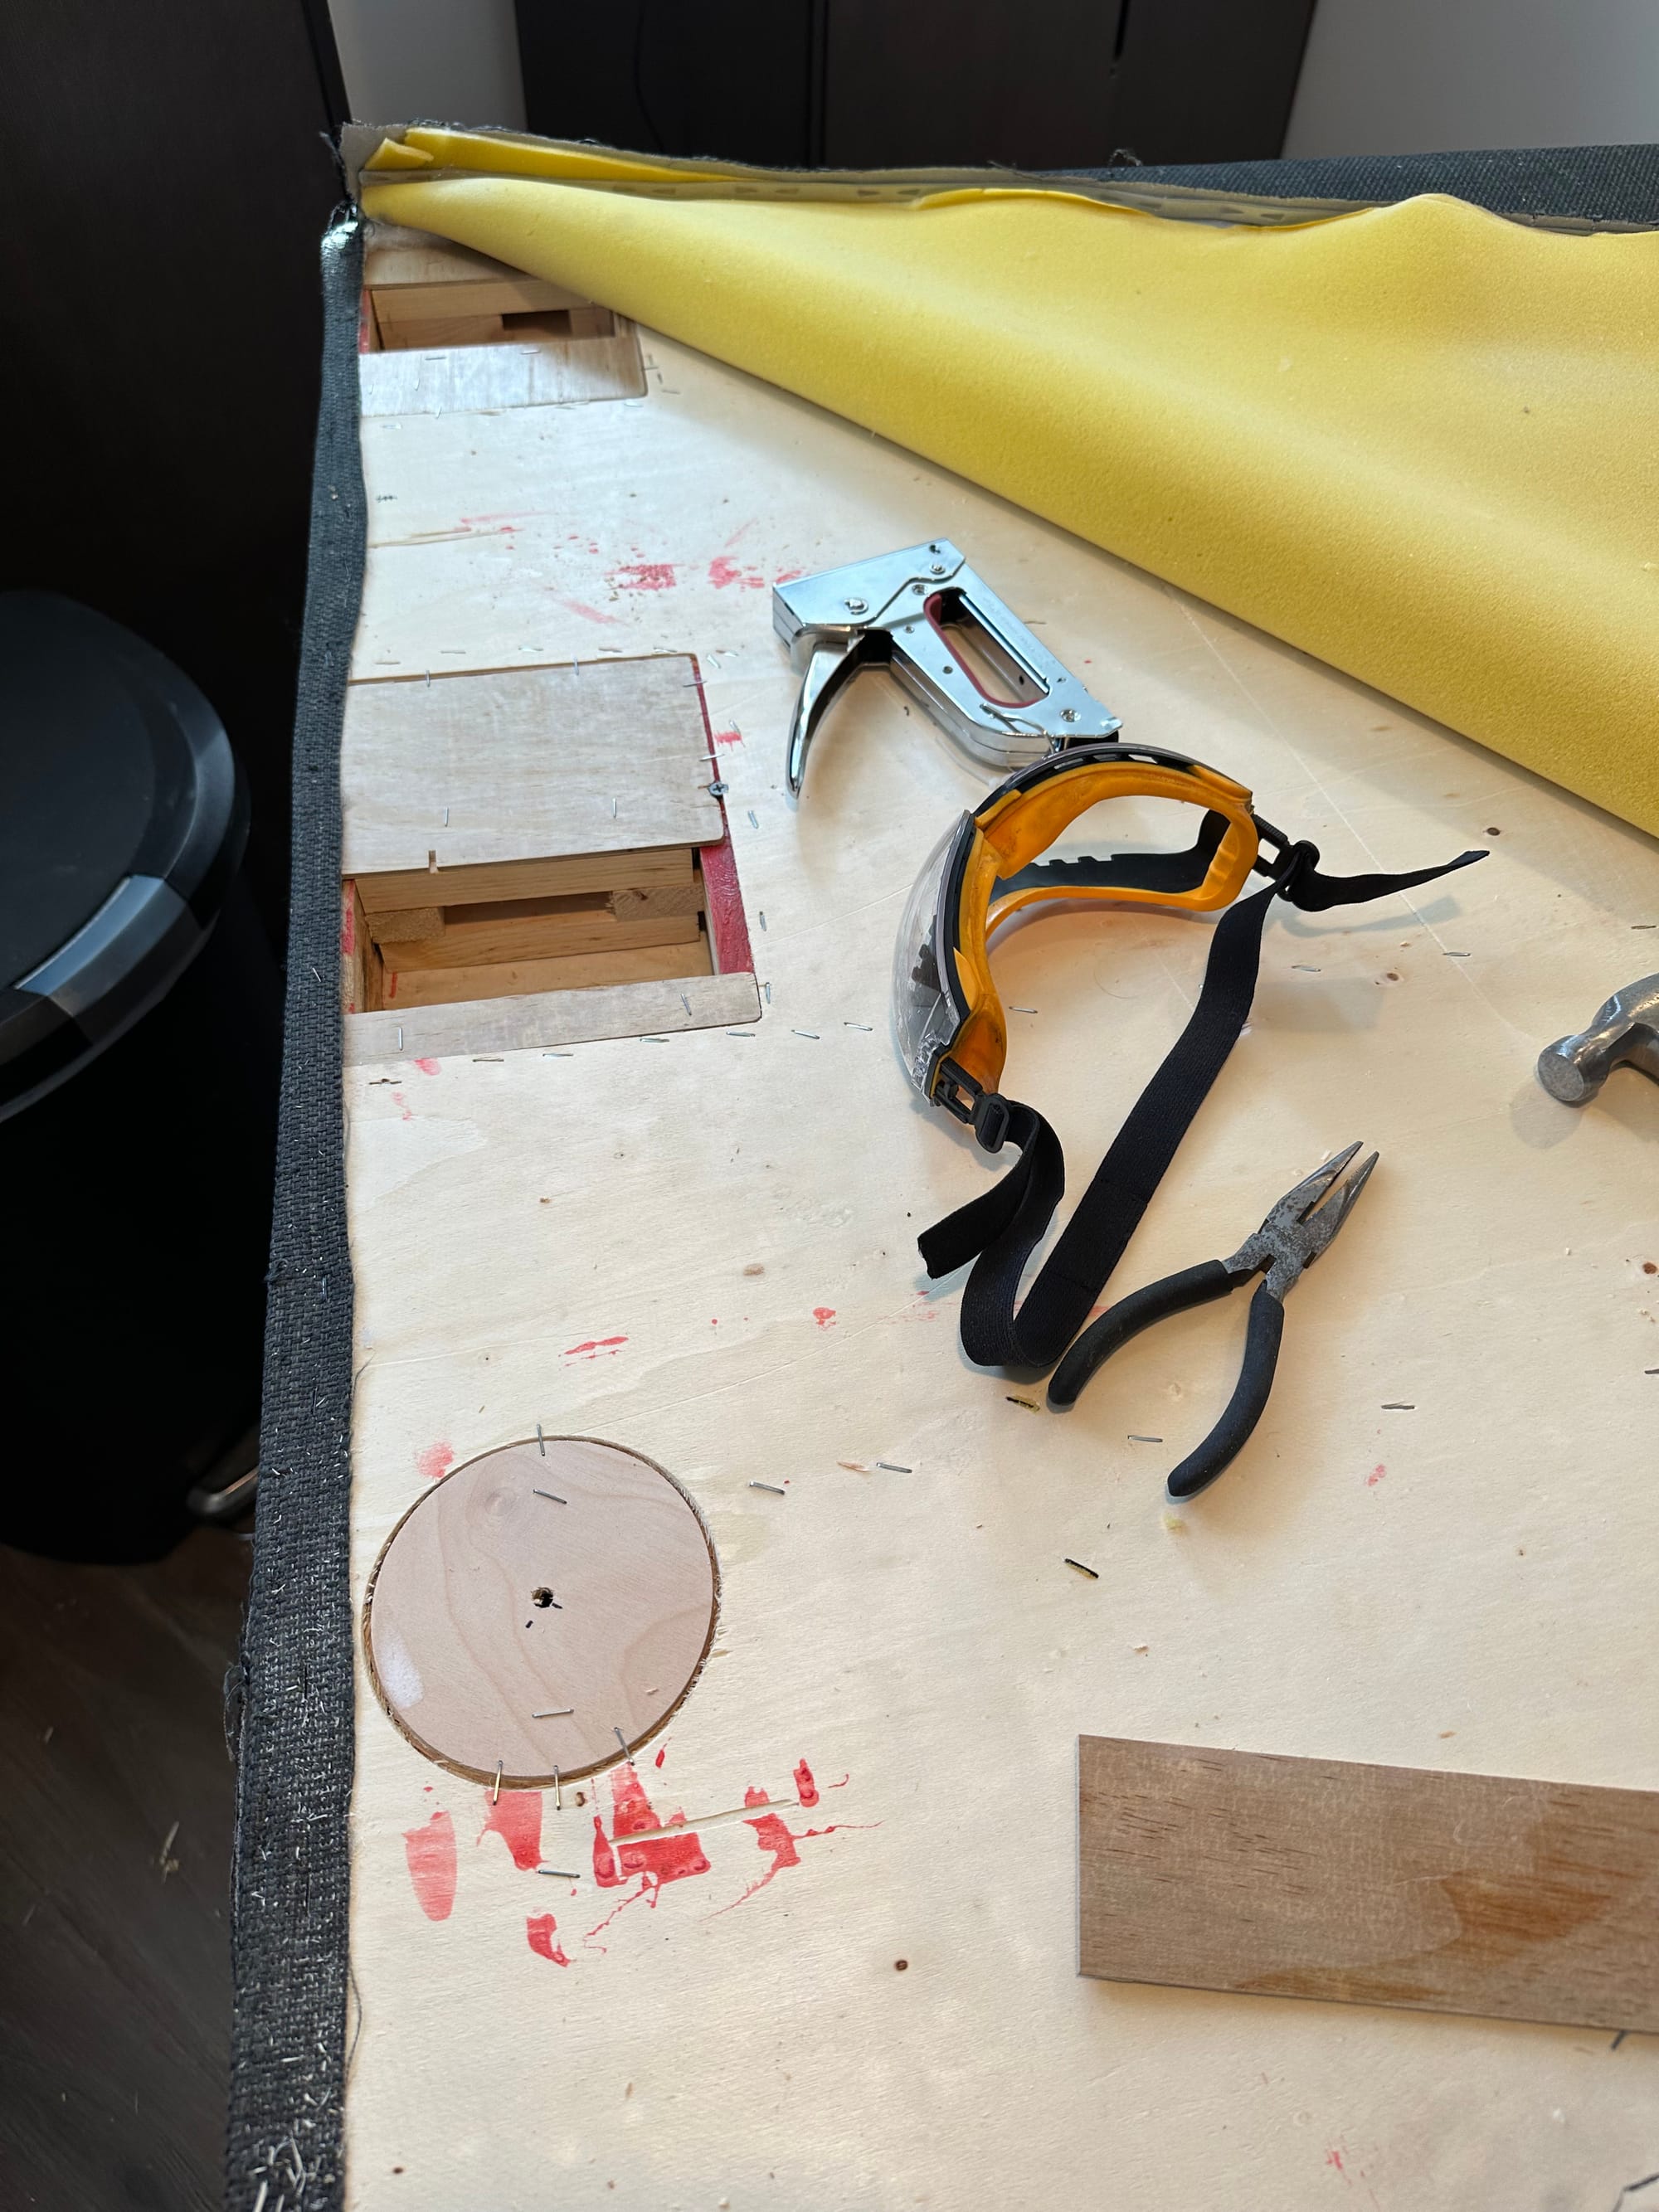
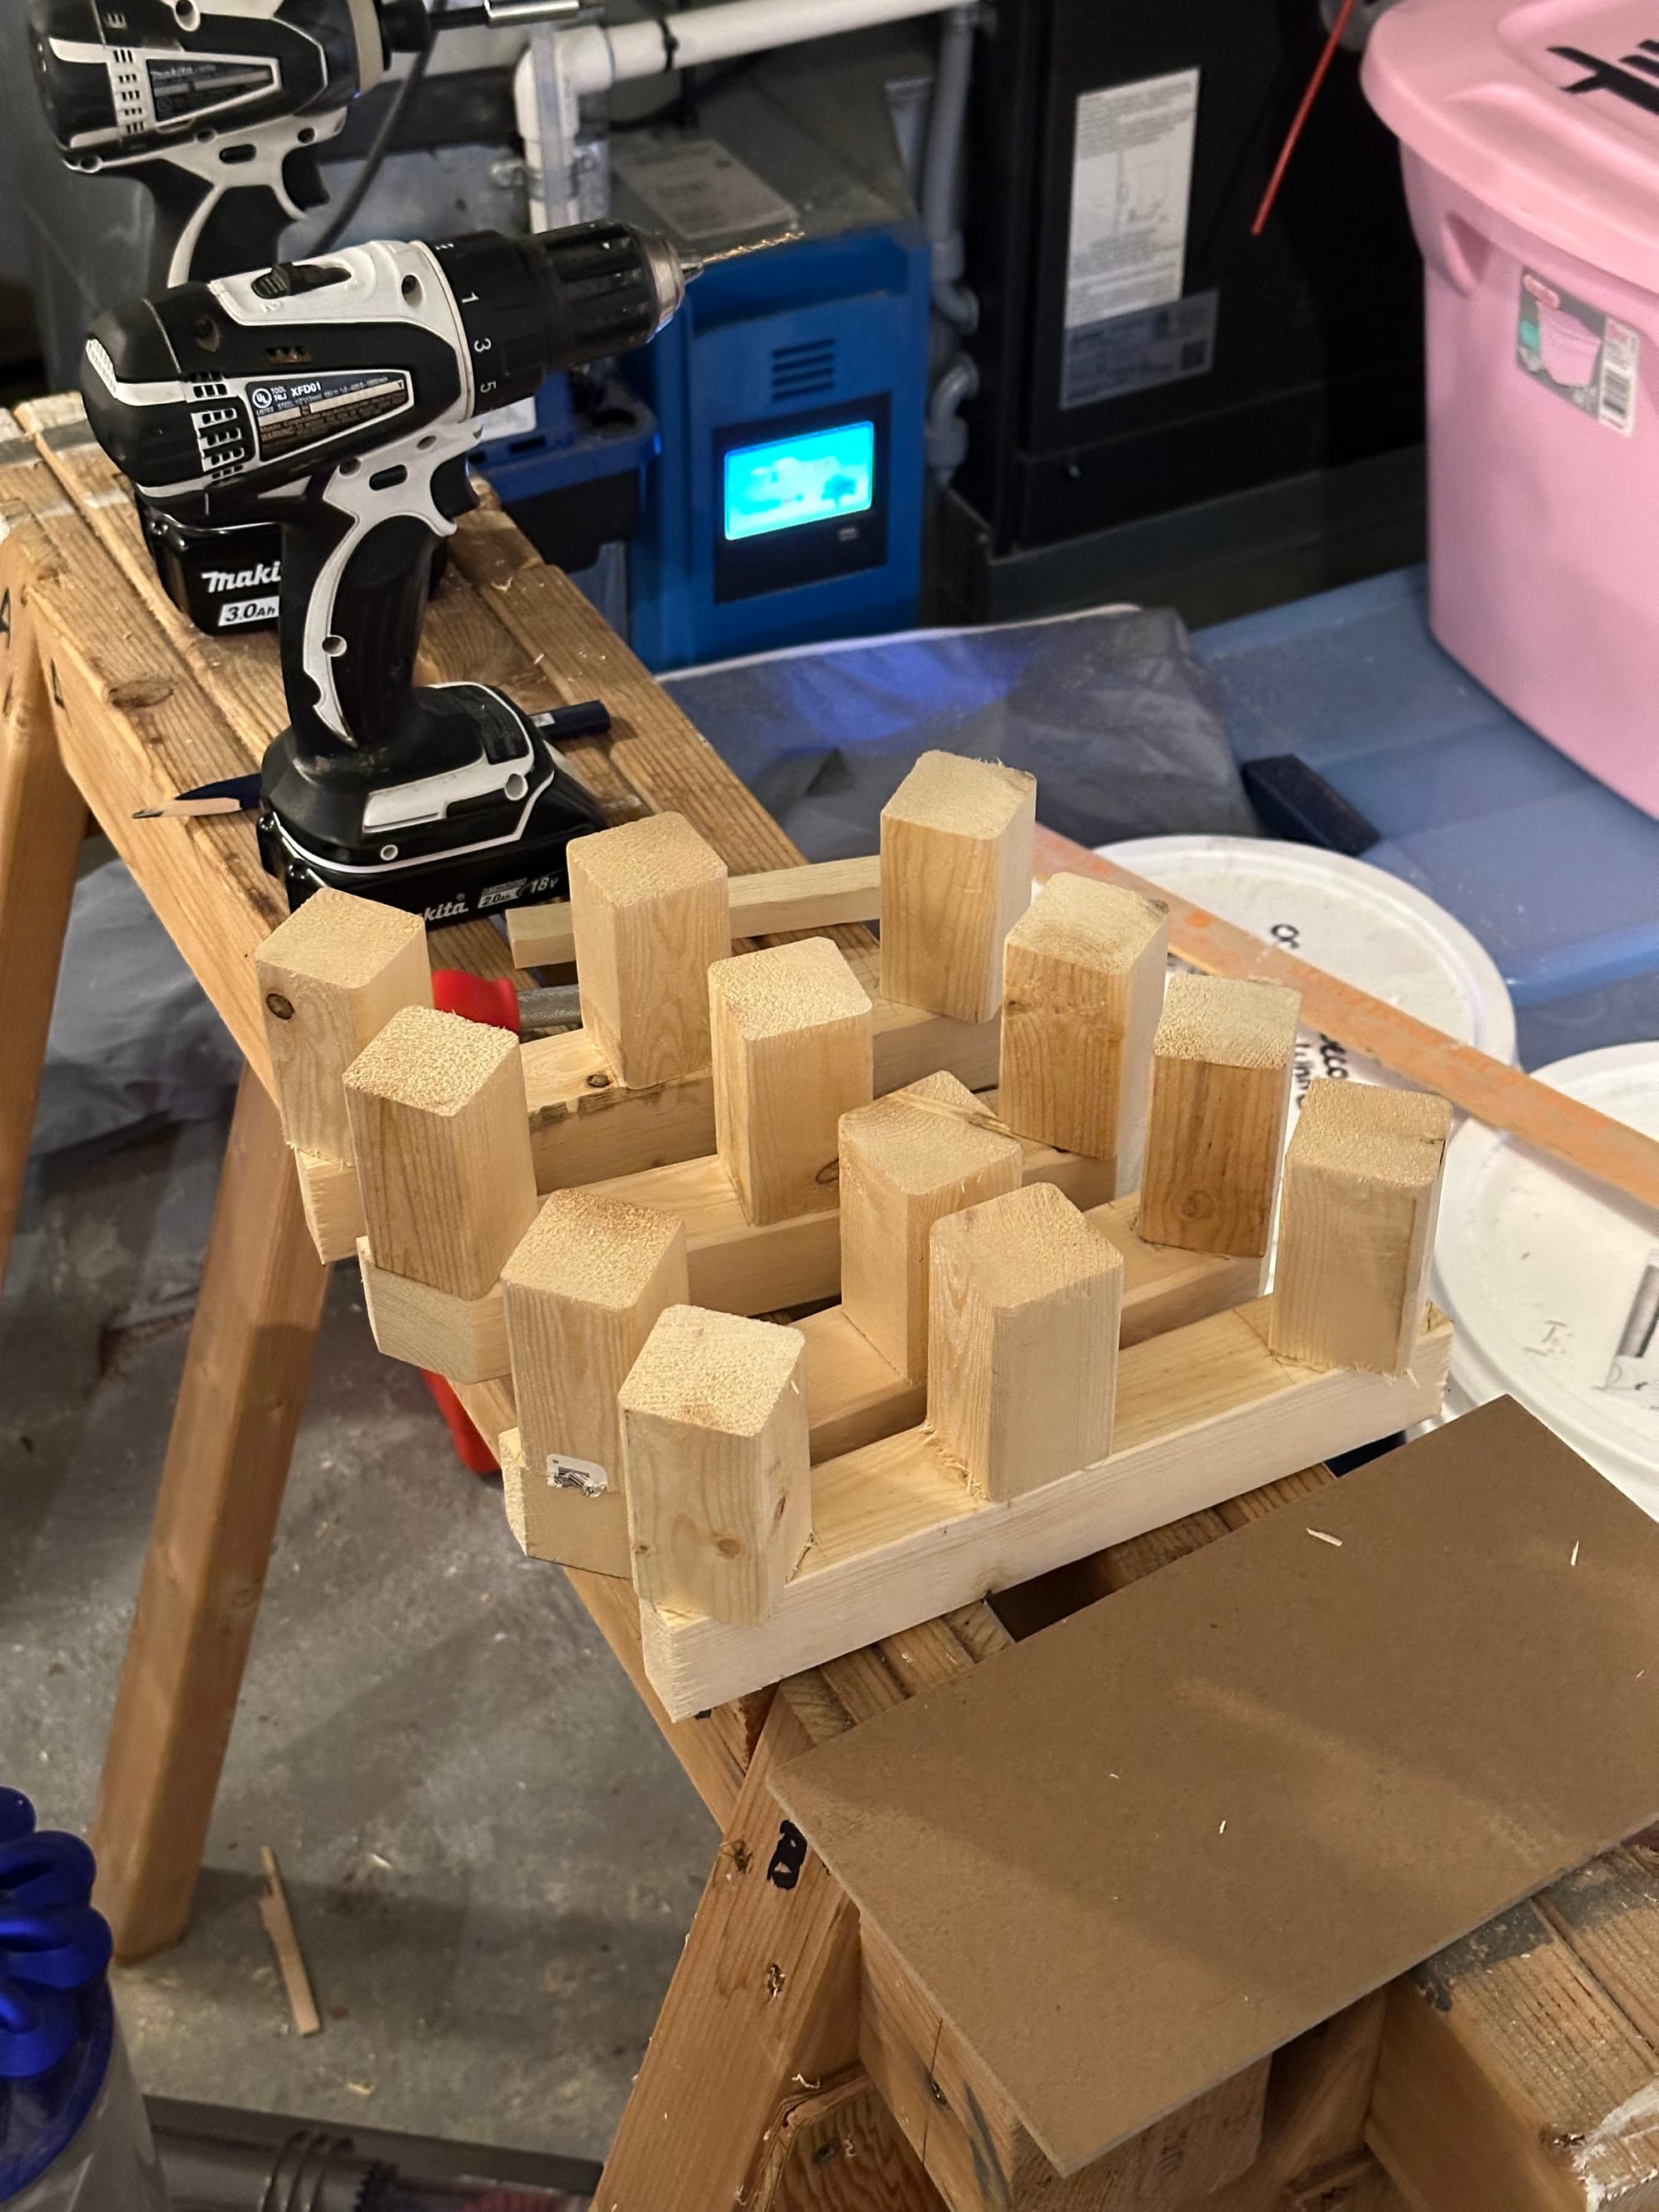
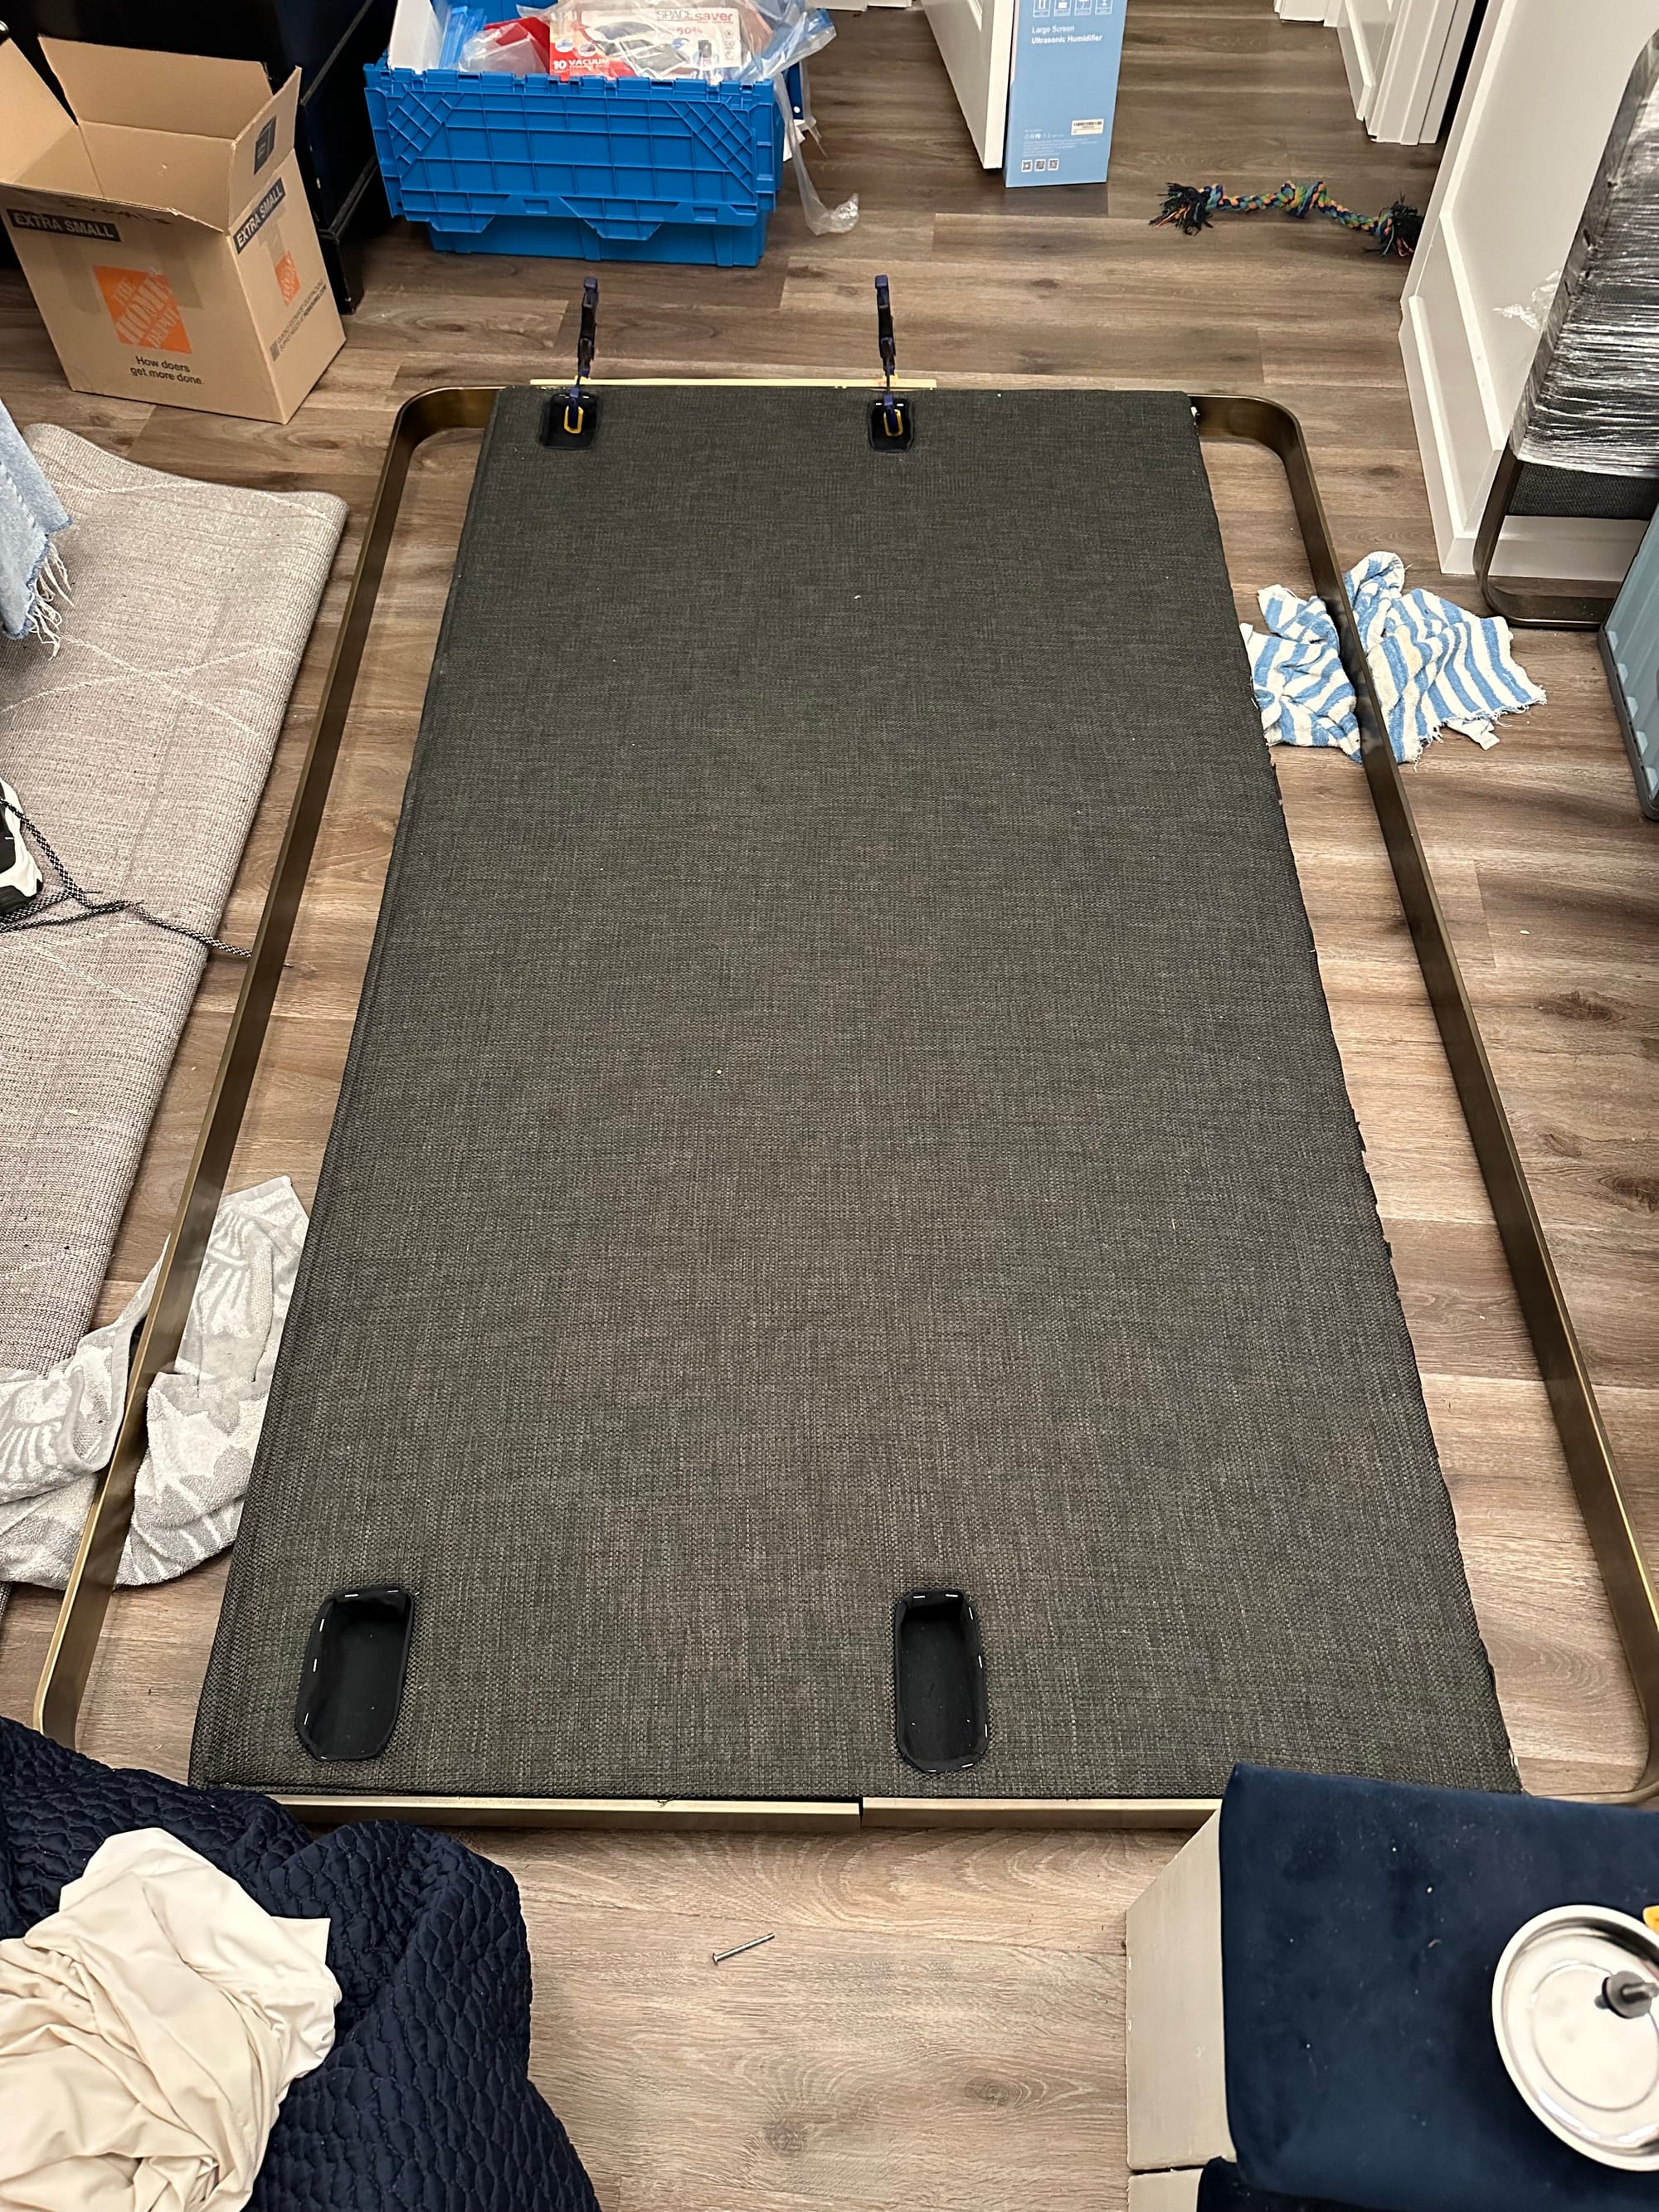
First, to frame these pockets up. The interior structure of the middle piece was fairly open, with just a few structural wood pieces, and I needed to add significant reinforcement to have decent structure around the walls of each pocket. I was able to jigsaw together wood pieces that could be maneuvered in and attached.
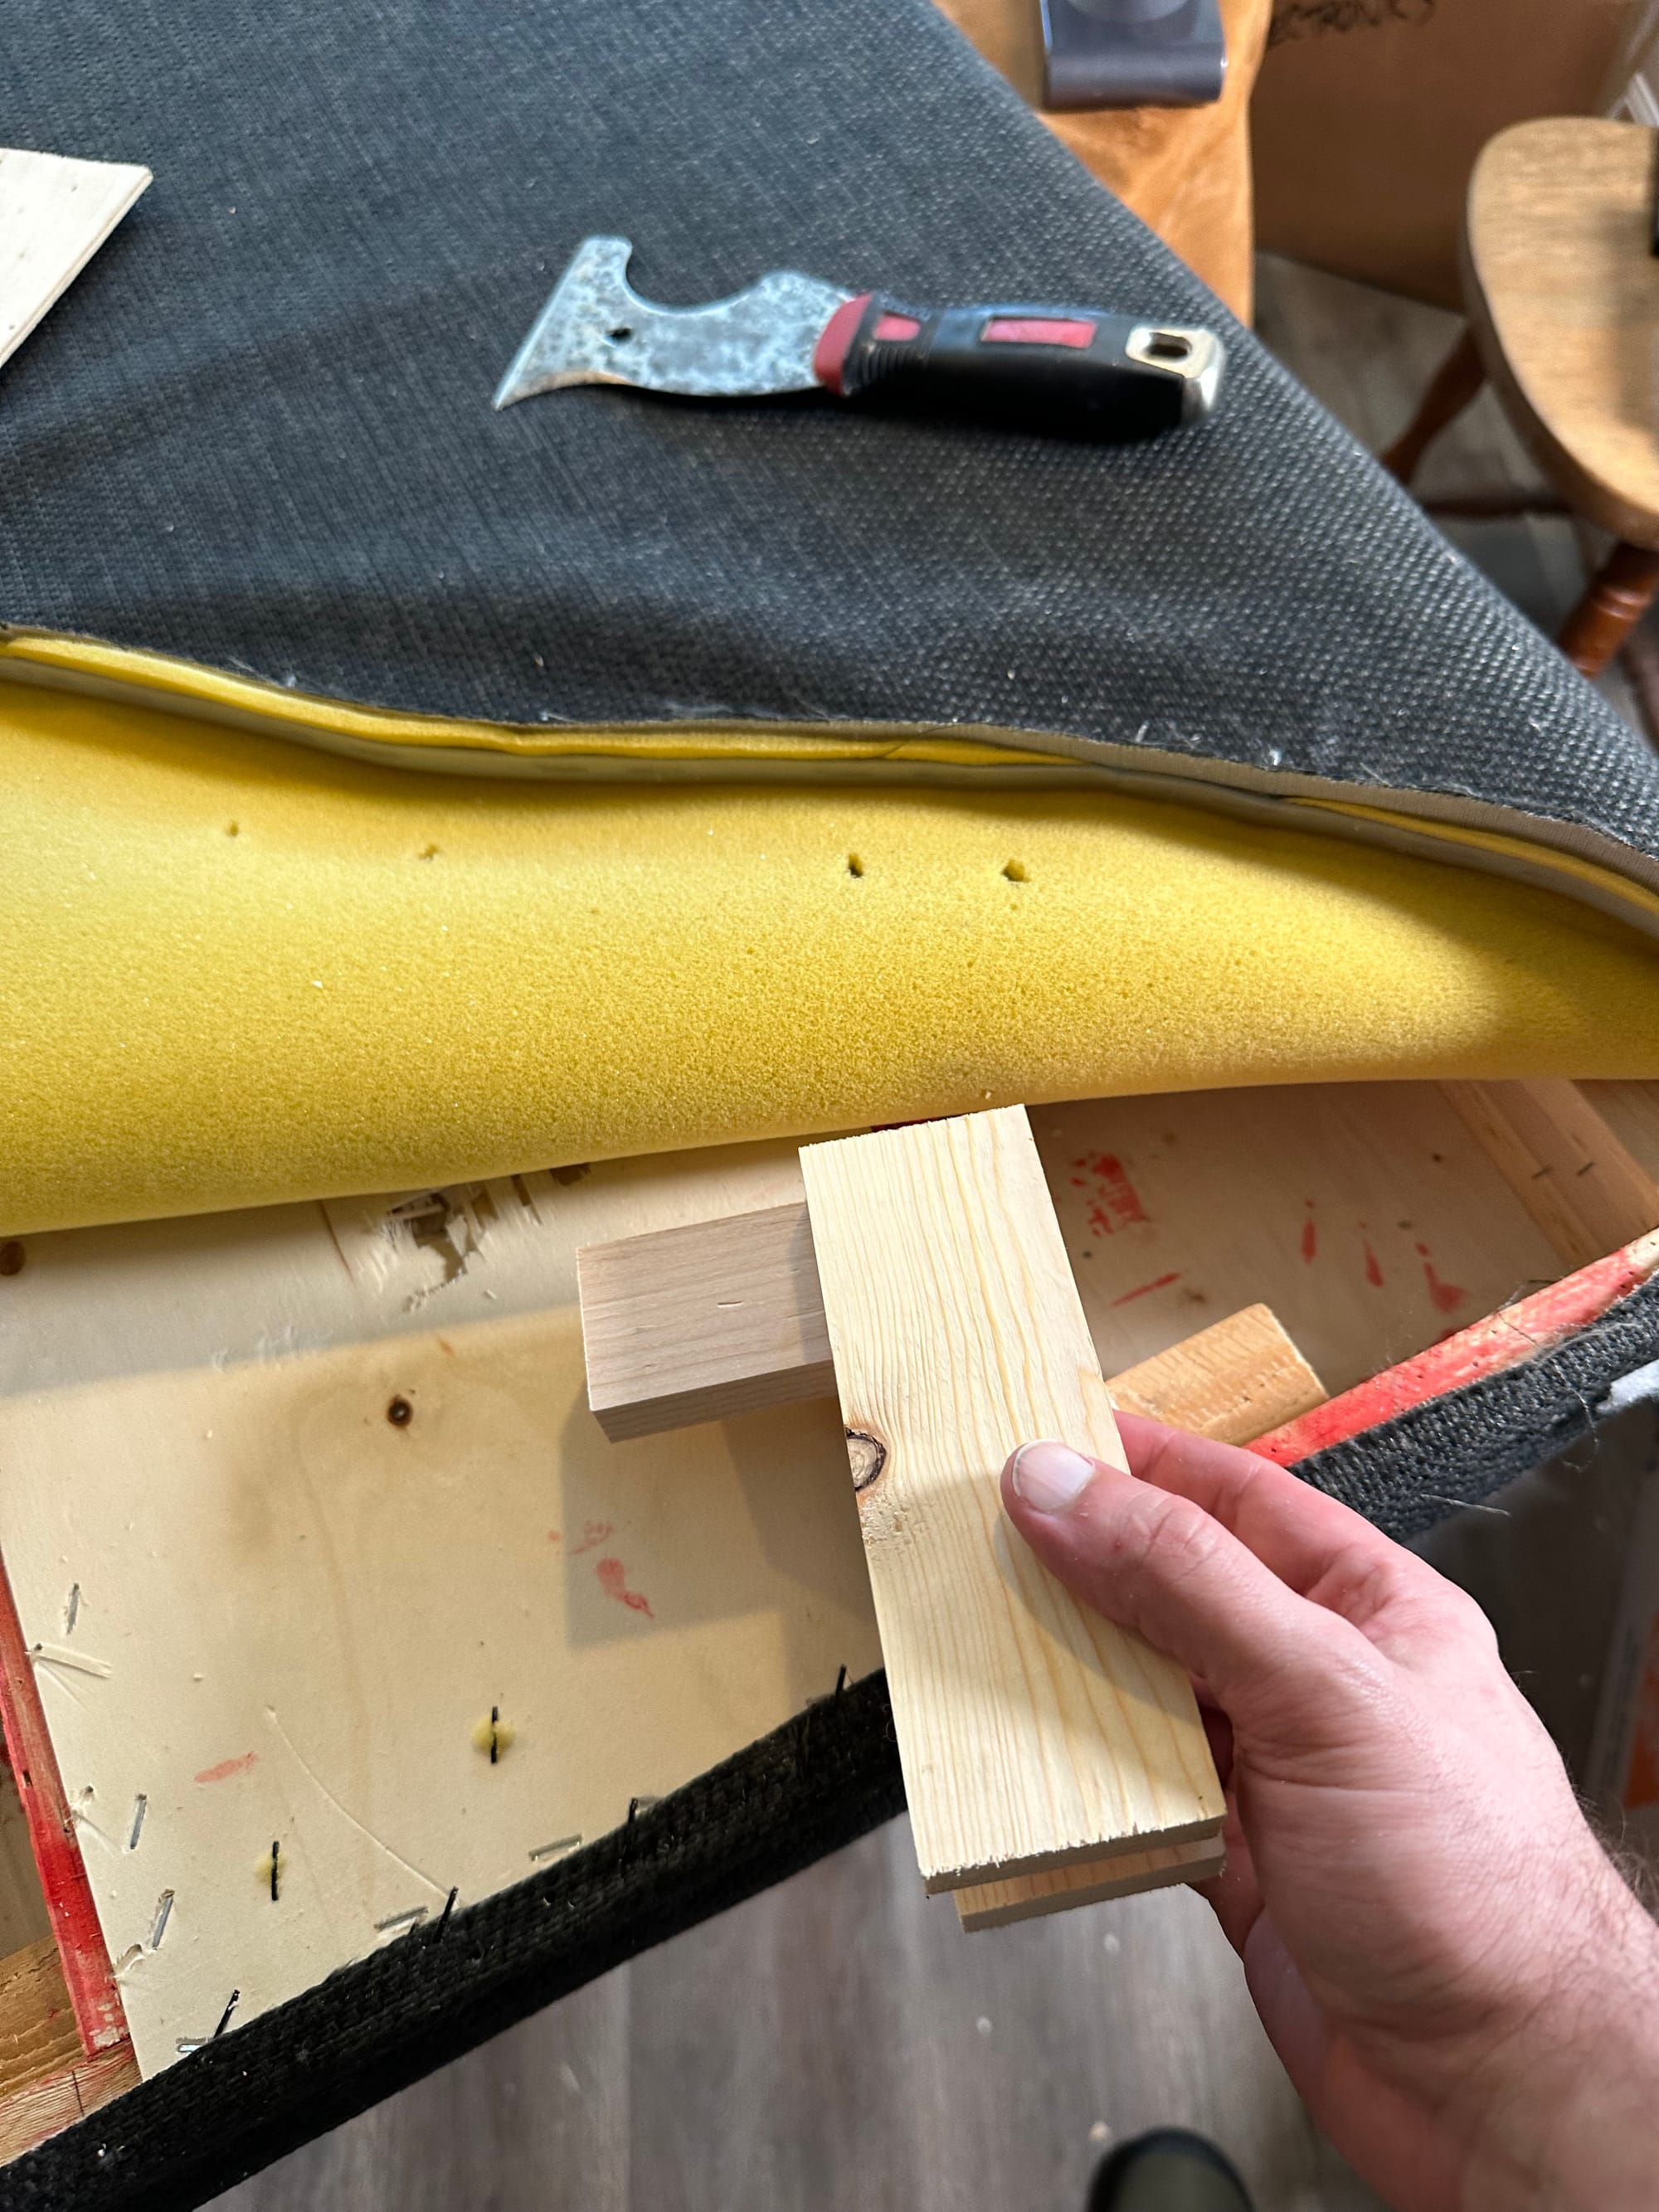
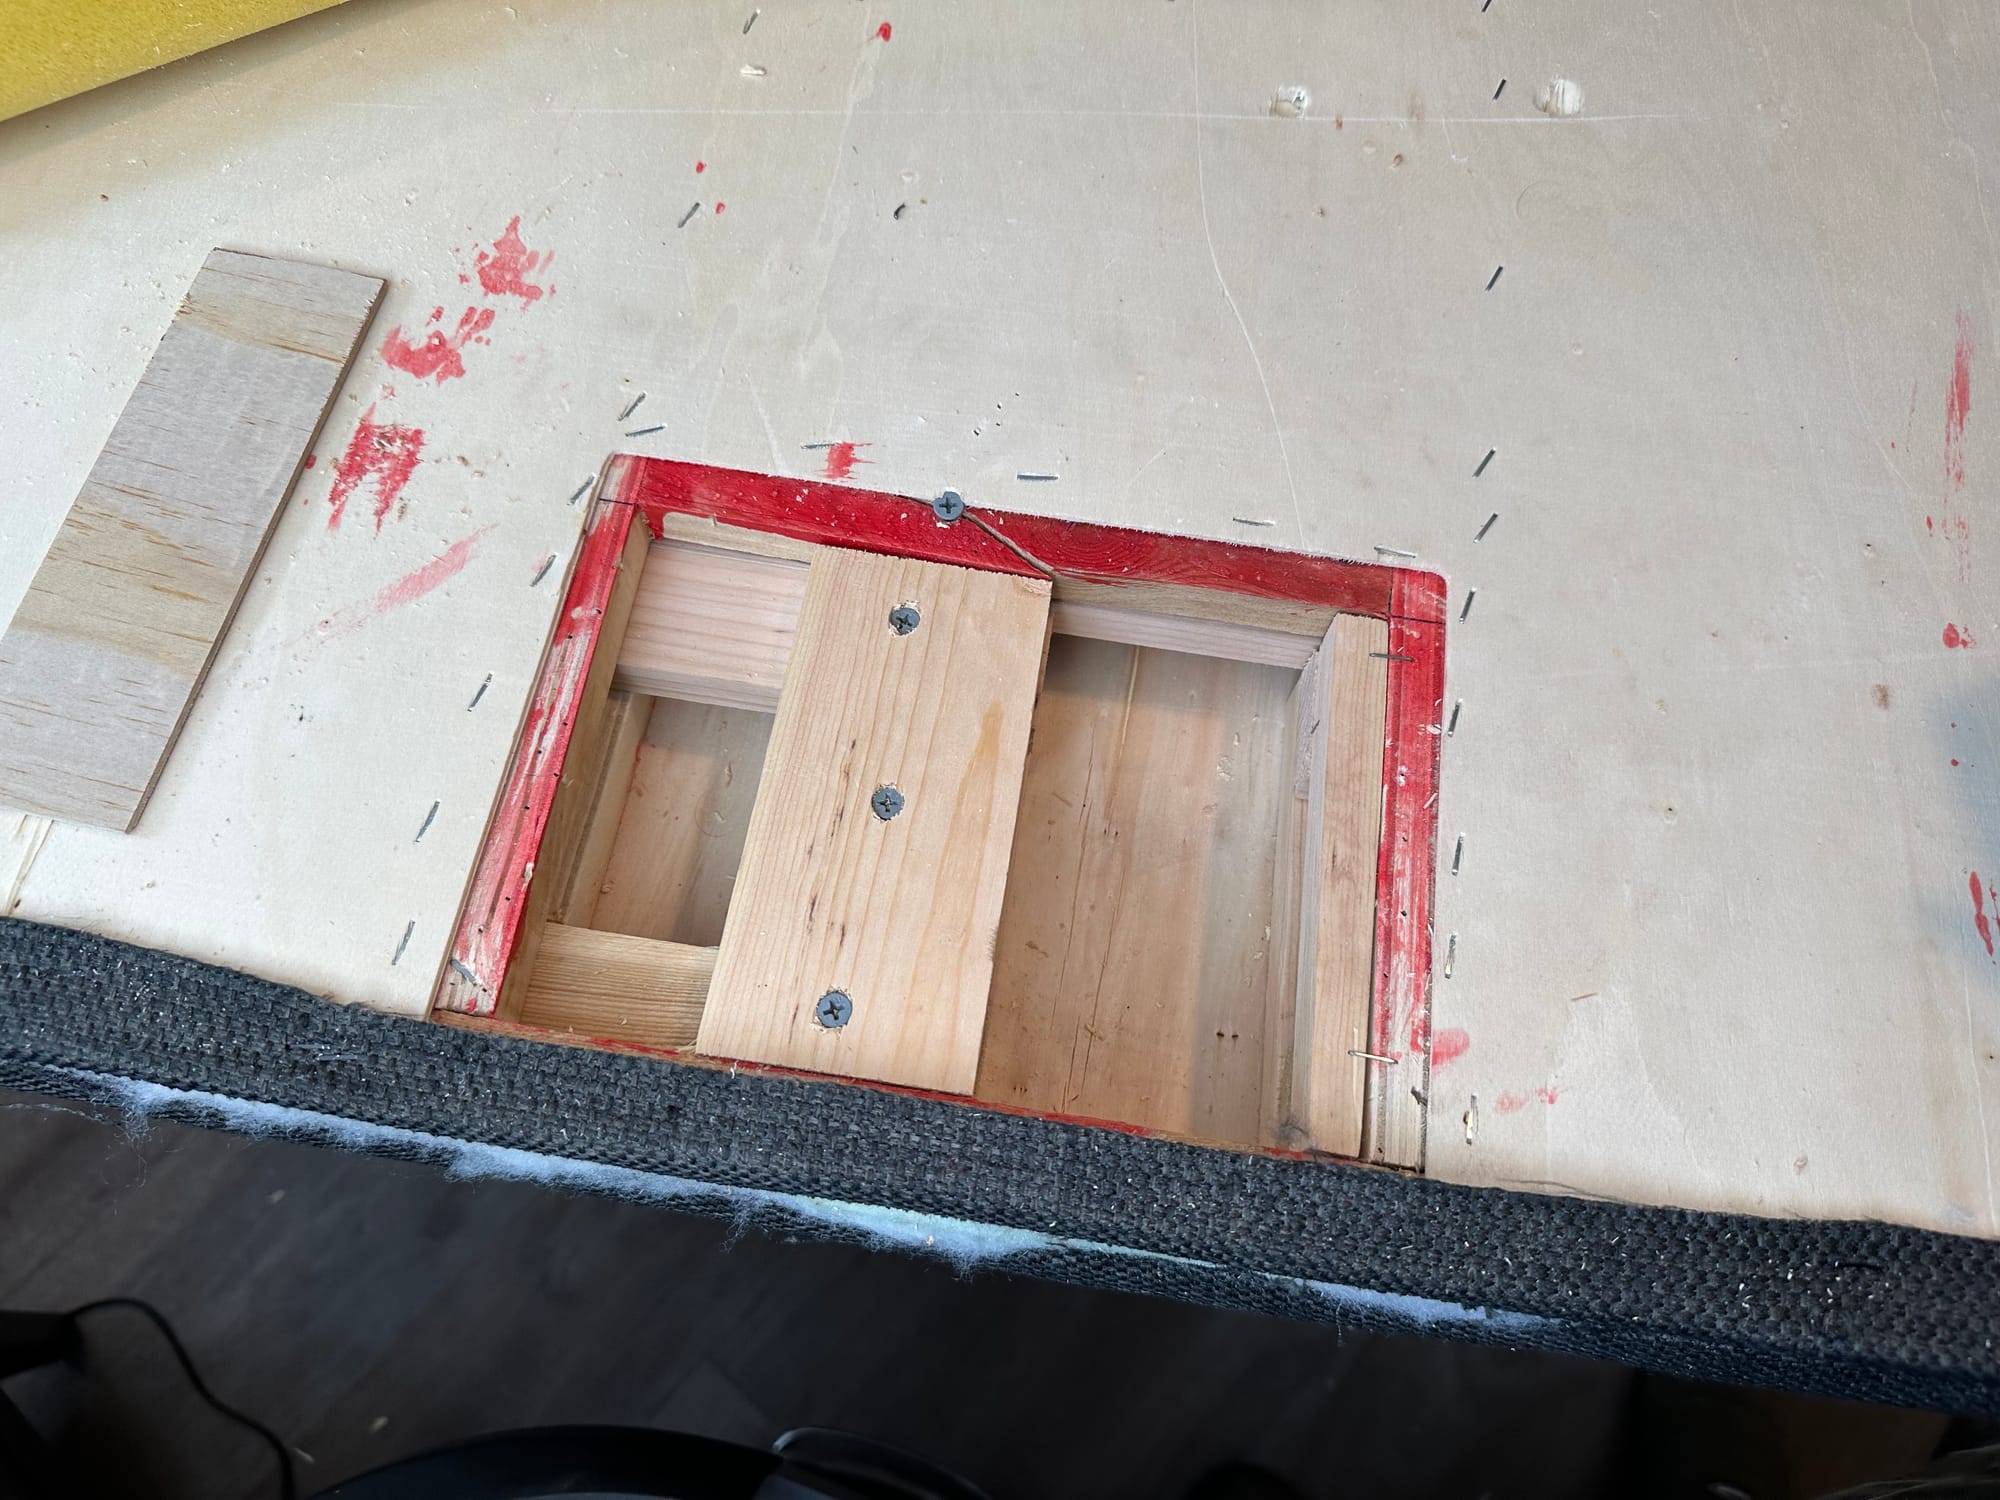
With that completed, I cut new pieces of ply to cover and secured them into place.
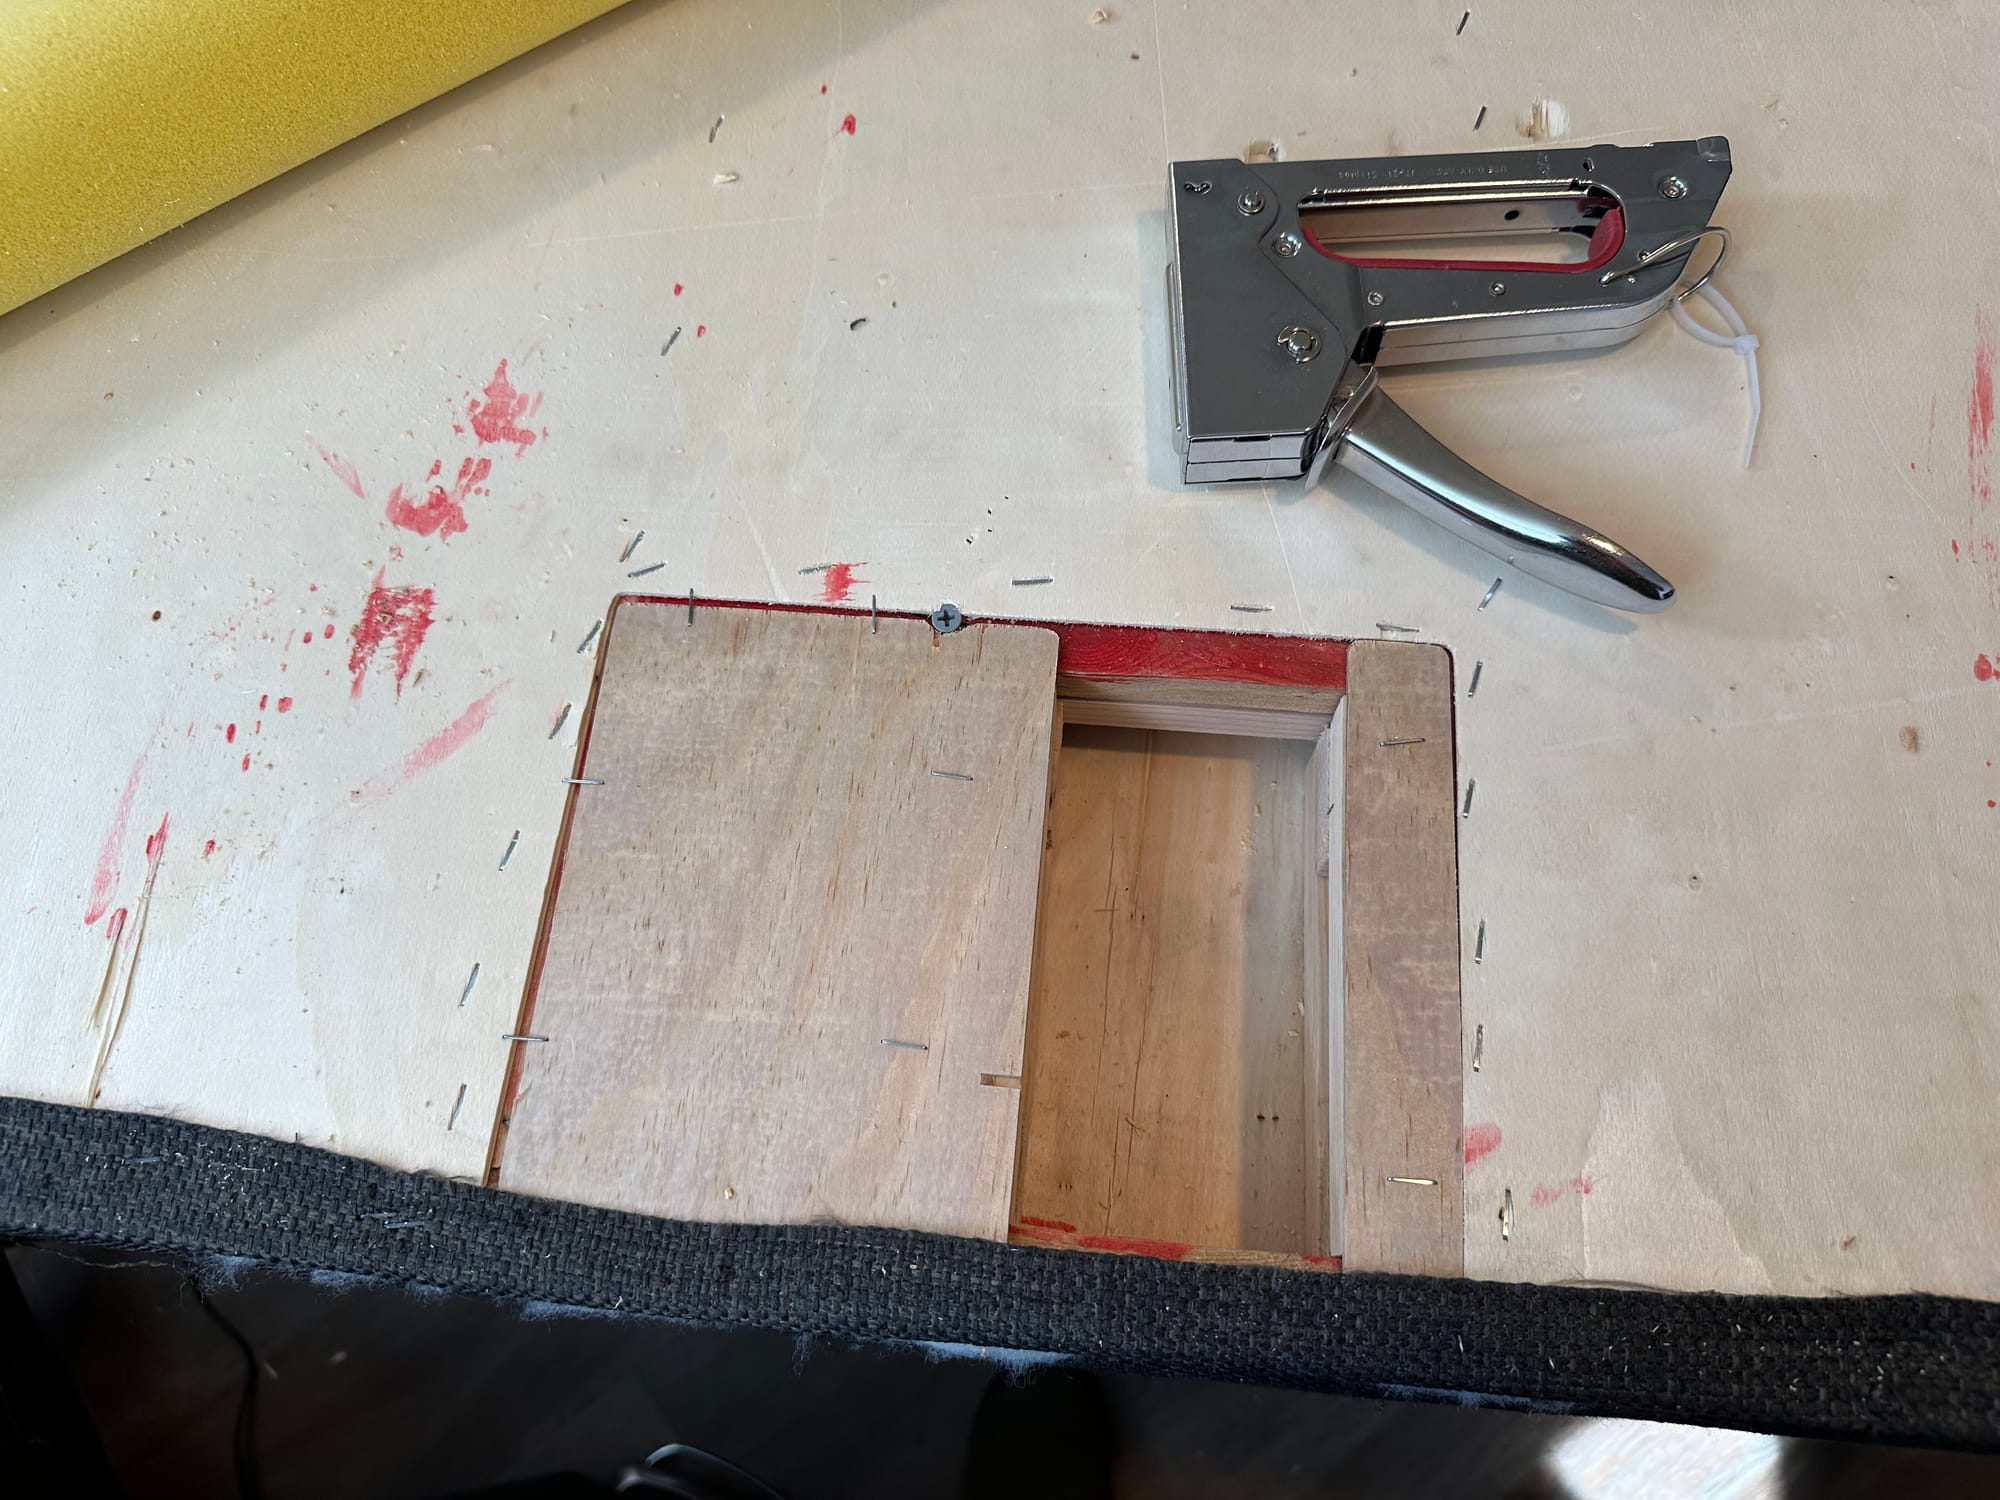
Then, to reattach the upholstery. I tacked the tack strips back down, and re-stapled the bottom. The fabric on the bottom edge ended up a little mangled, but it's not visible when the bed is set up, so I chose not to sweat that detail.
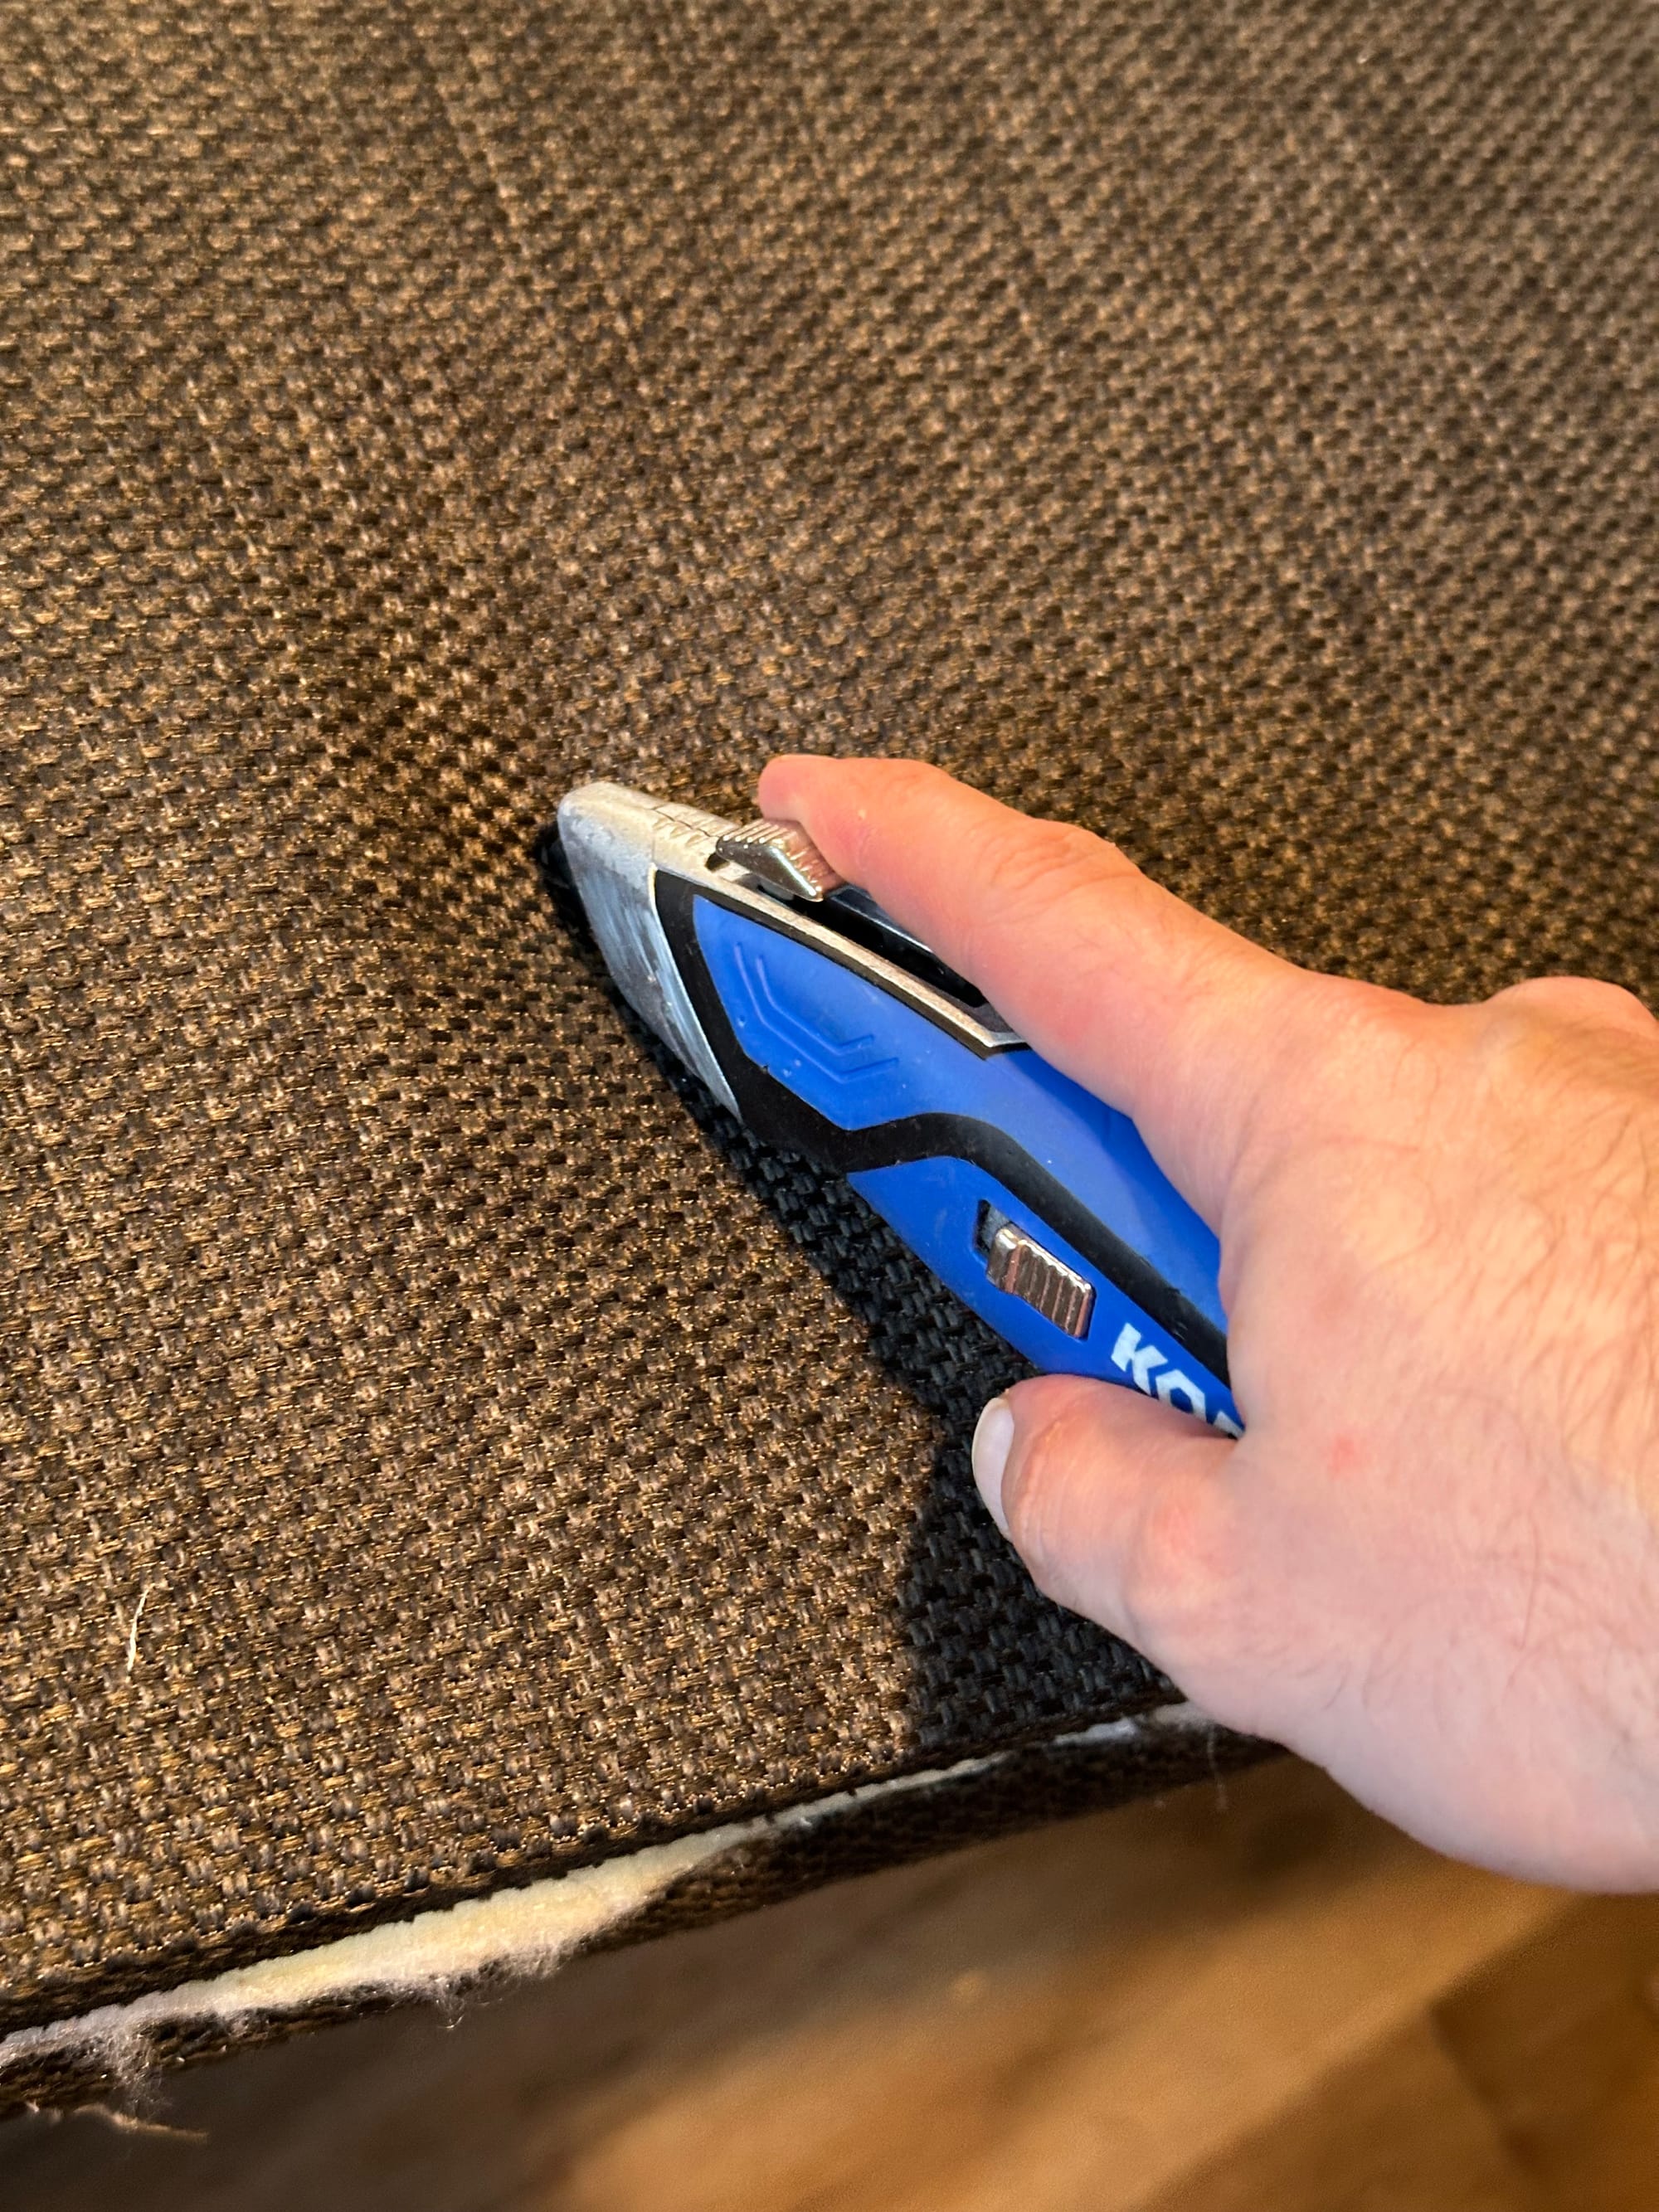
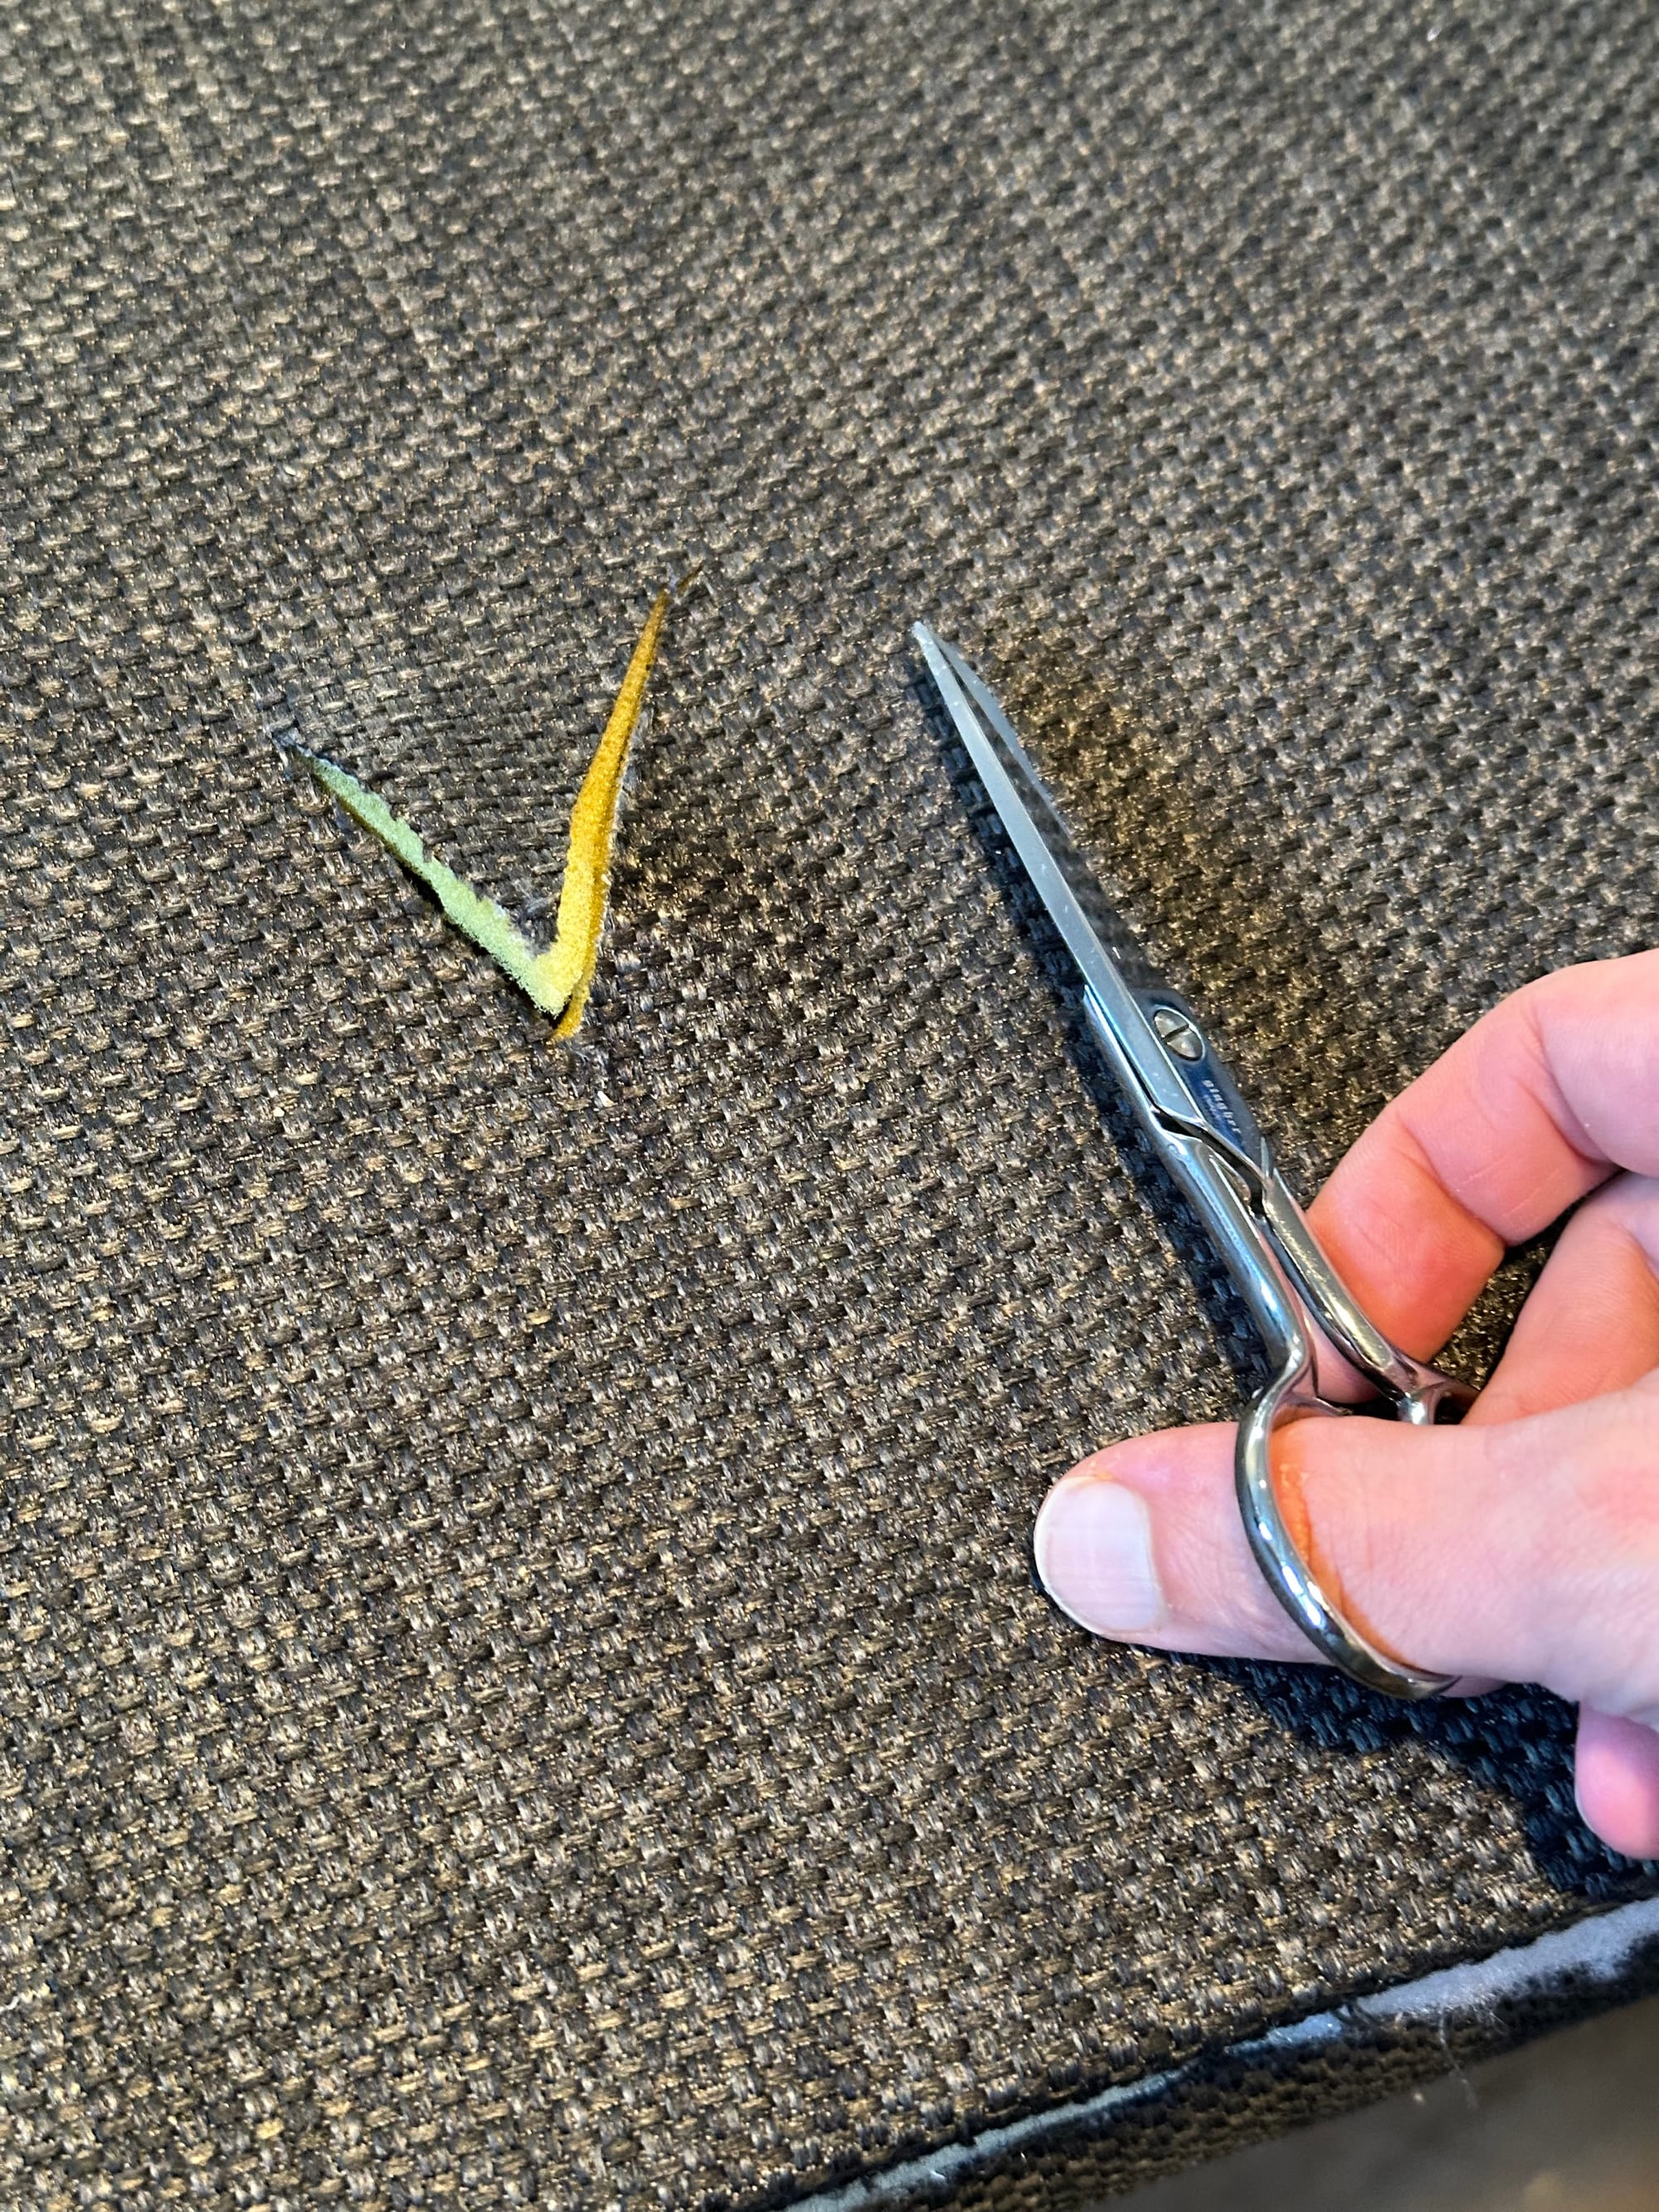
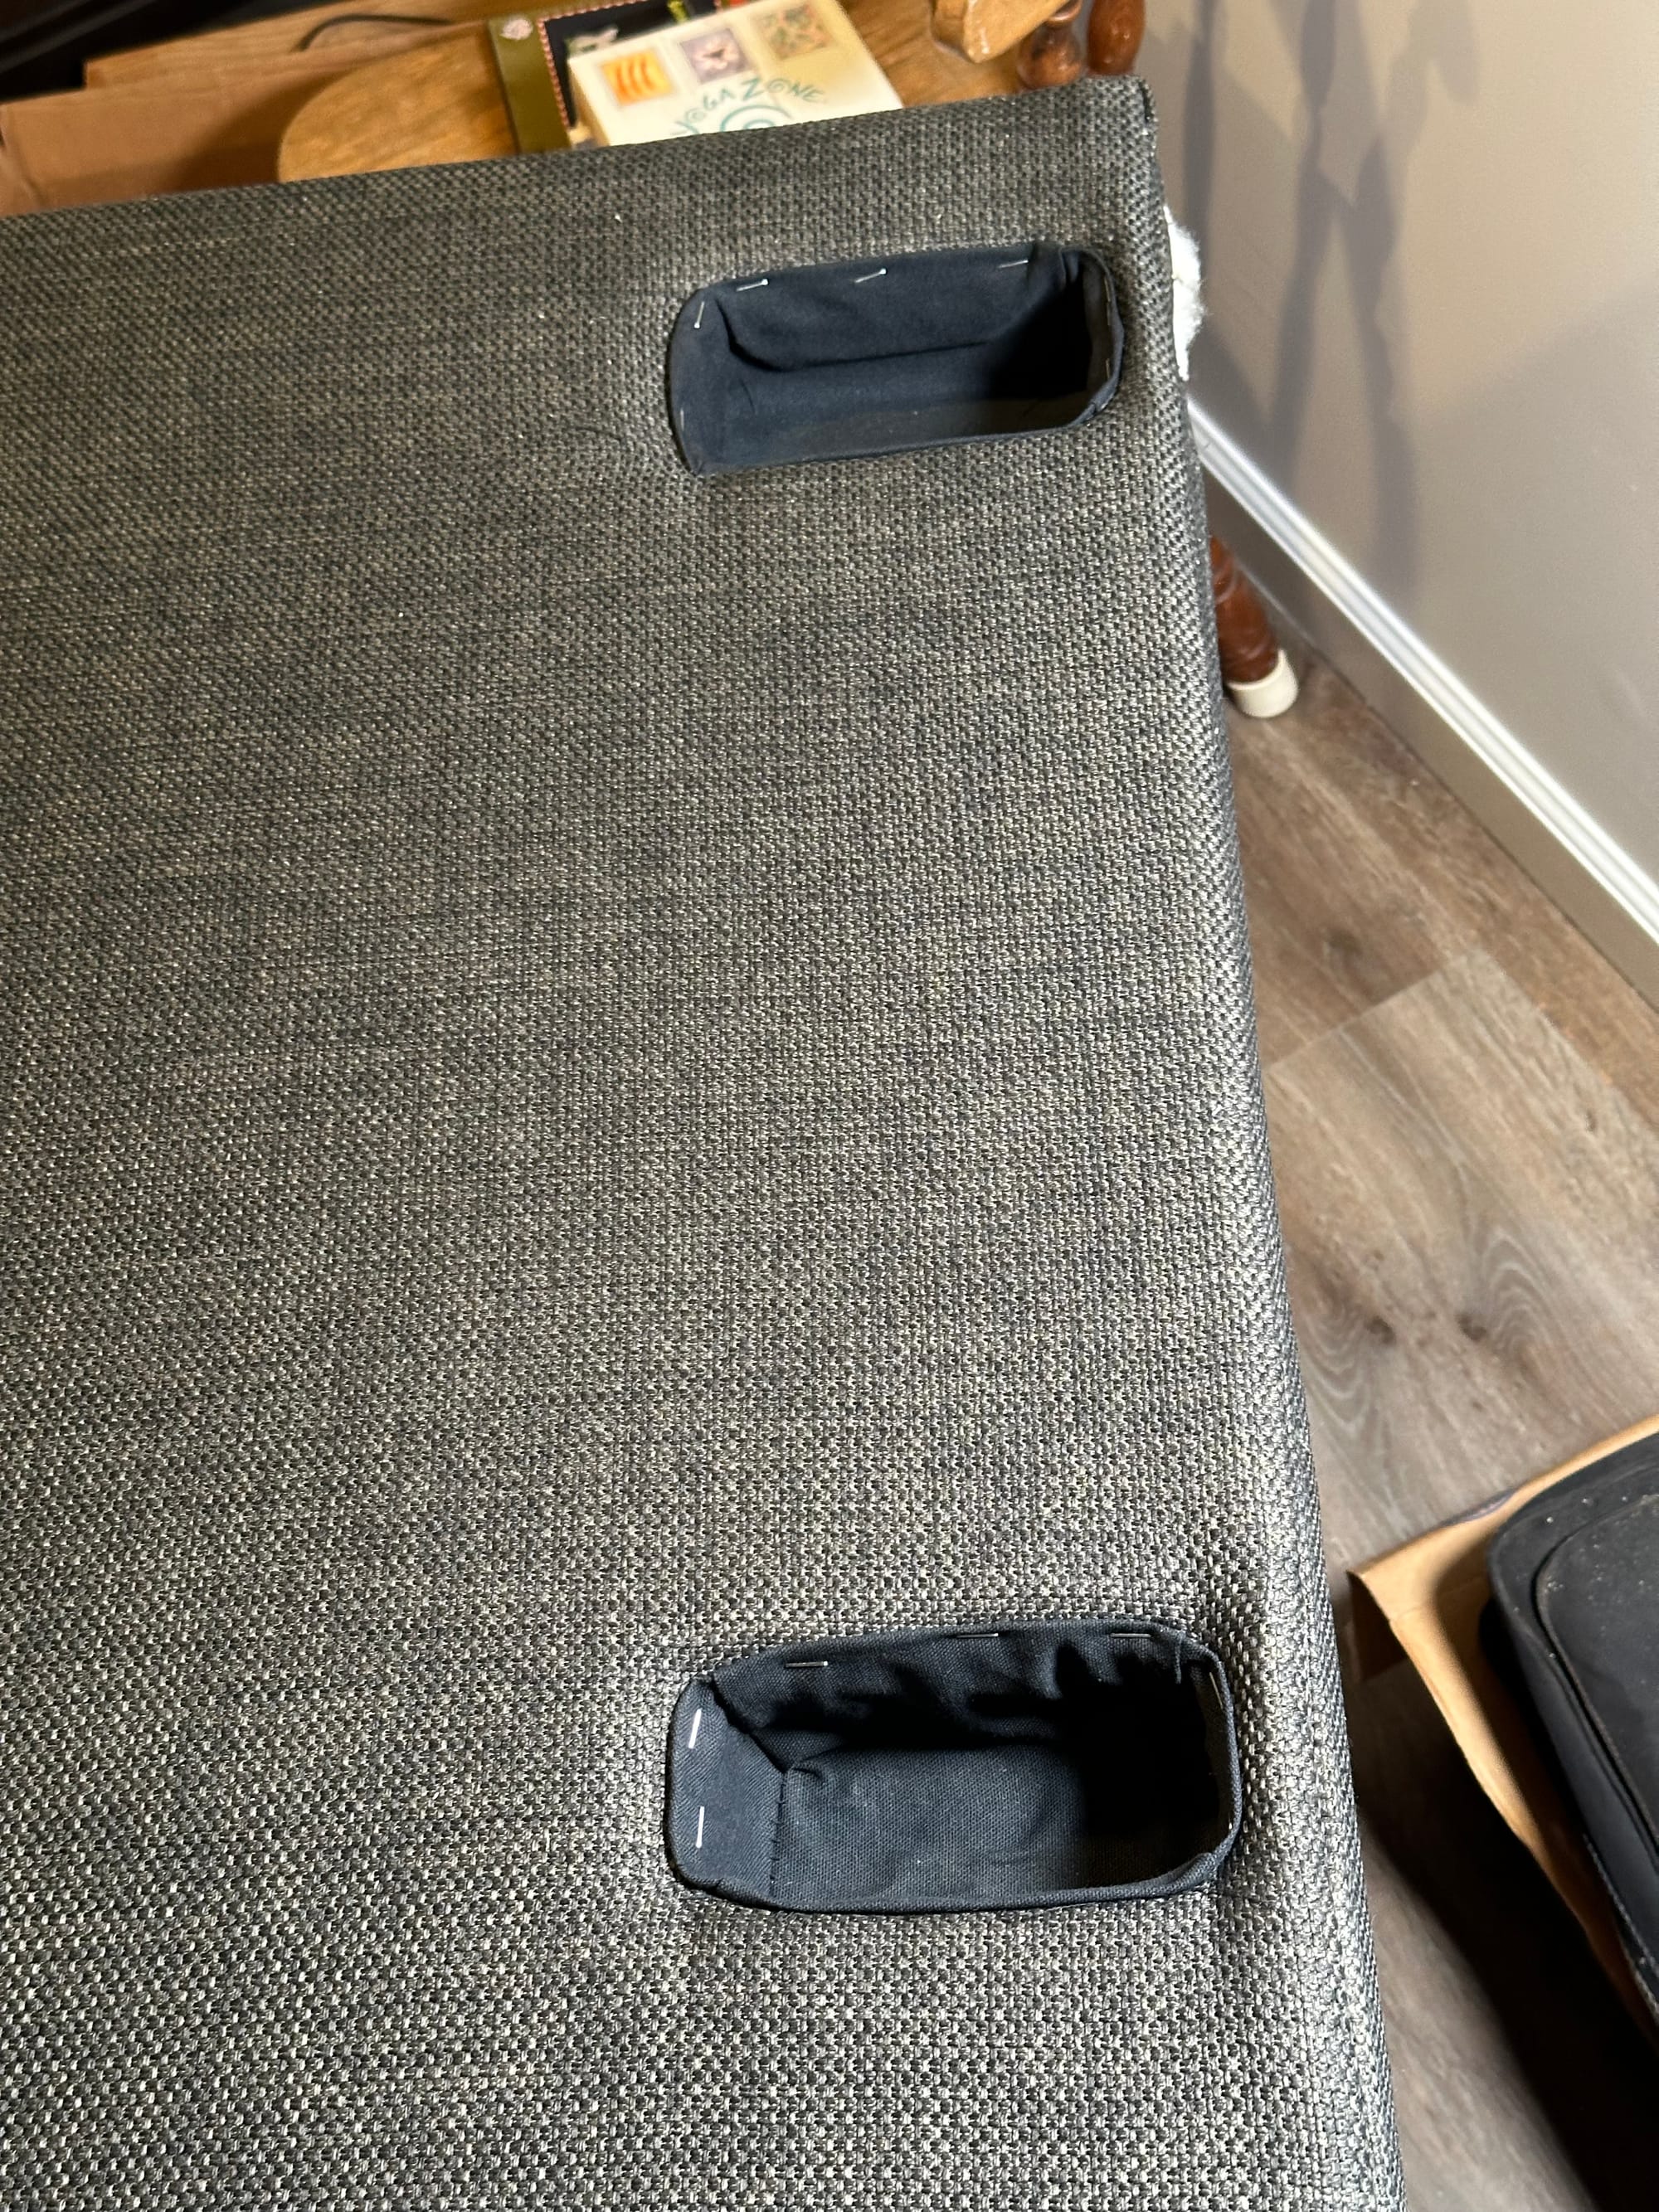
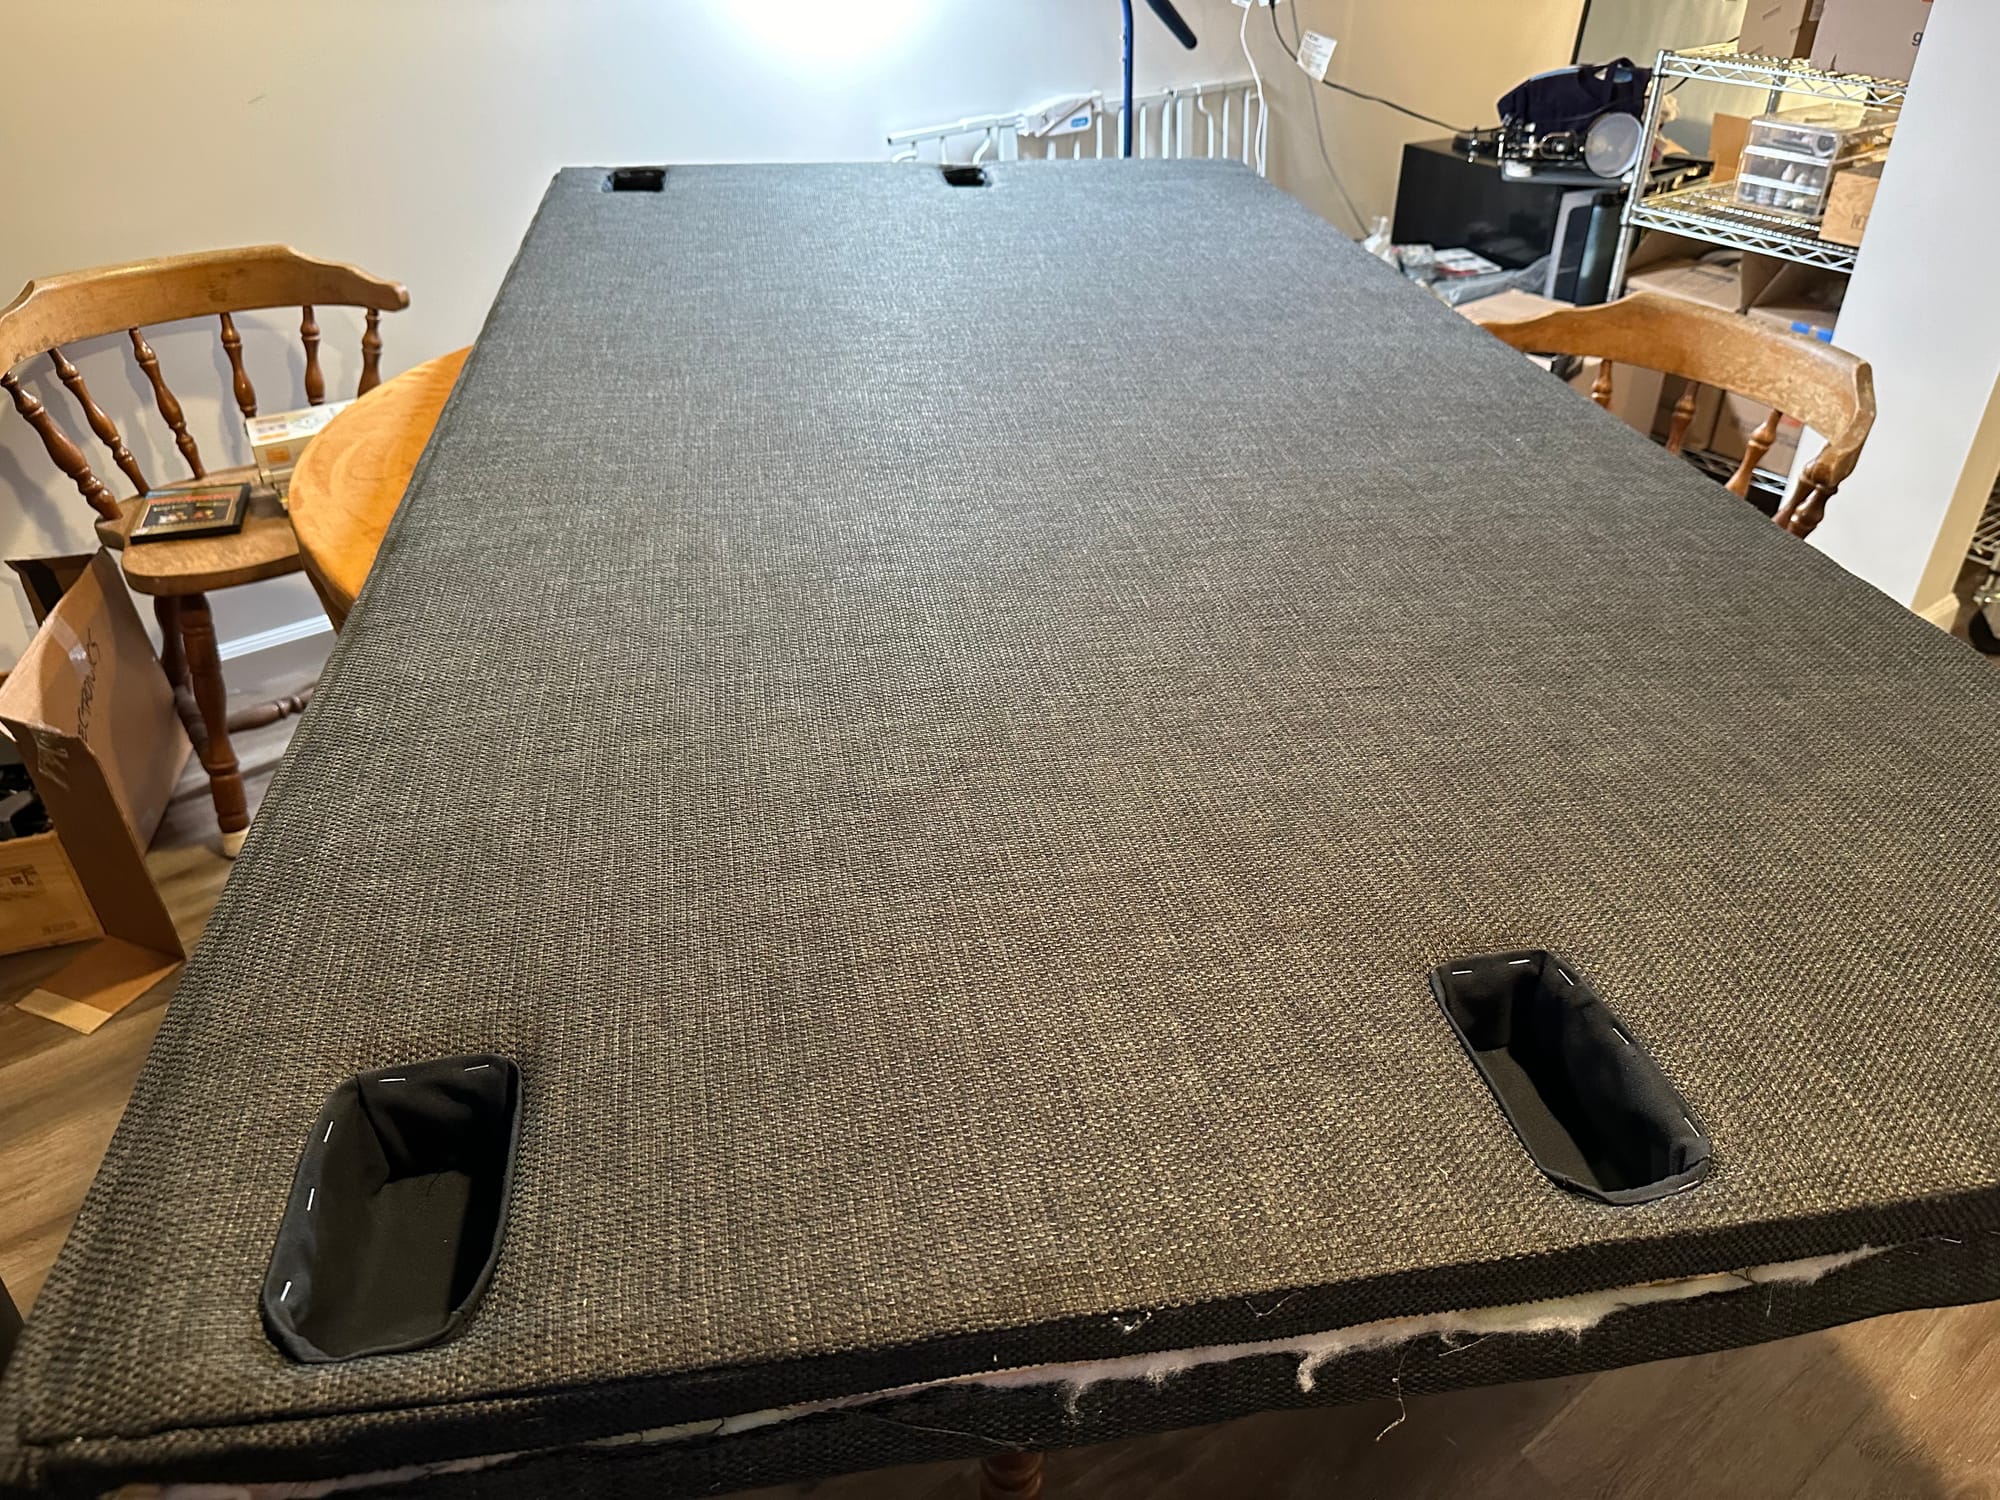
I then cut the upholstery where the pockets would go, using fabric tape to seal the edges, and stapled down to the sides.
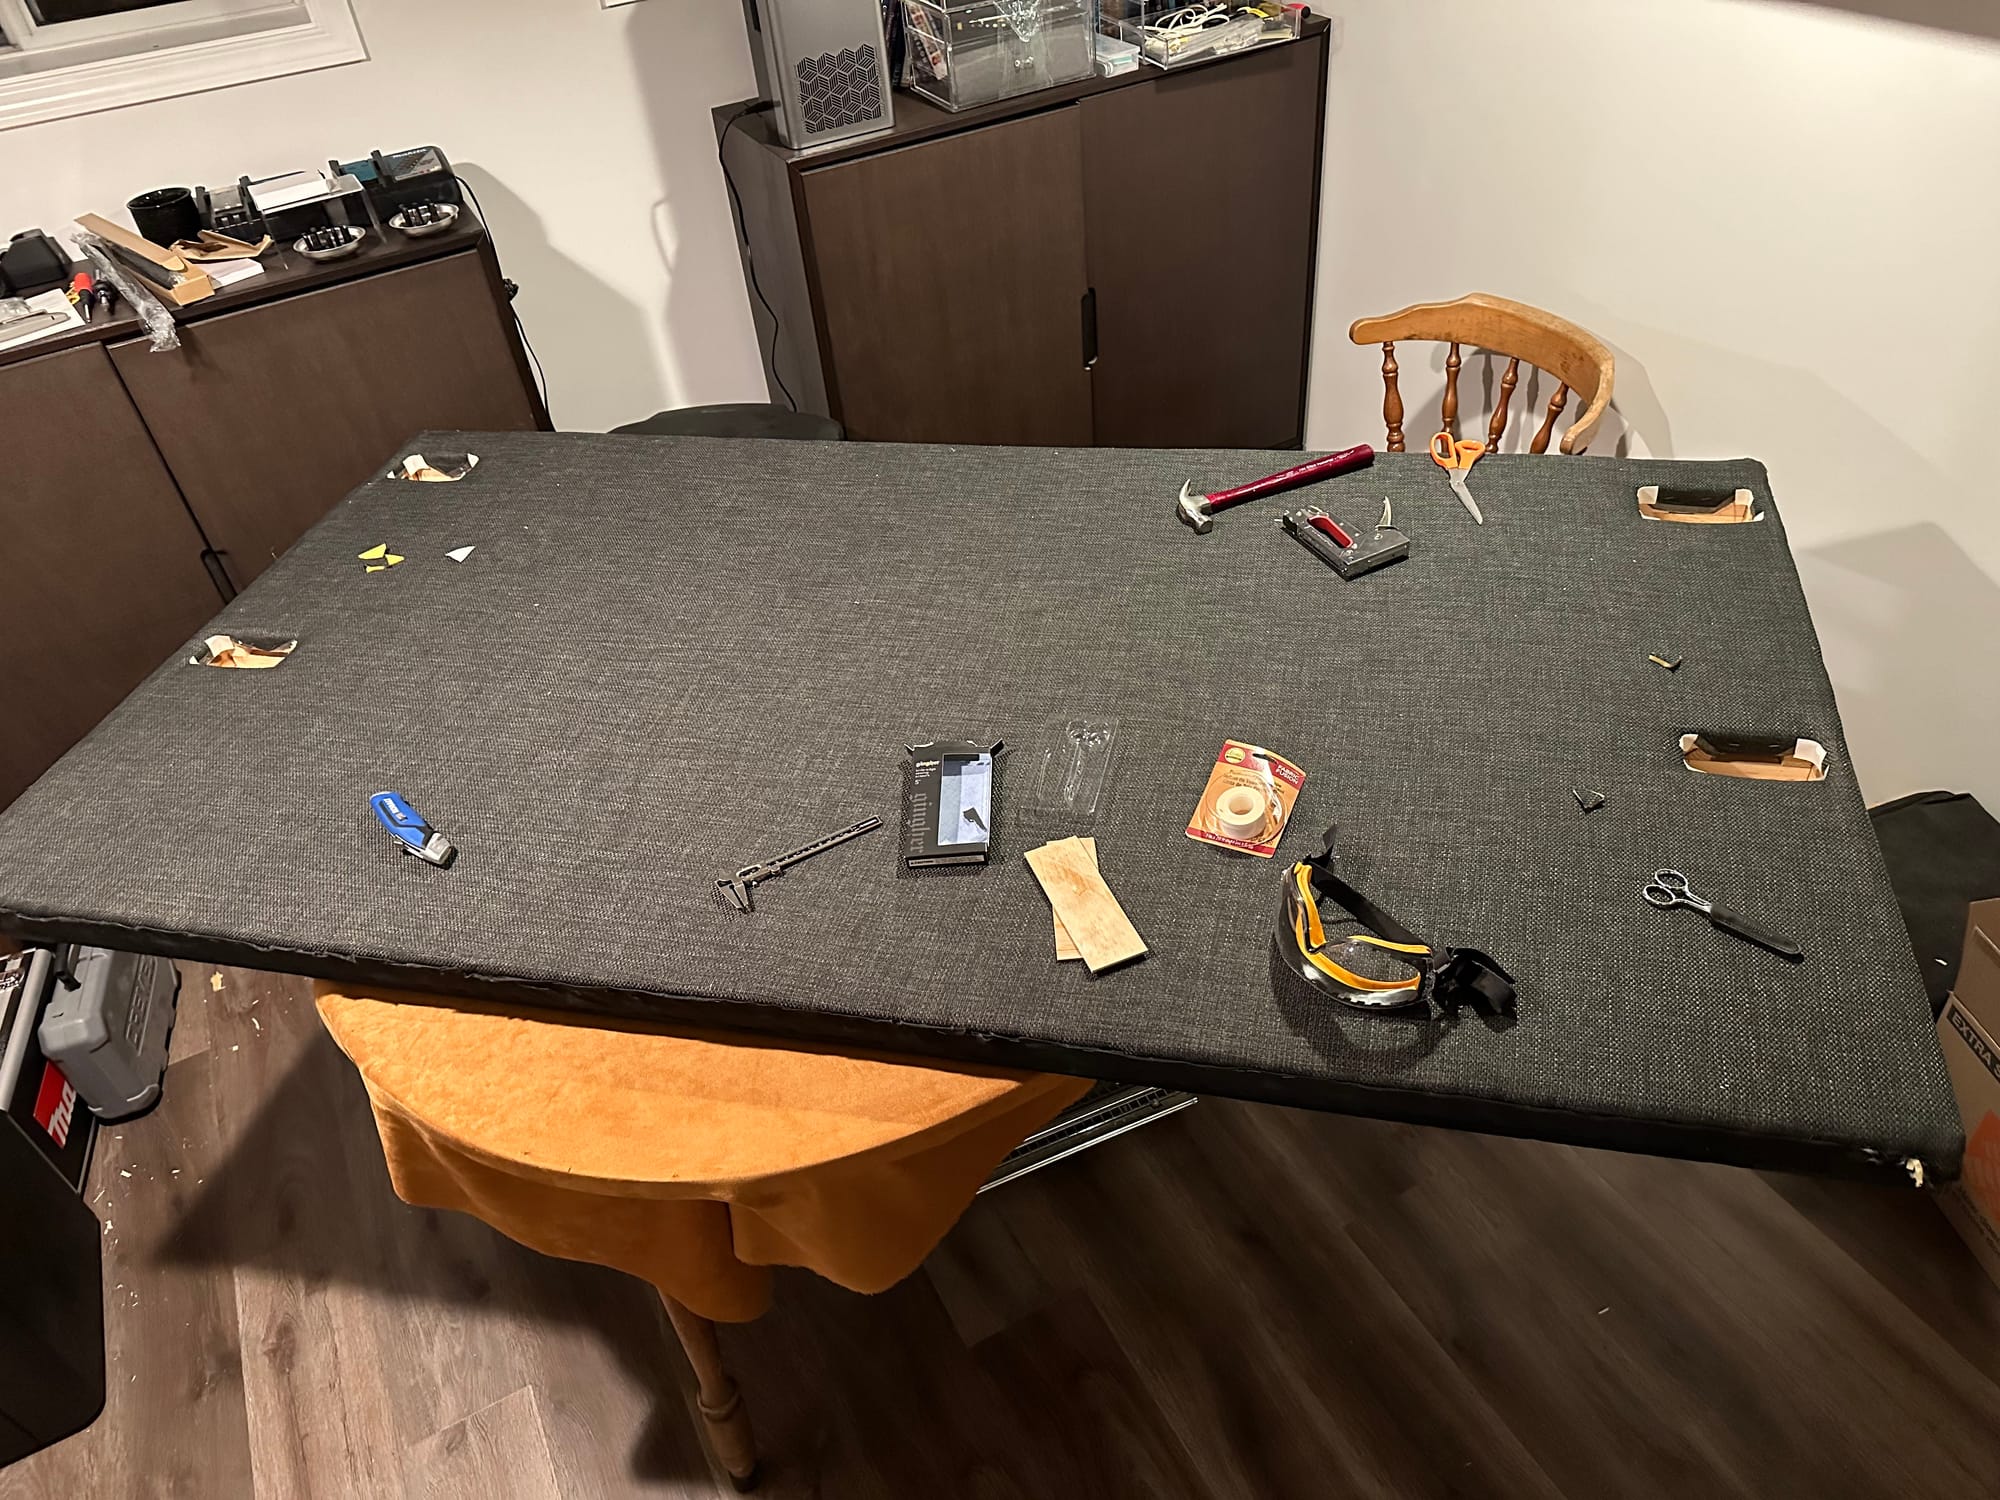
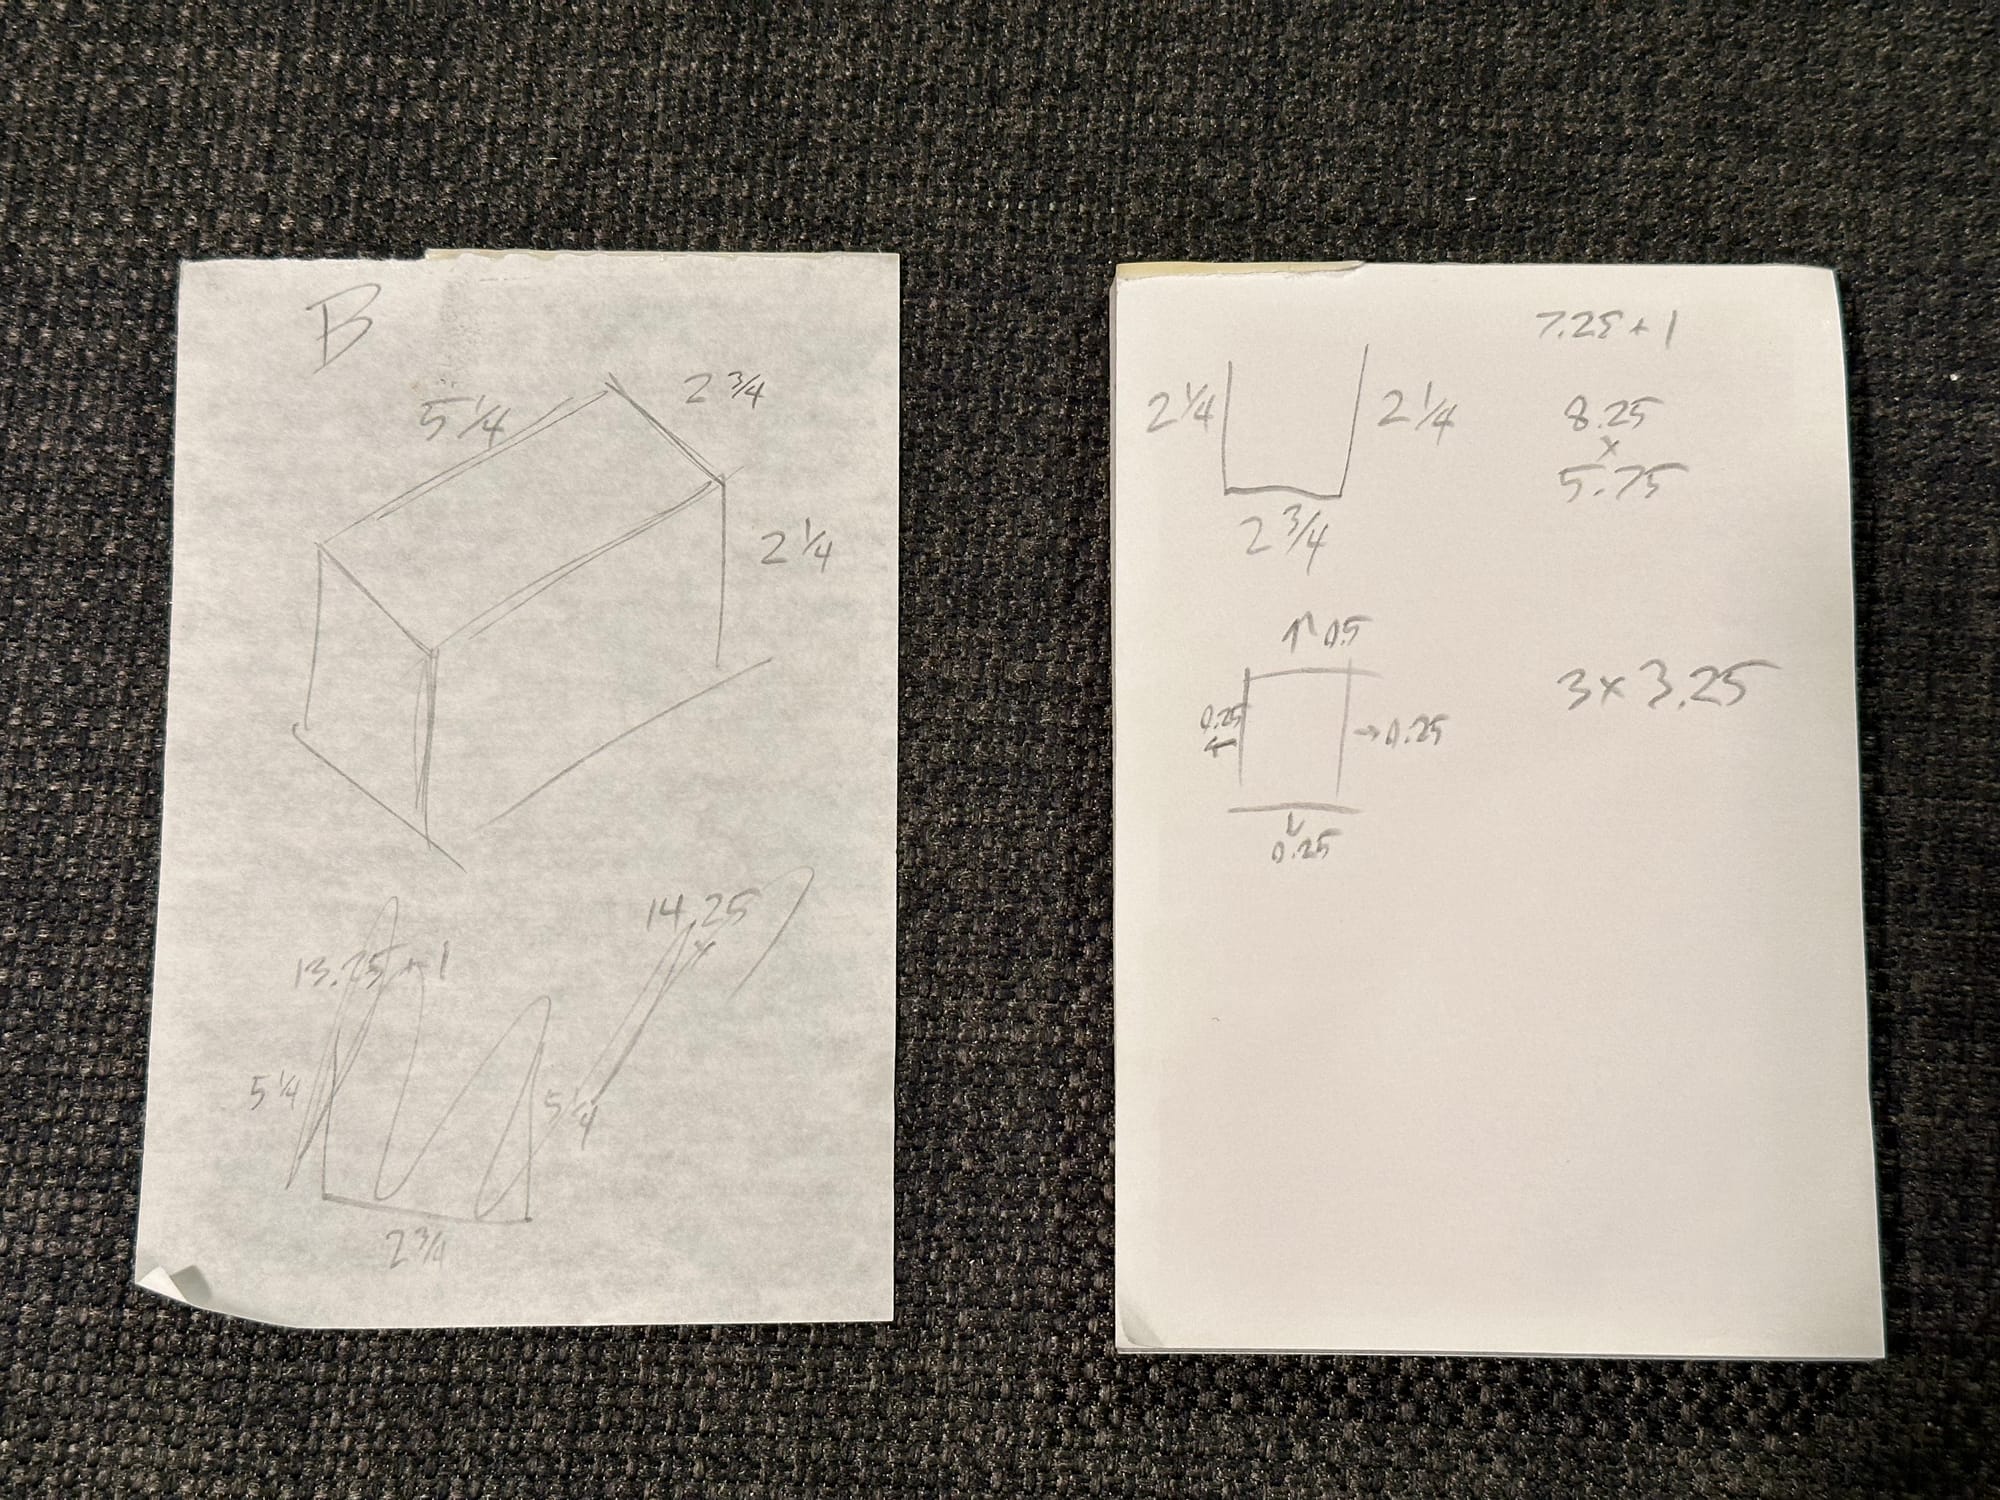
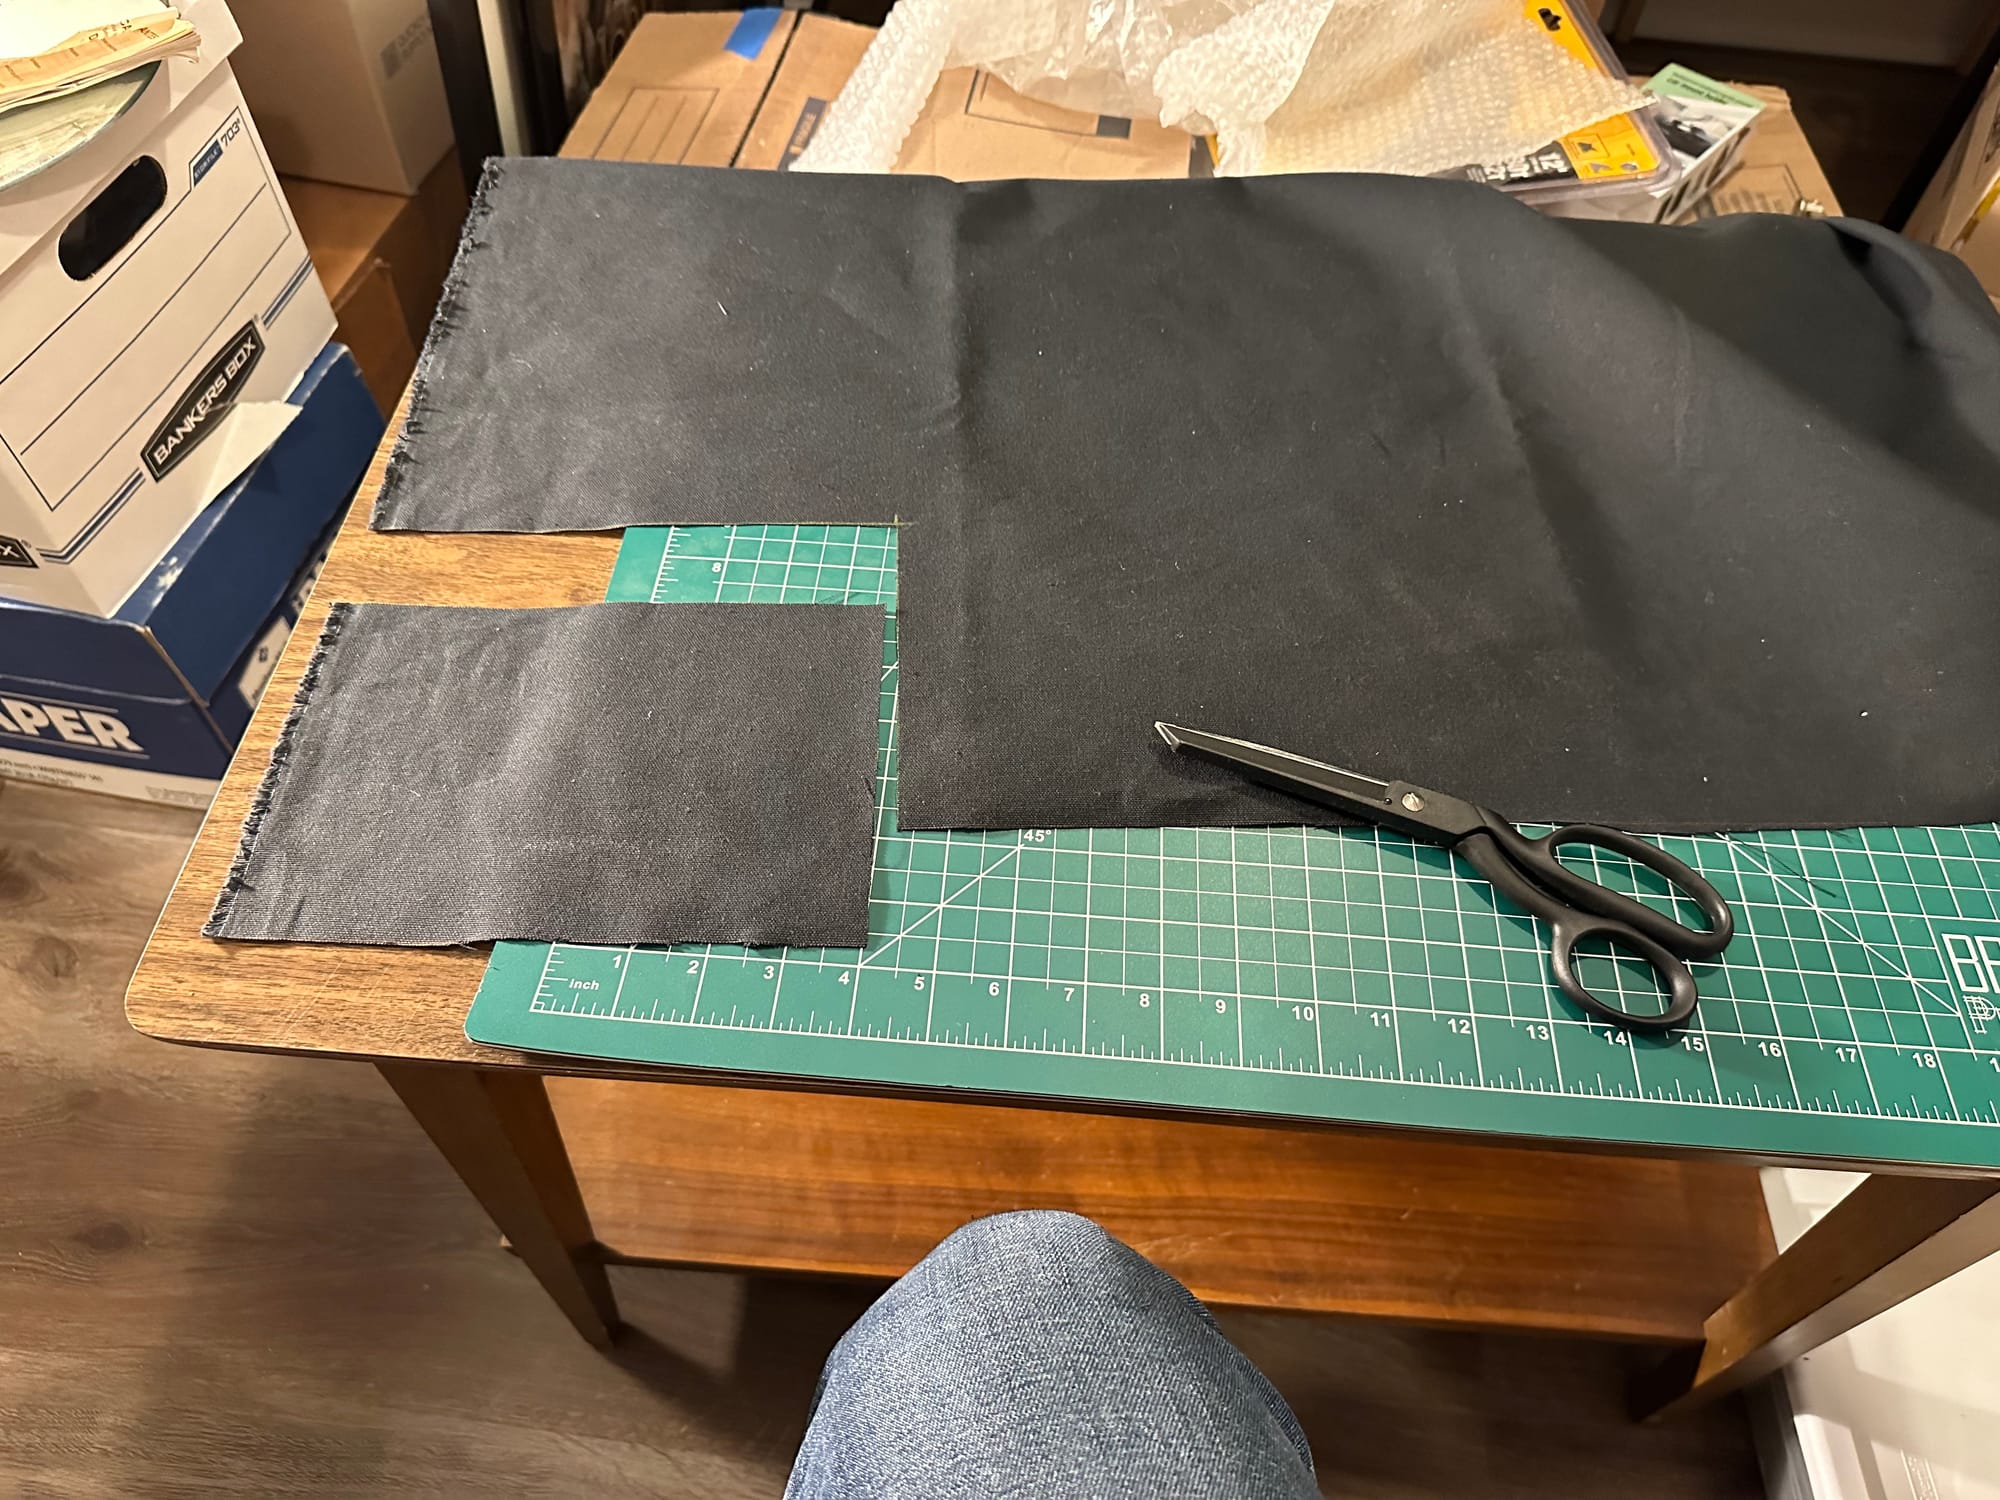
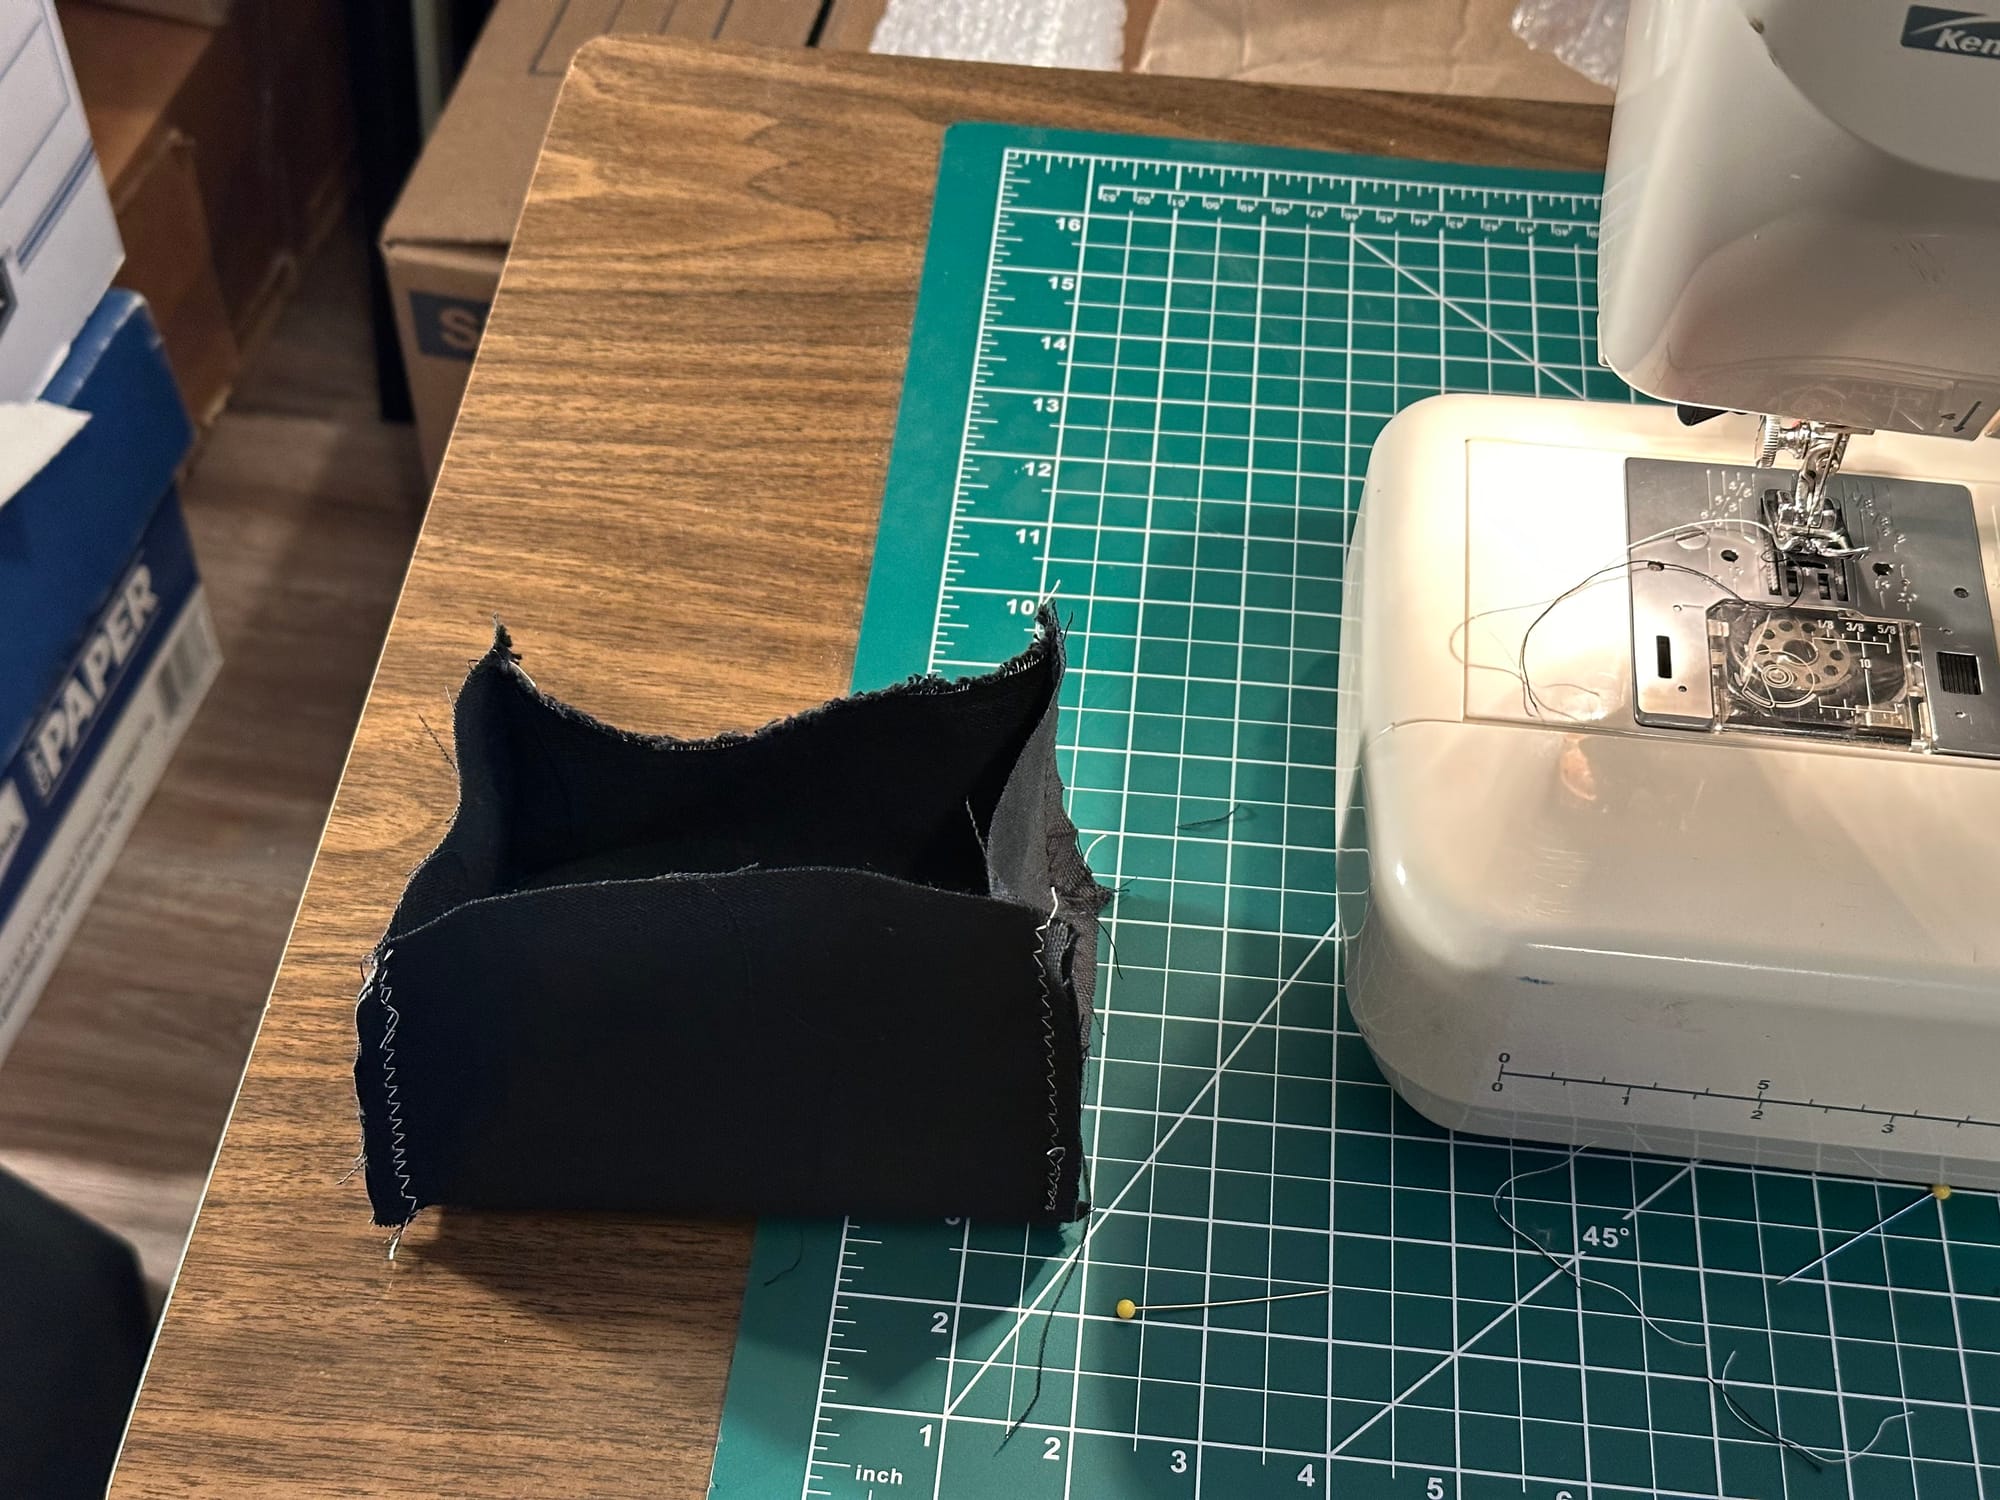
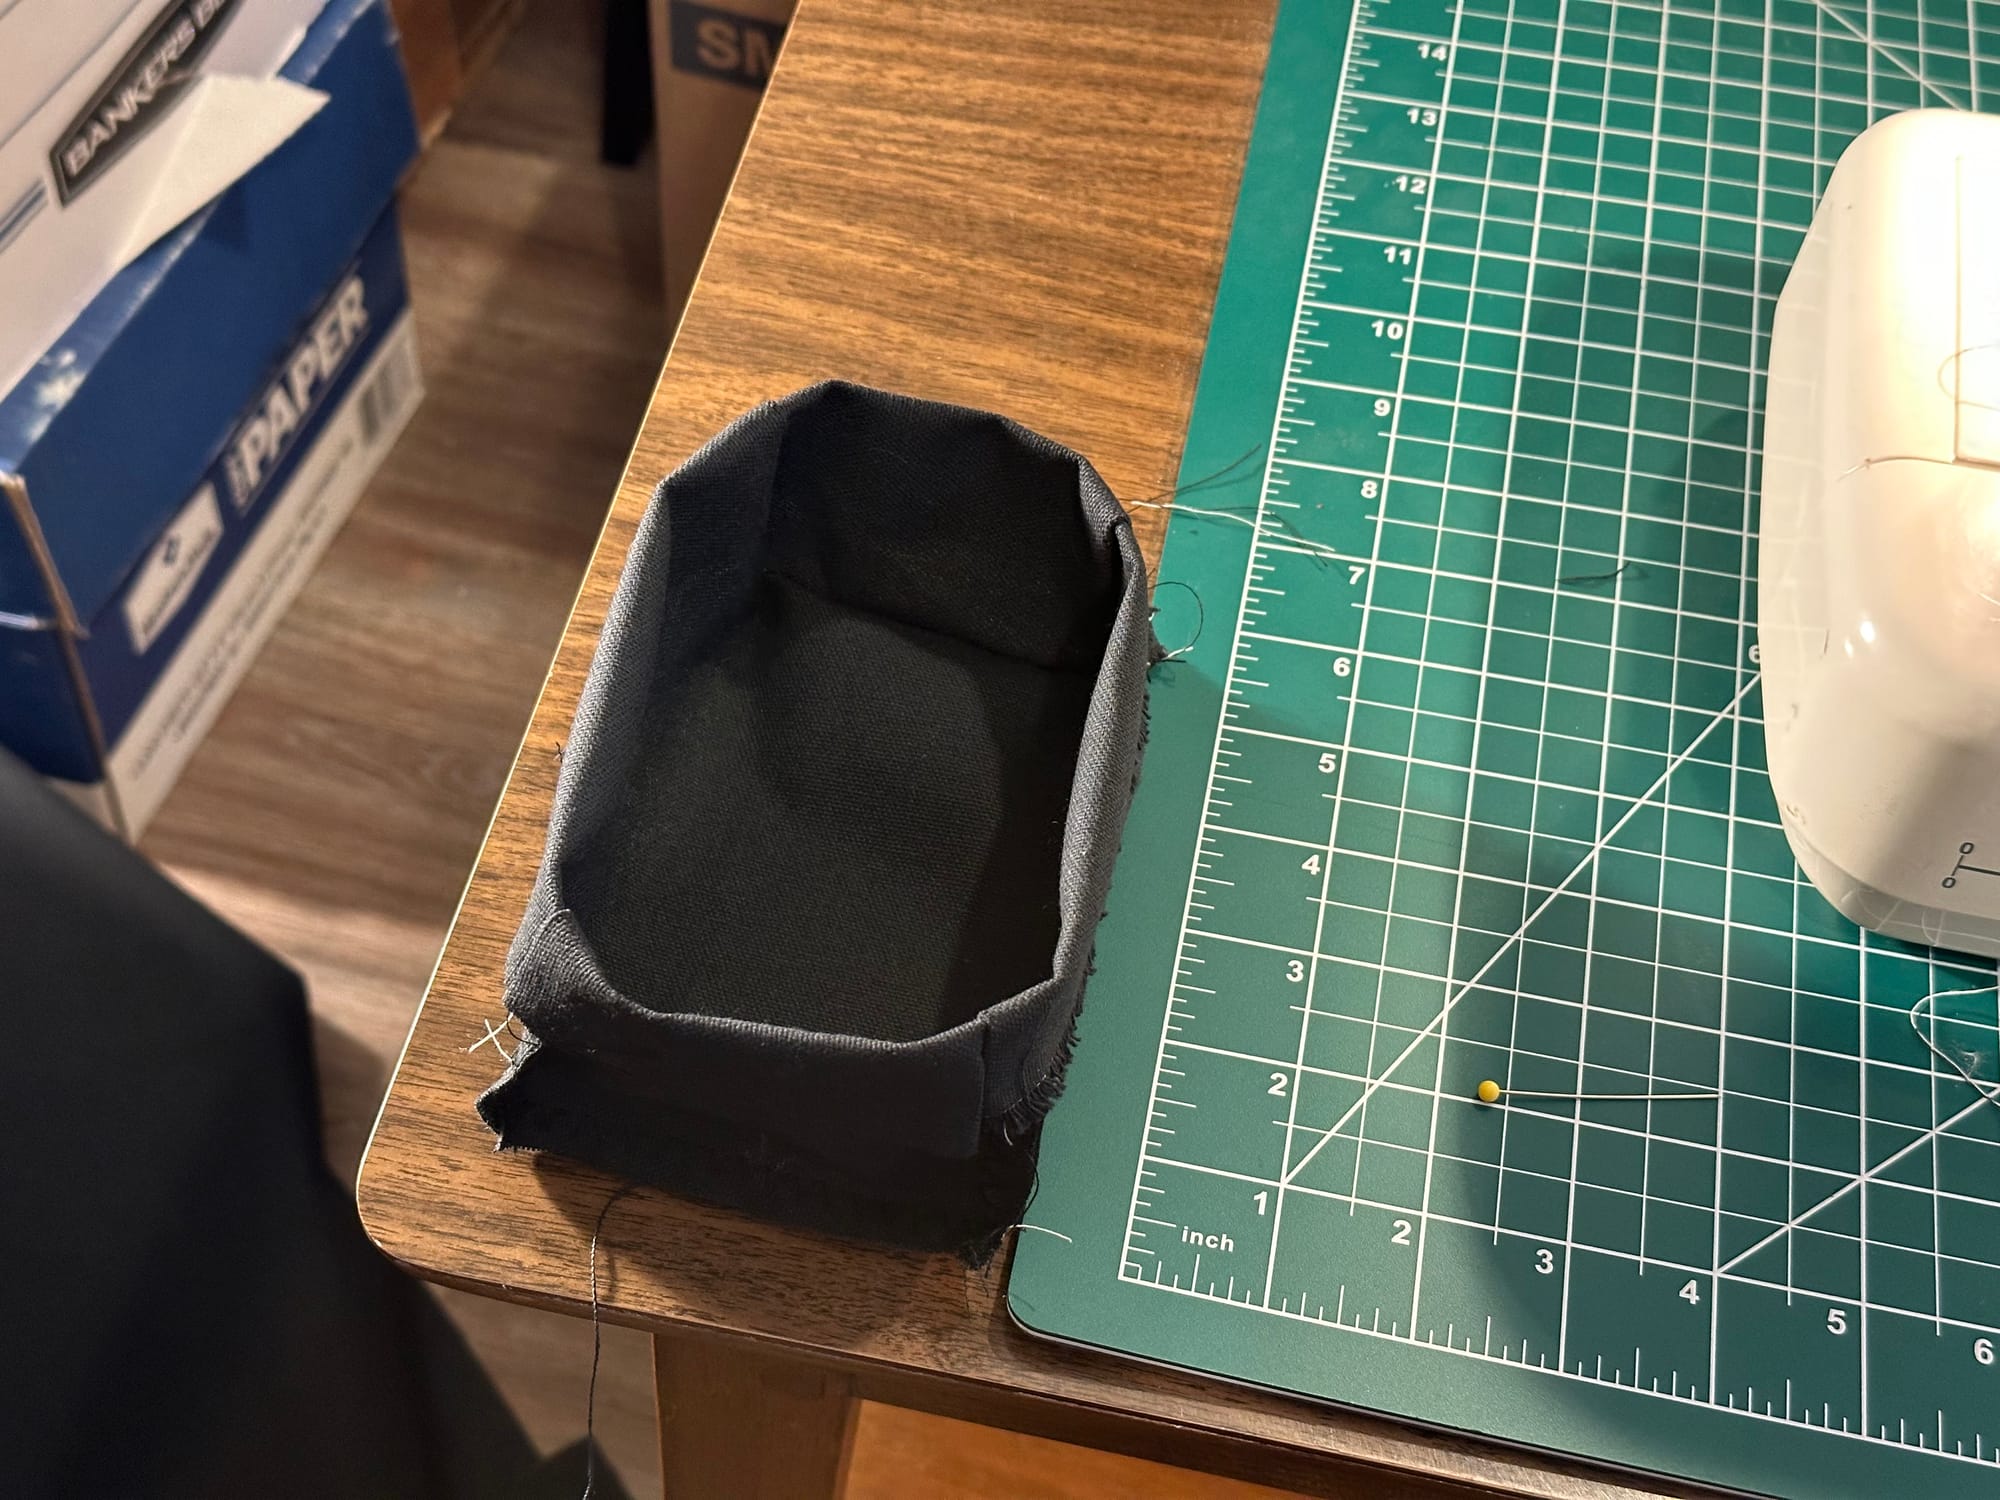
Next, over the next week I broke out the sewing machine and stitched up fabric covers to go into the pockets. They are a pretty simple construction, creating a box with an open side—I worked out my measurements, cut, stitched the edges, and turned inside out and folded down the top to have a nice clean hem. I then used double-sided fabric tape and staples to secure them into the pockets, cutting a slit to pass the bolts through the slot.

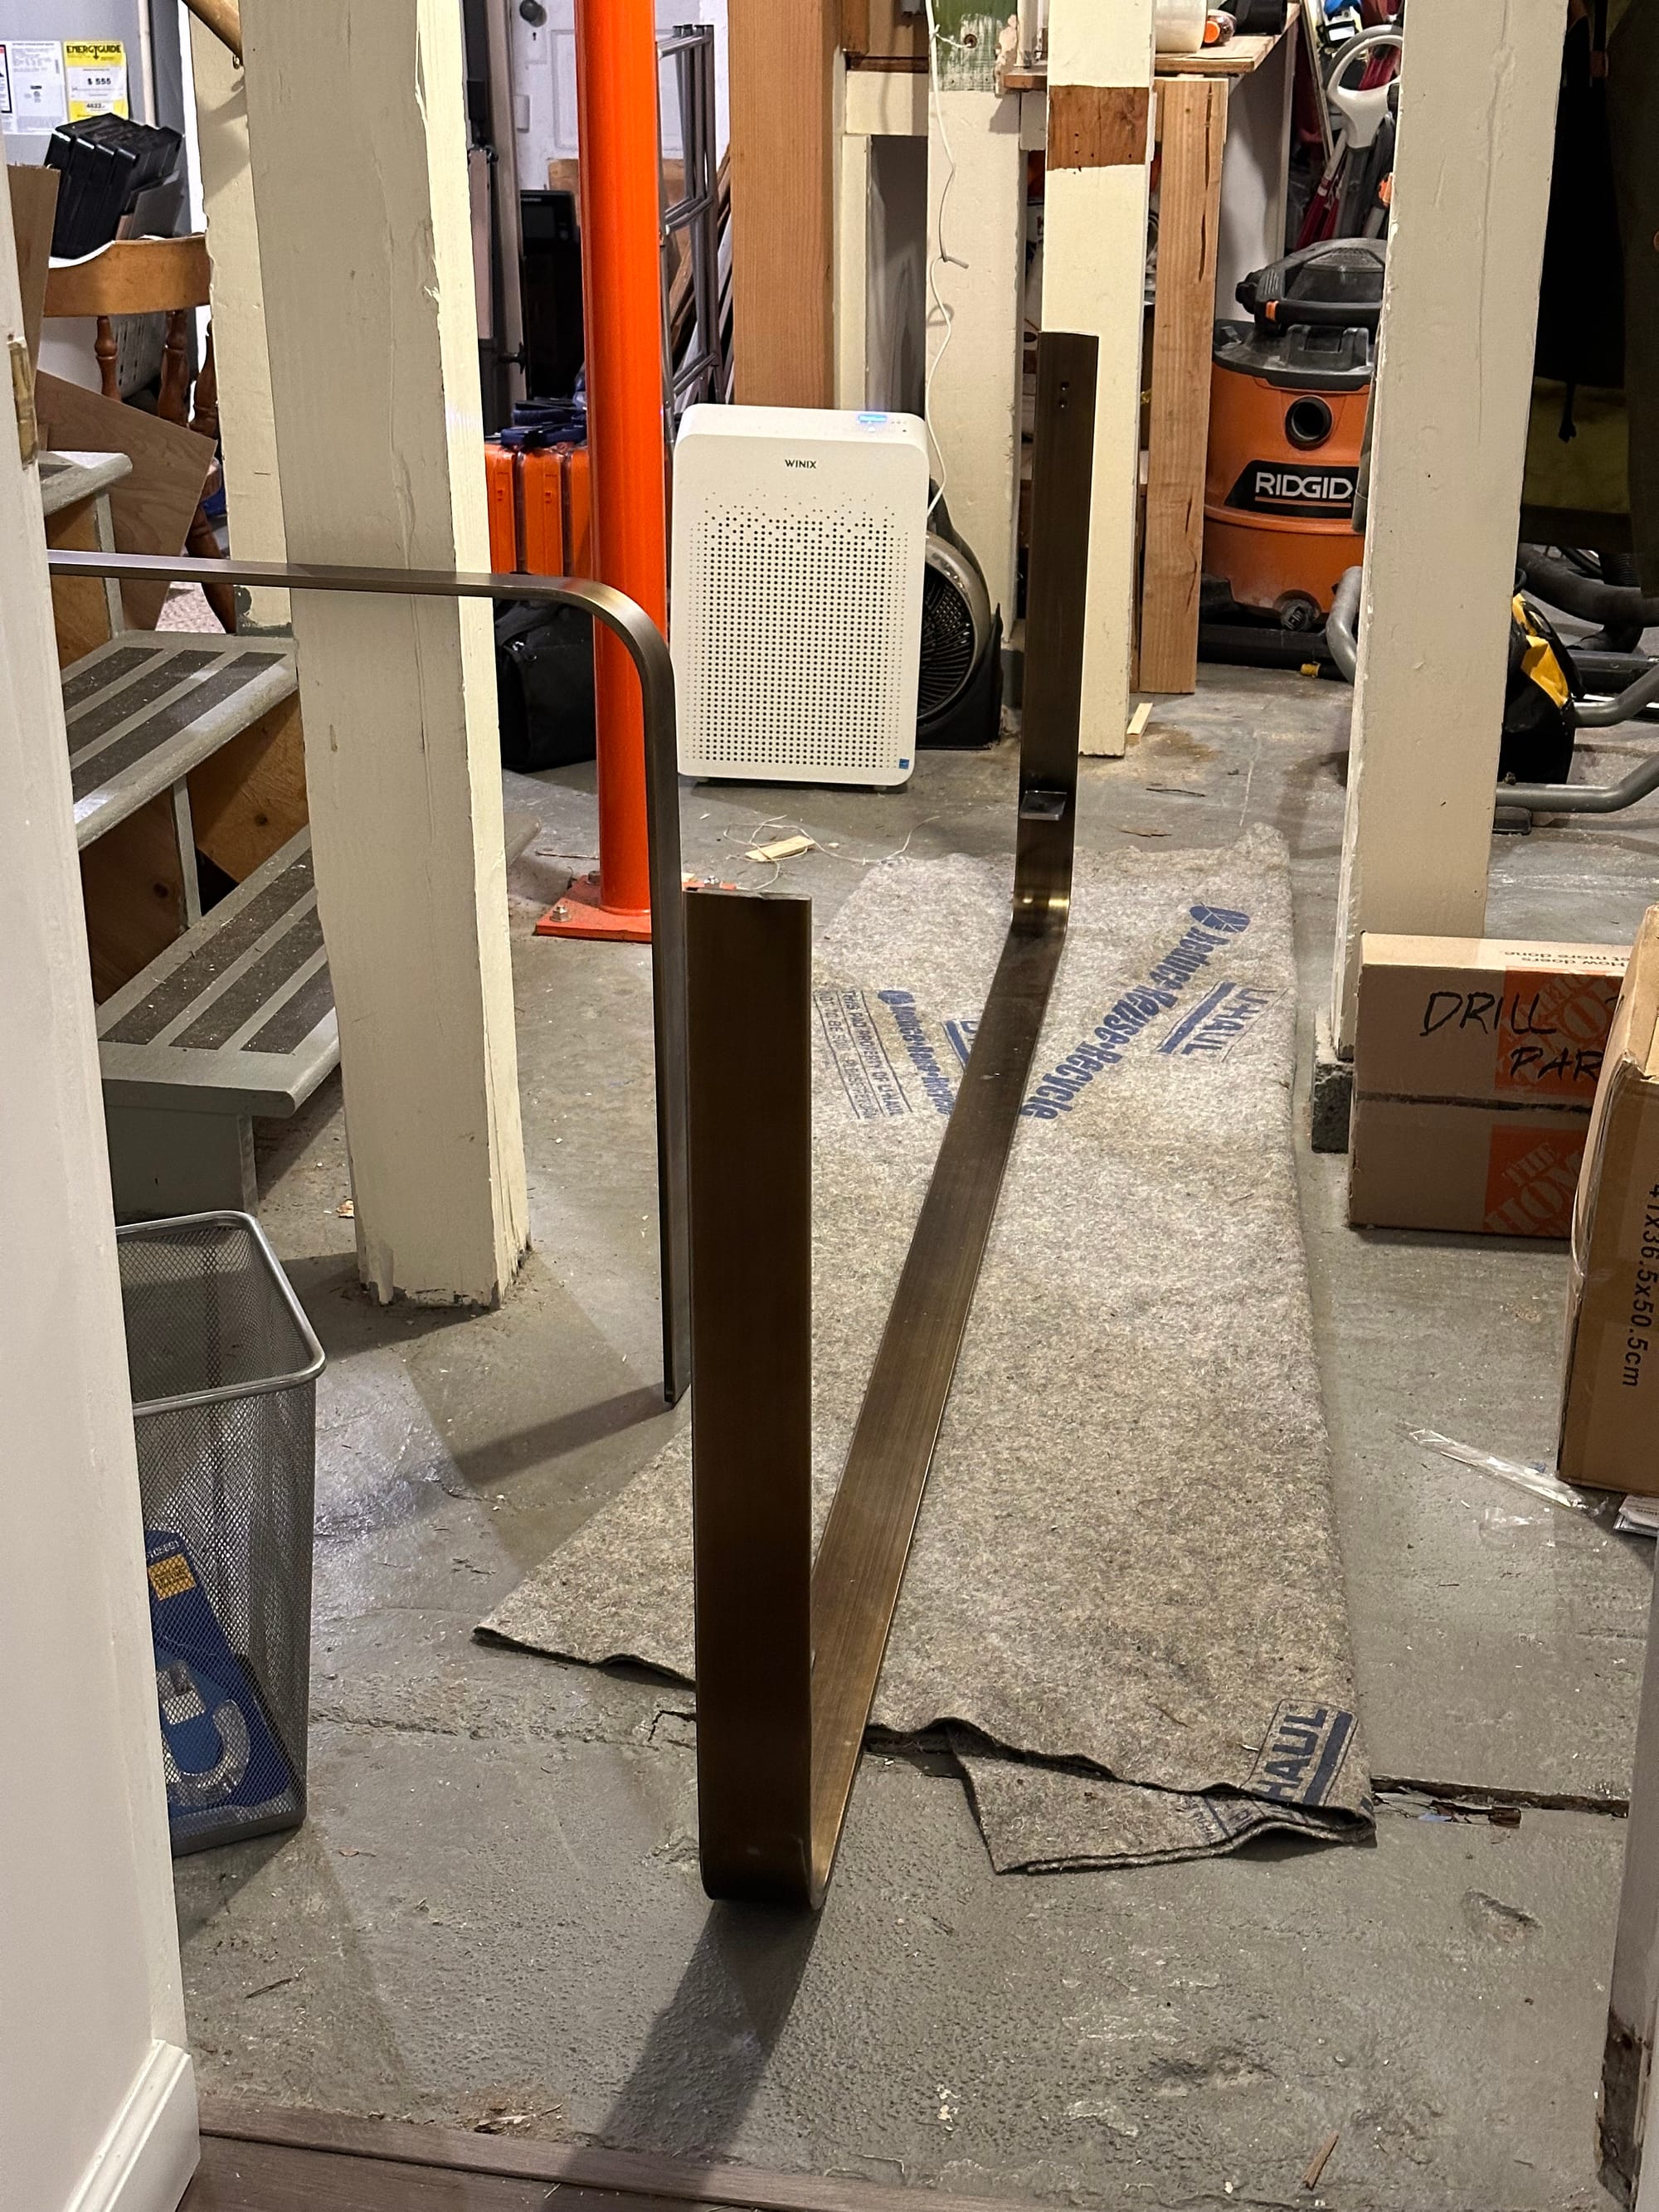
The next weekend, it was time for the step I'd been thinking about and stressing about since the beginning. The metal frame was ultimately the problem for navigating the headboard up the stairs. It was a single monolithic piece, and for this to work, it would need to be two pieces, not one.
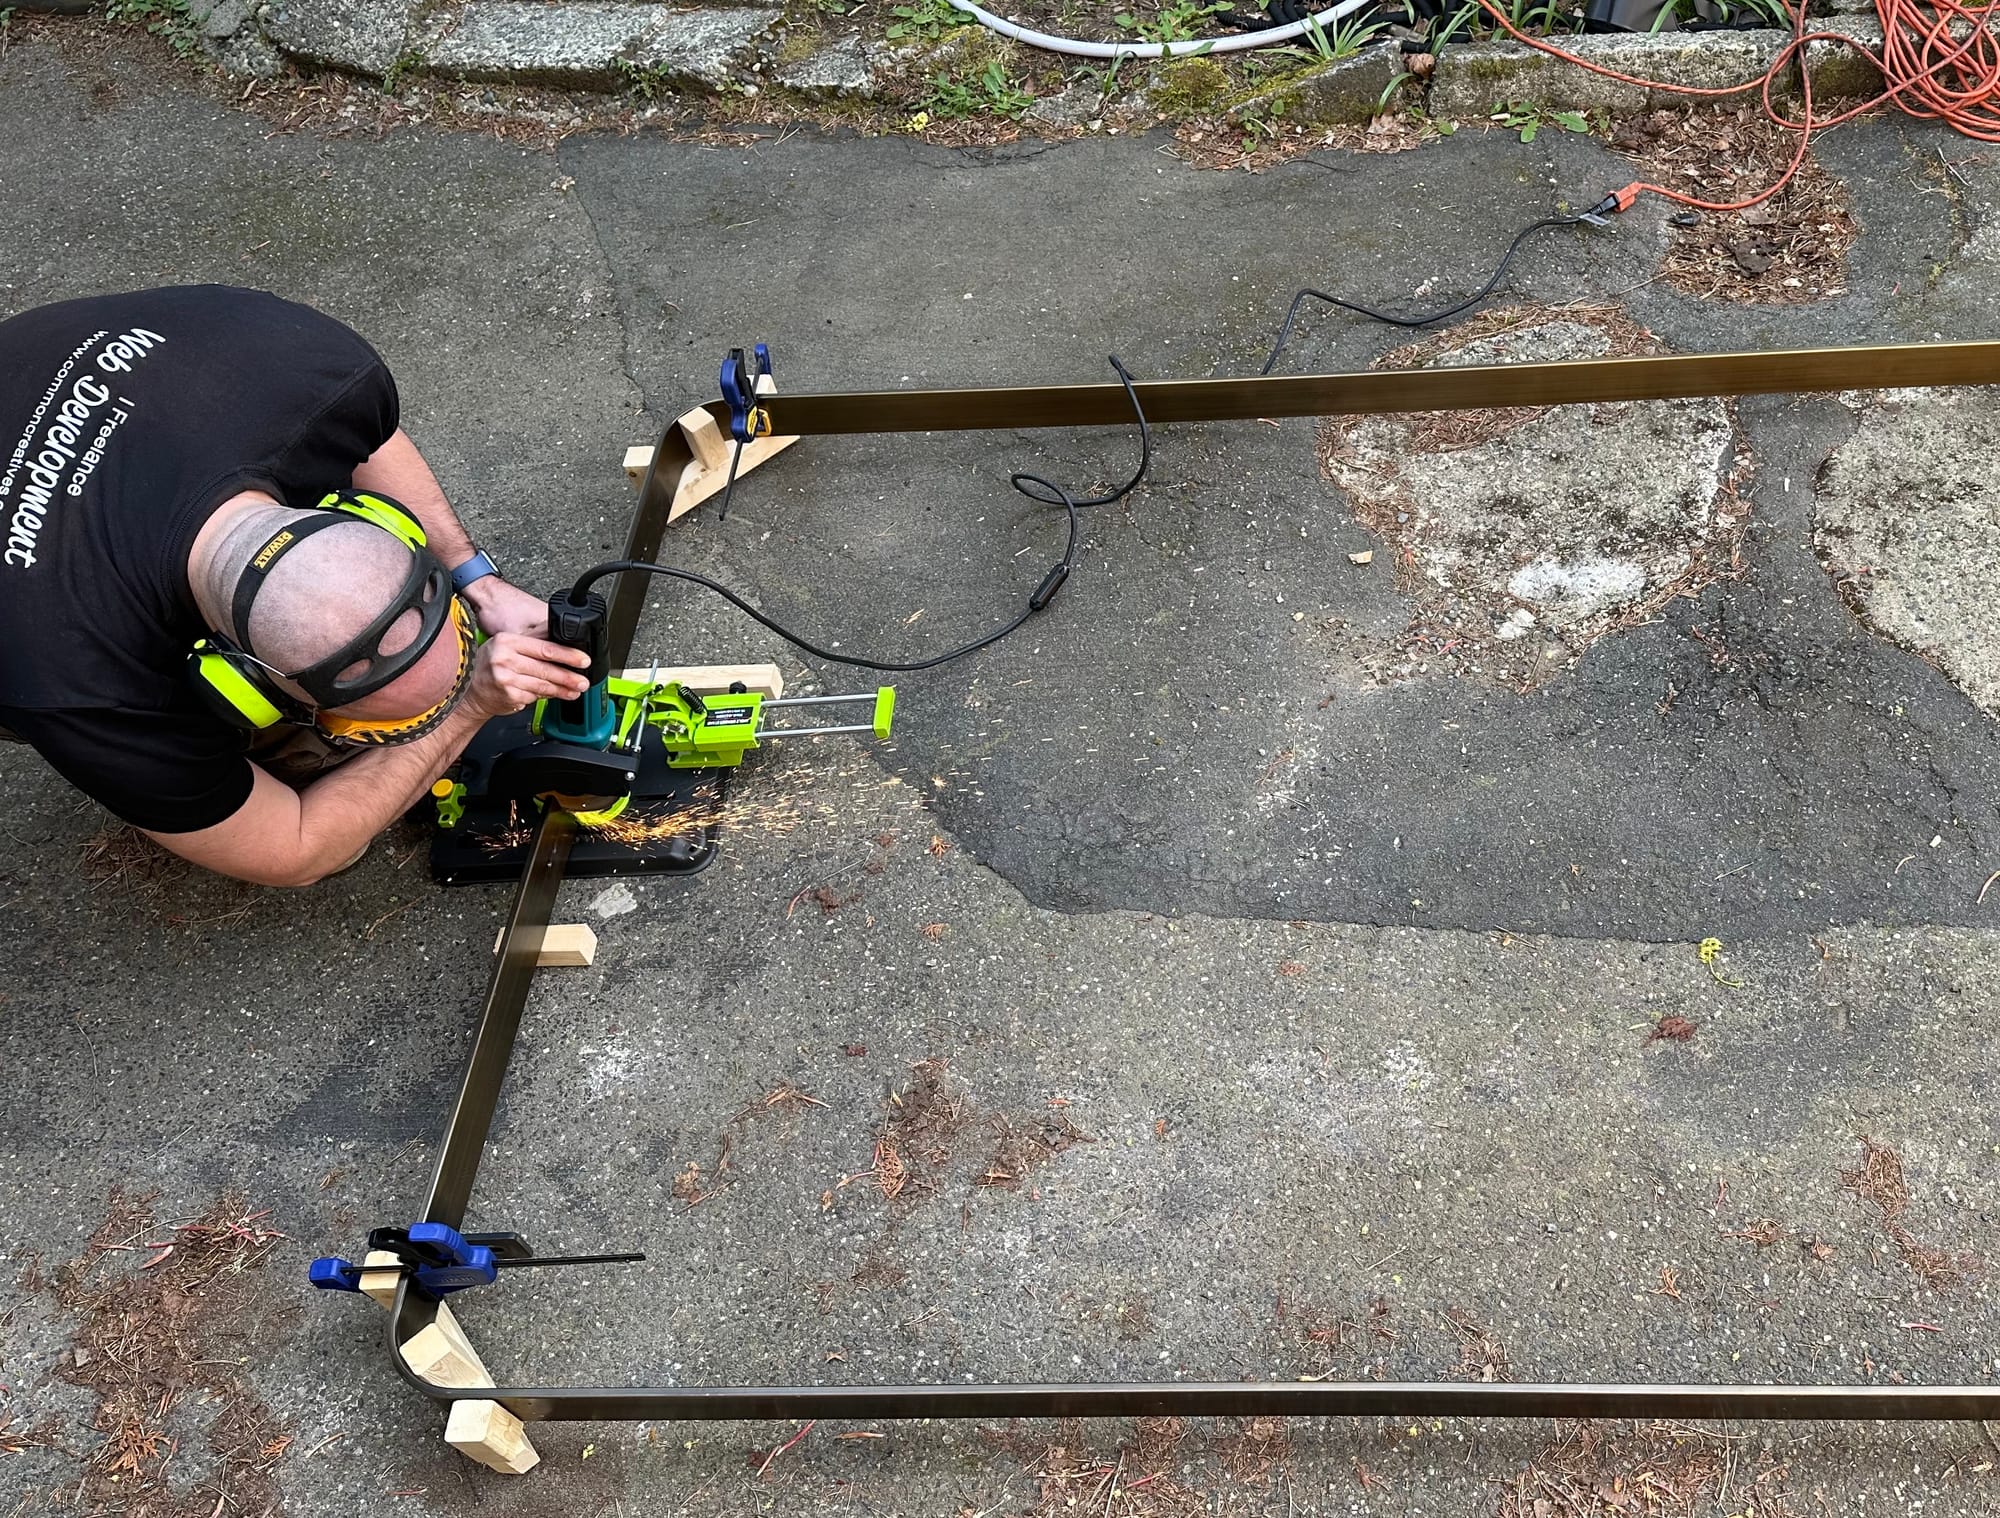
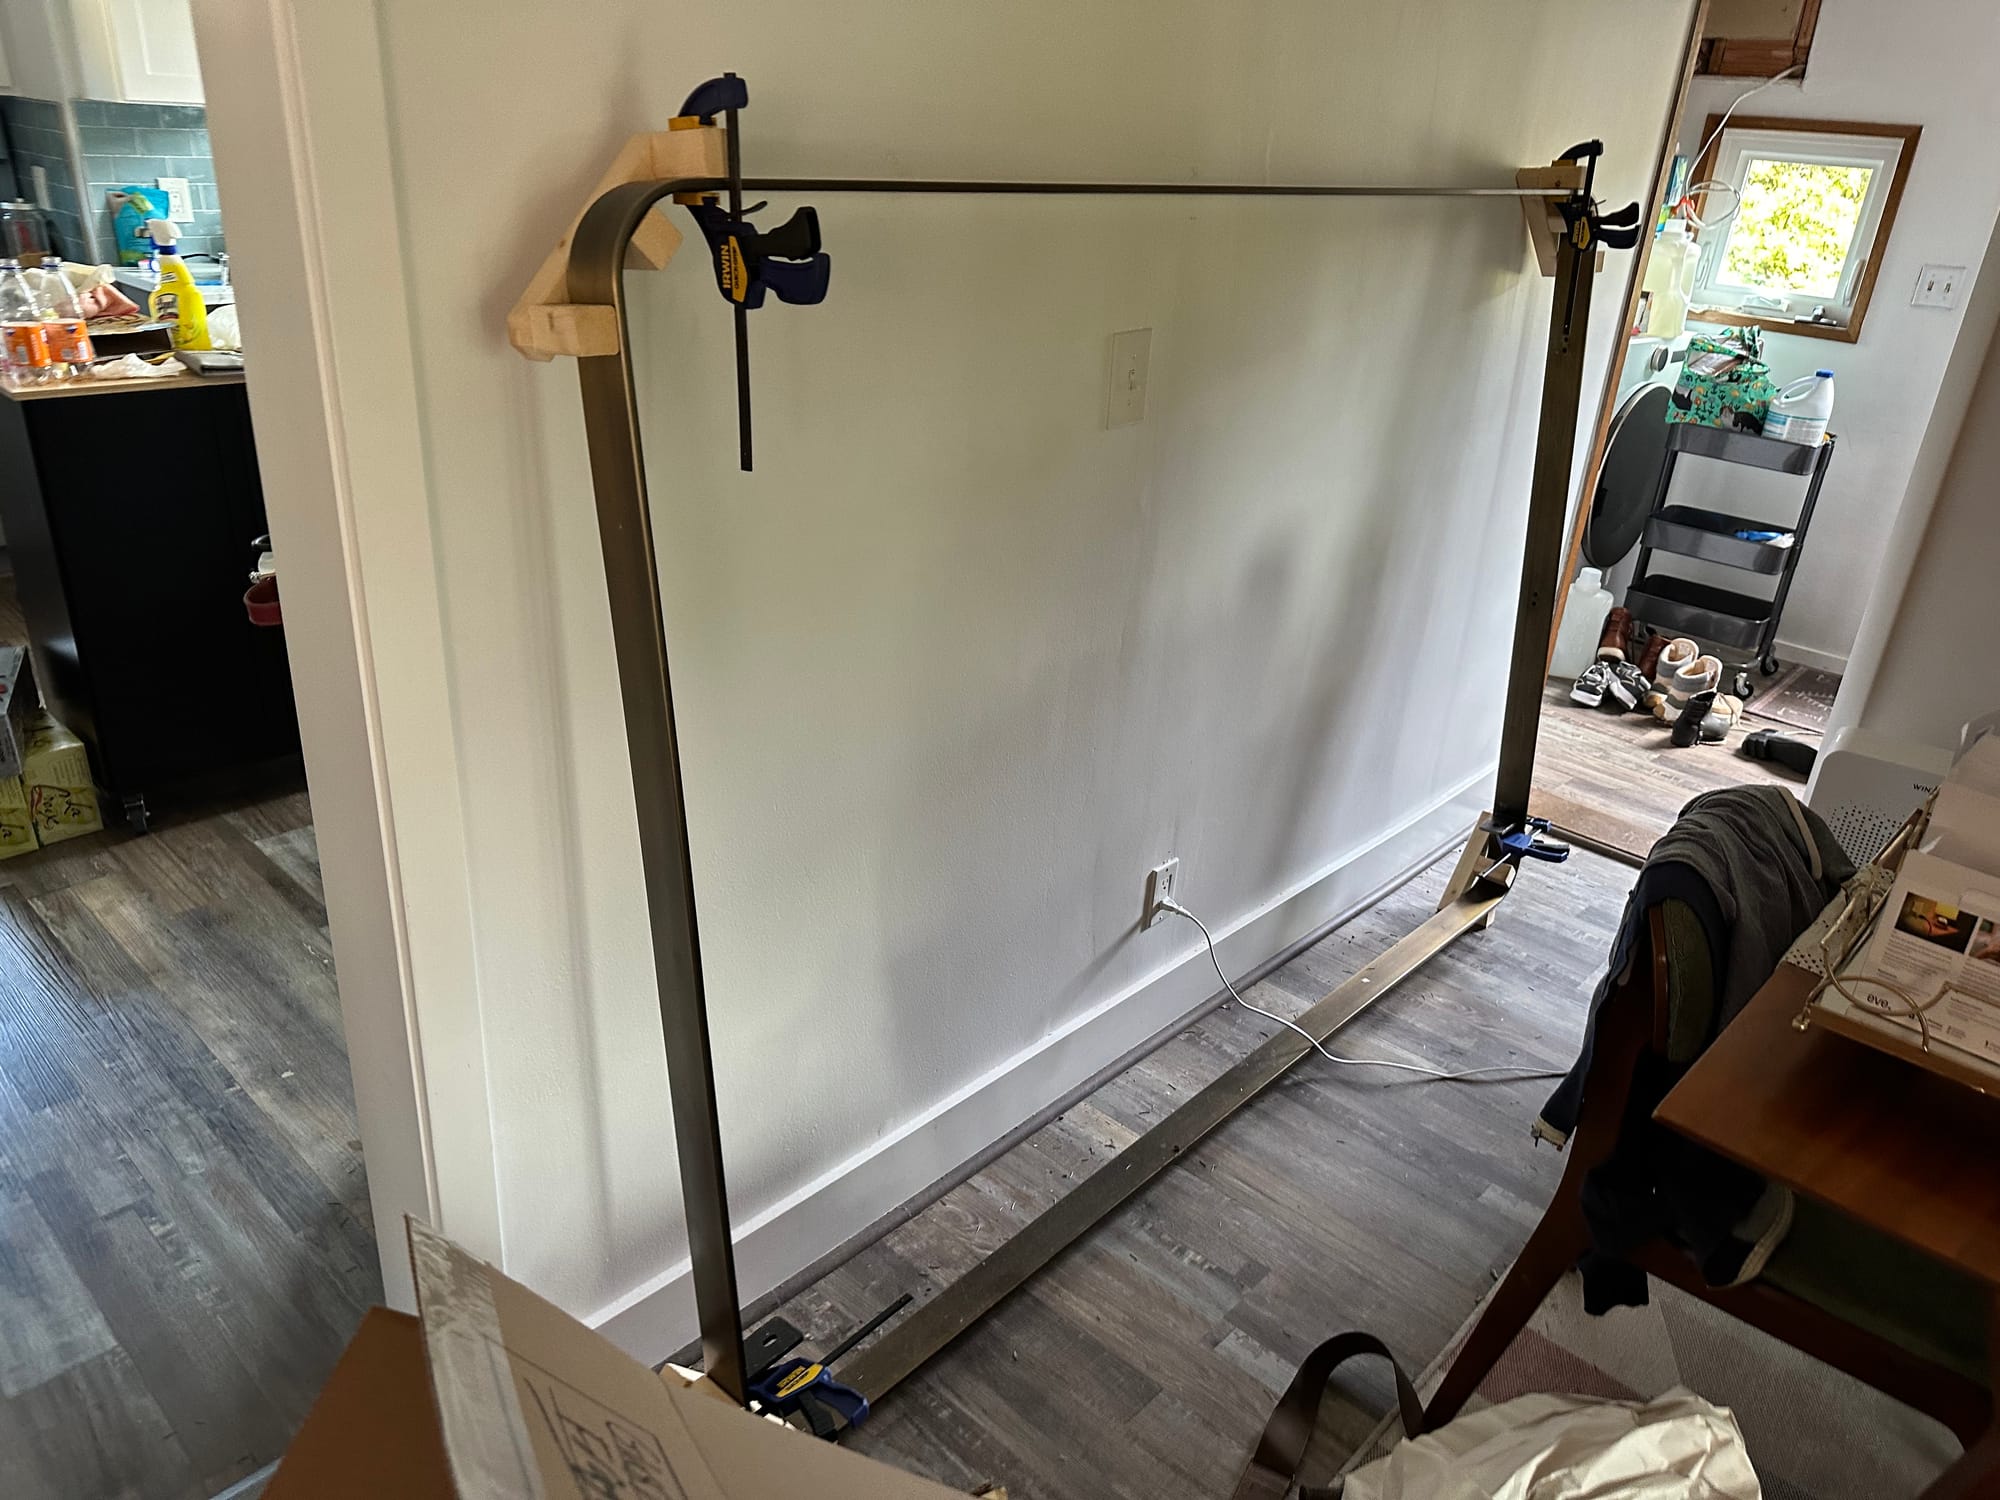
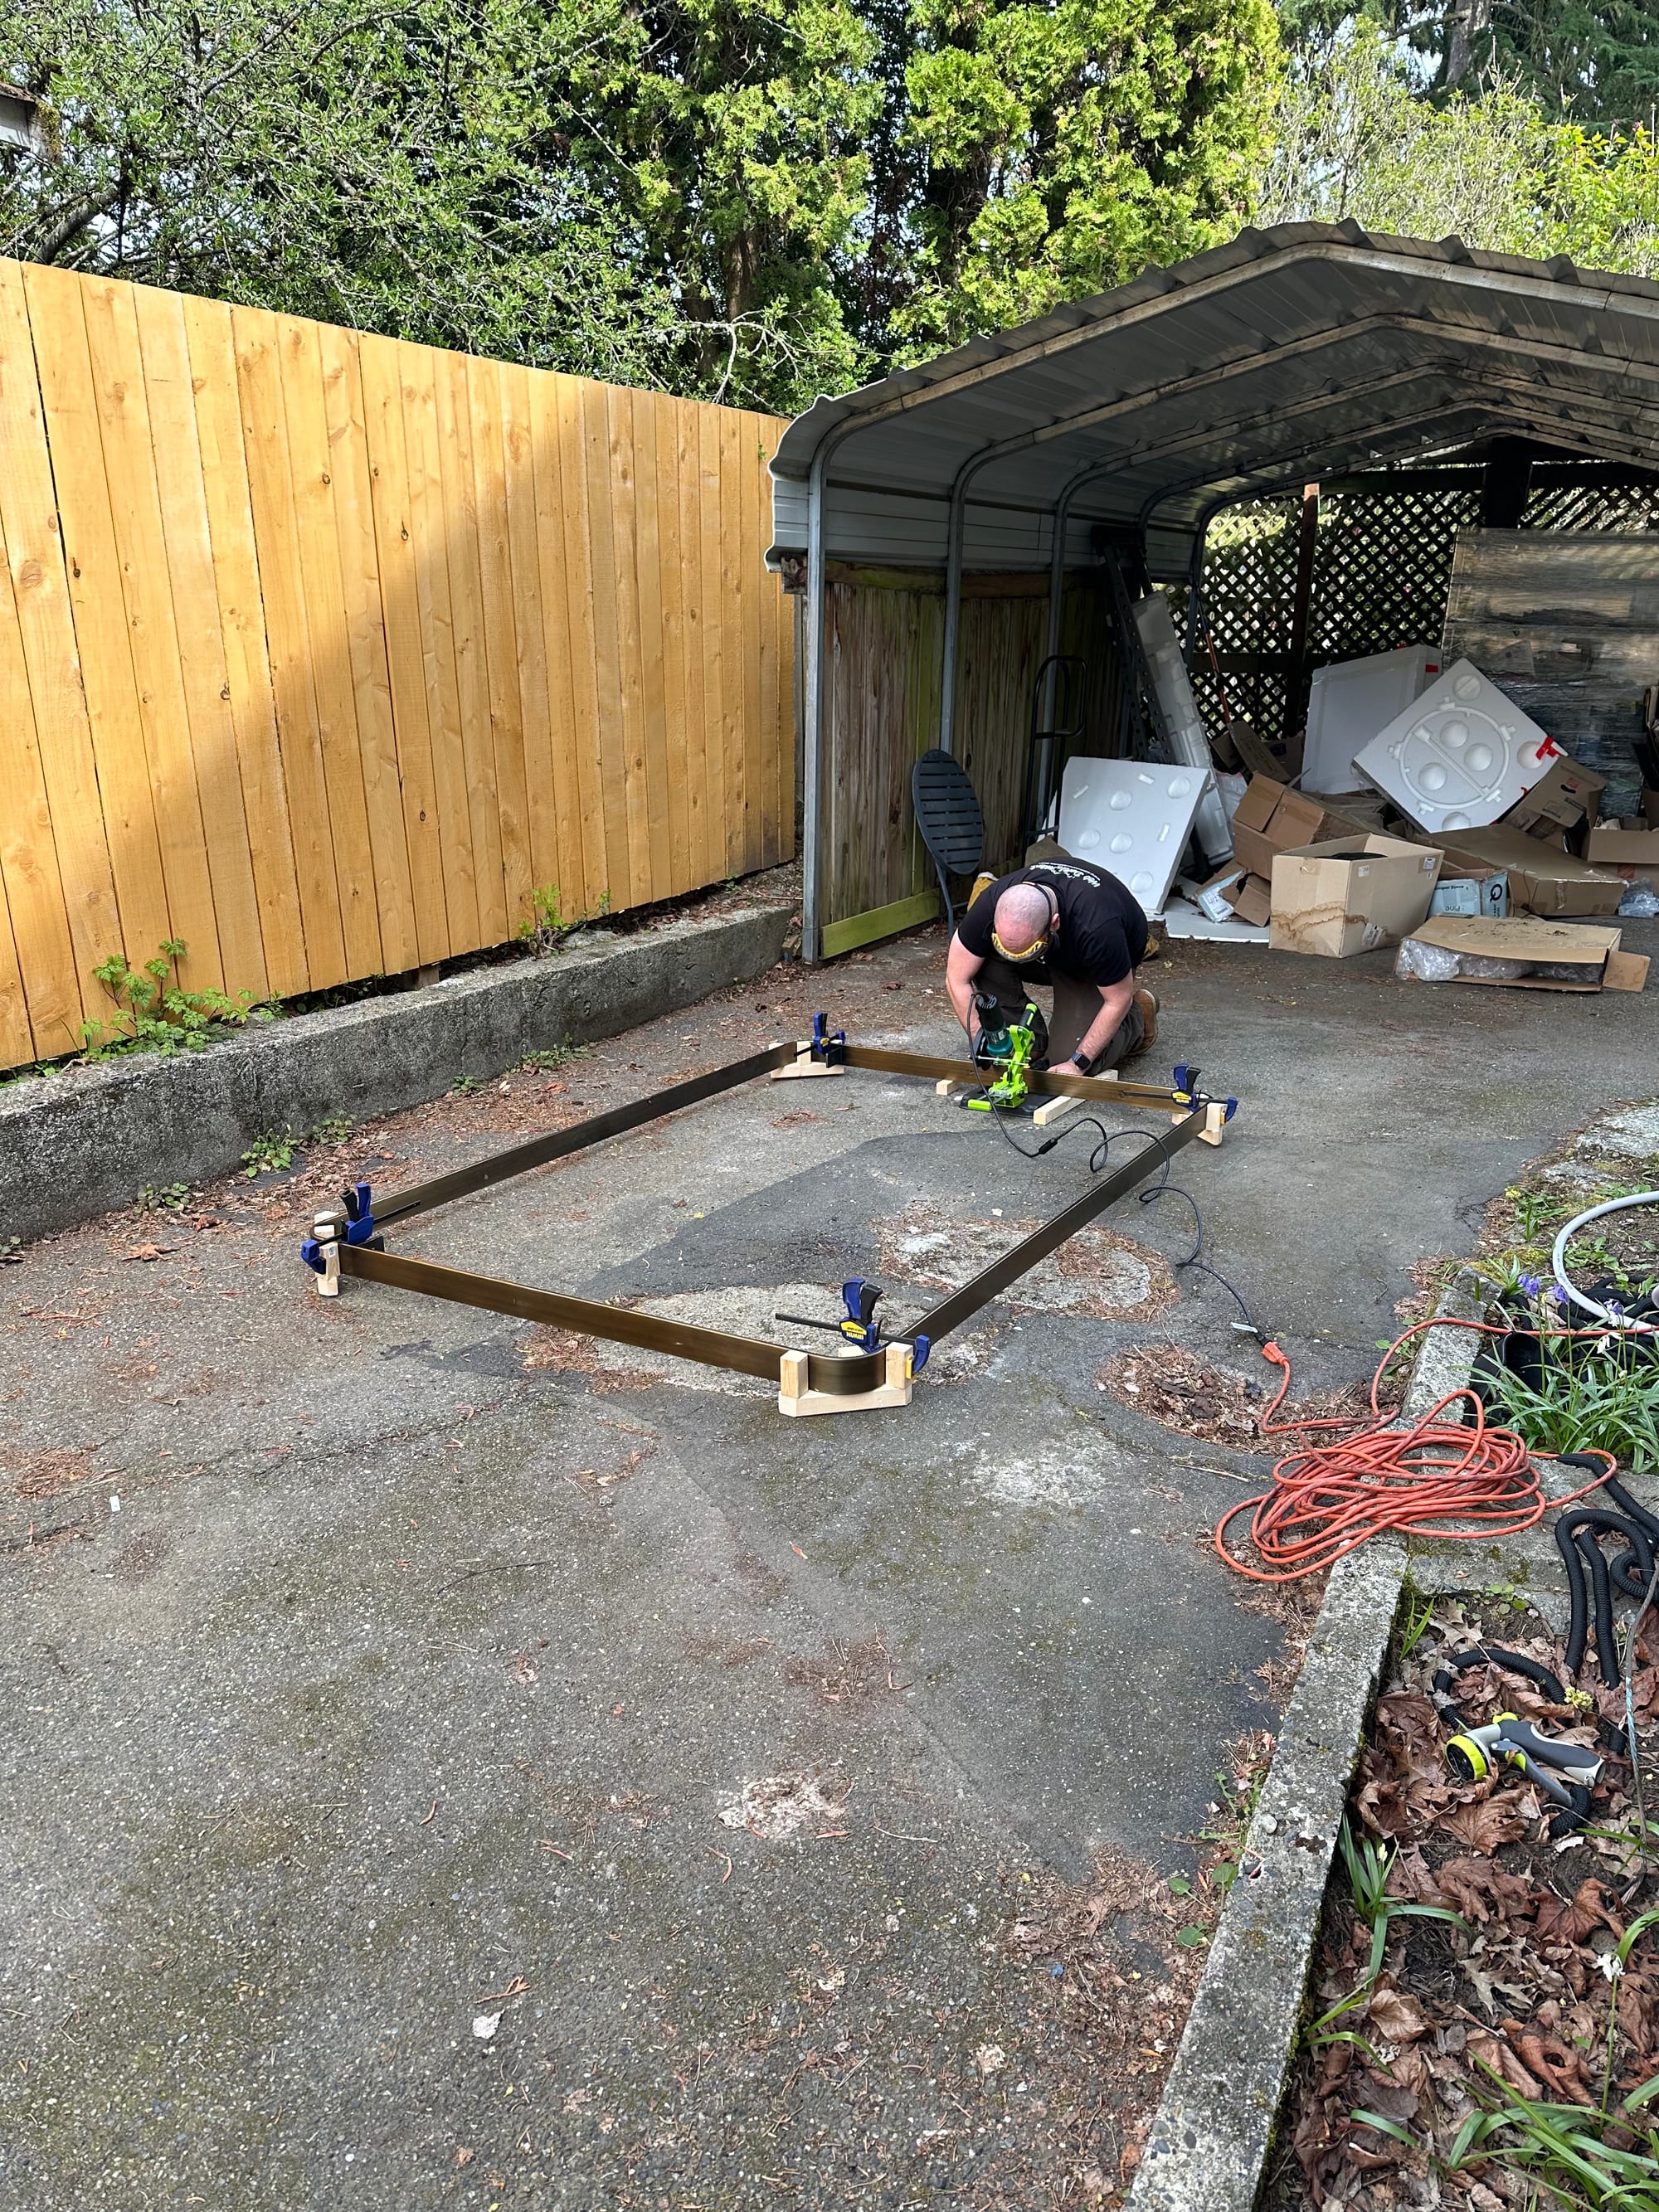
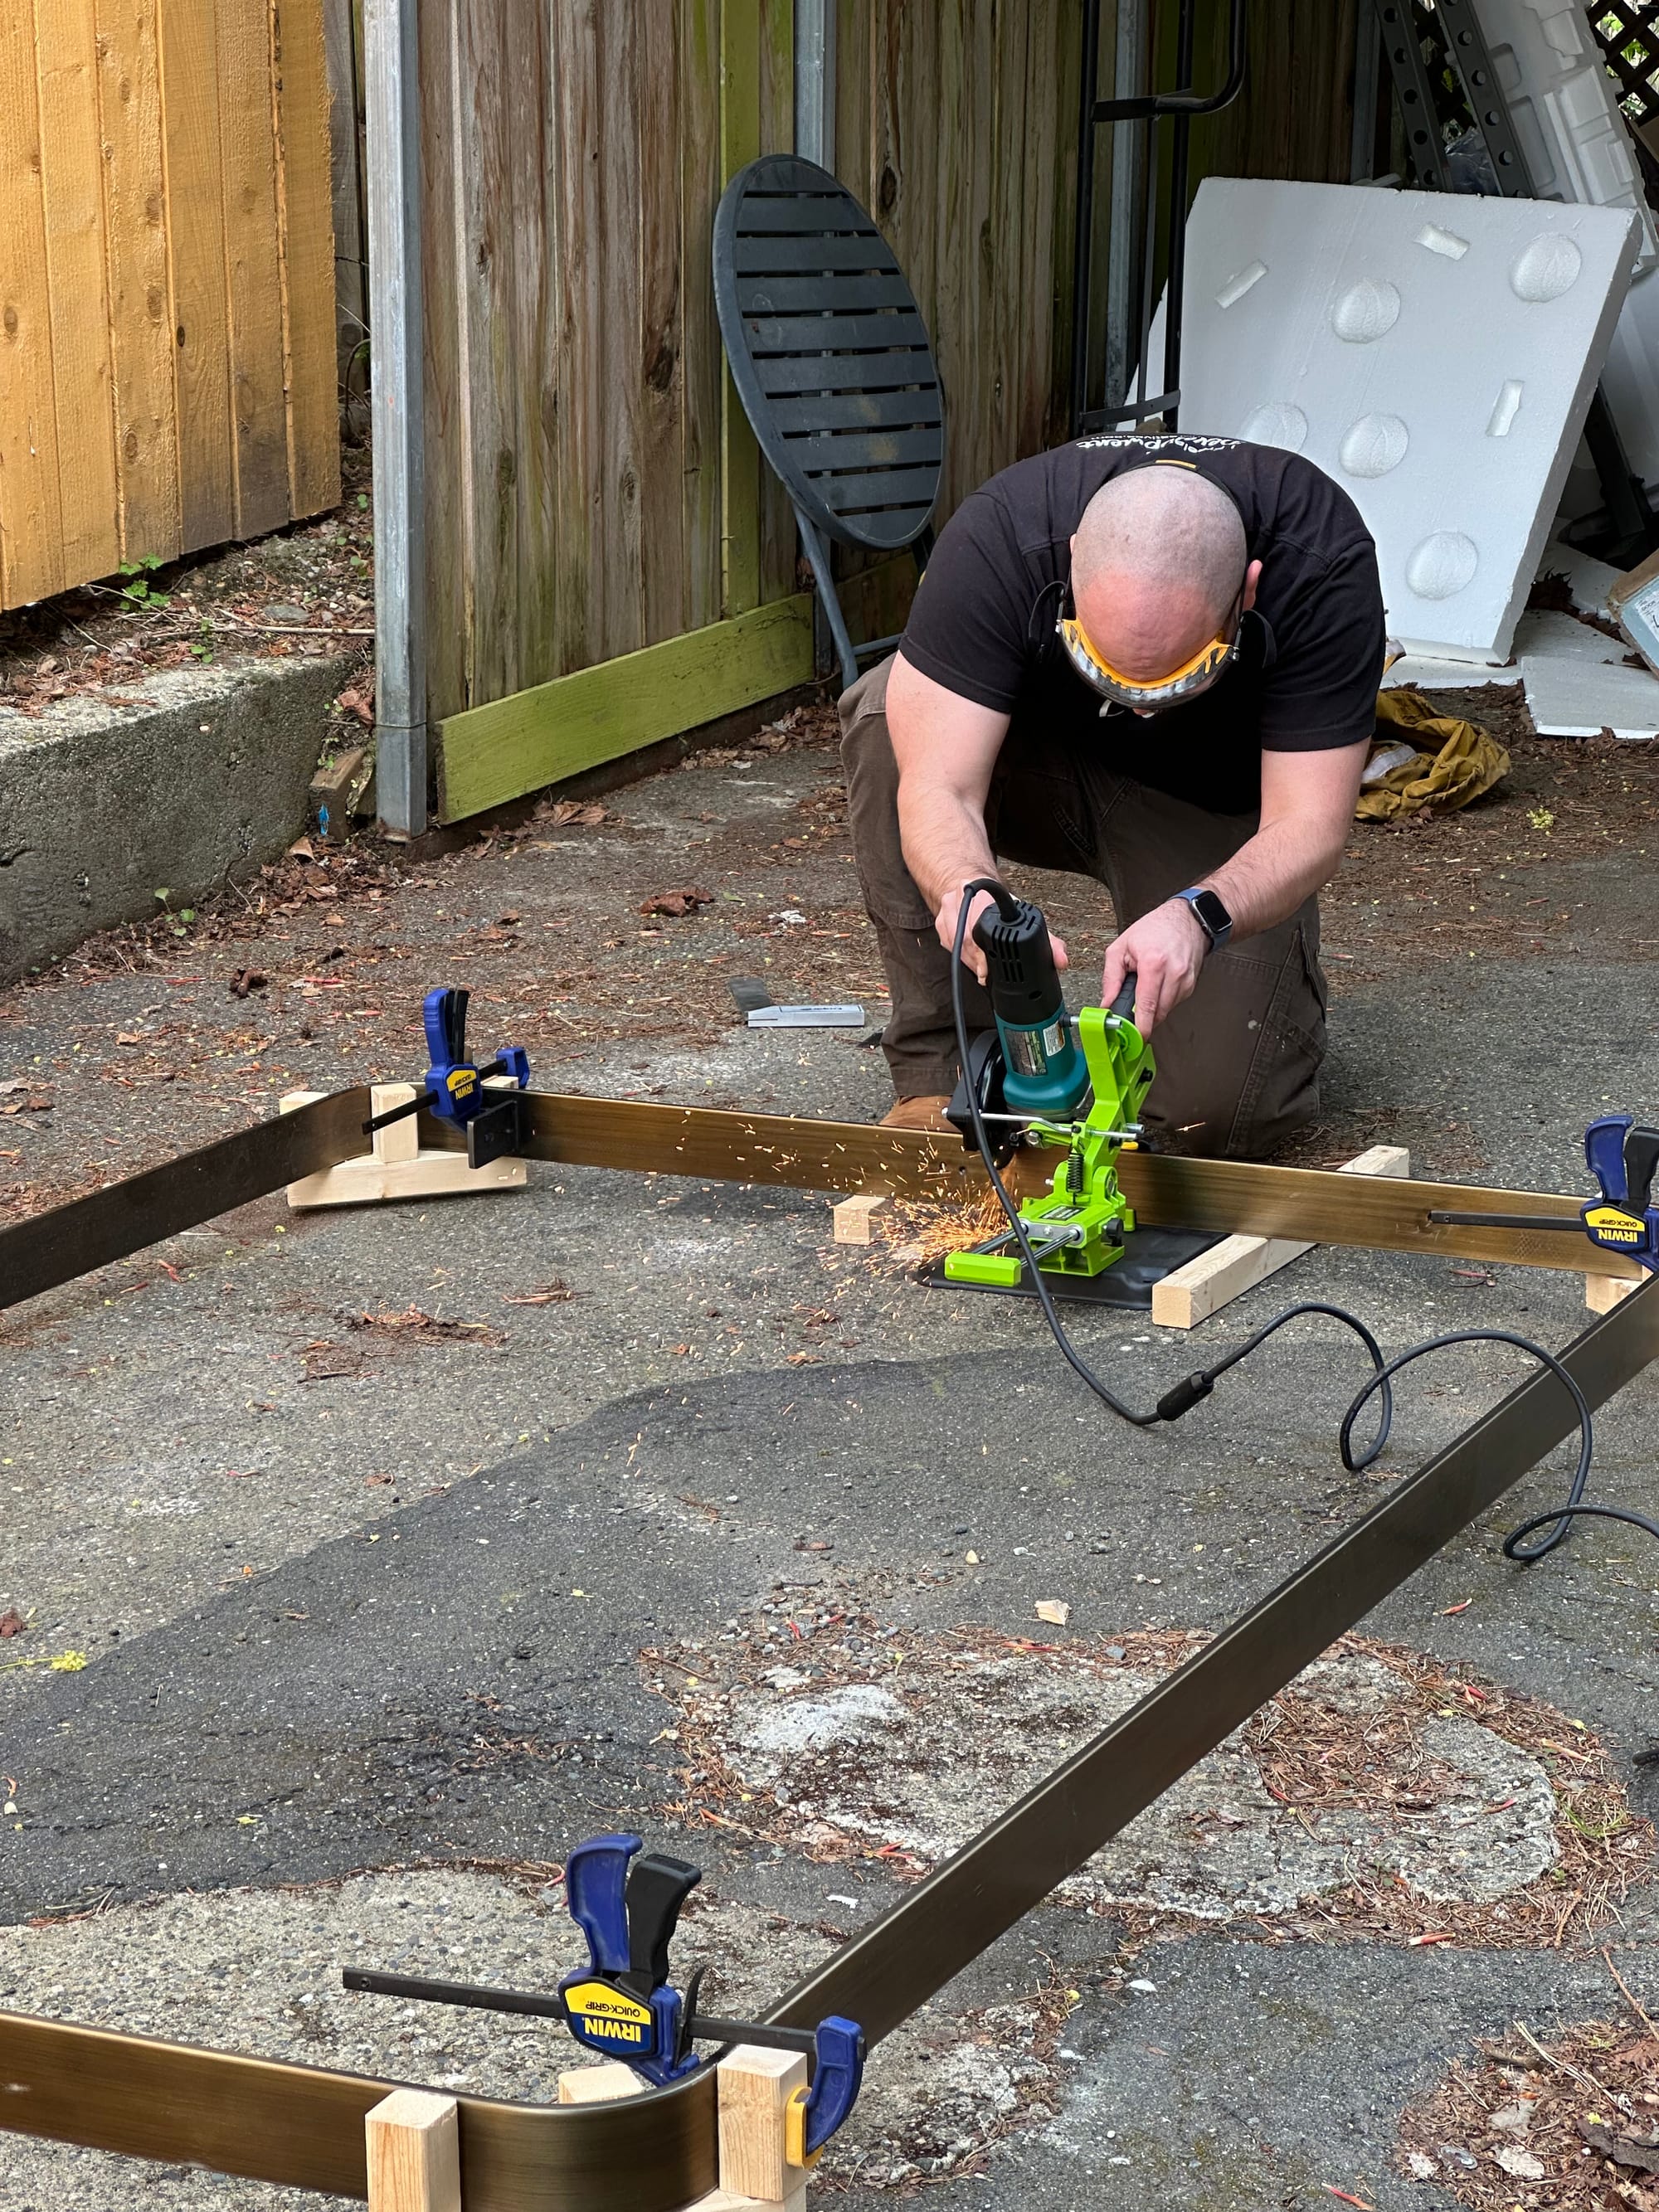
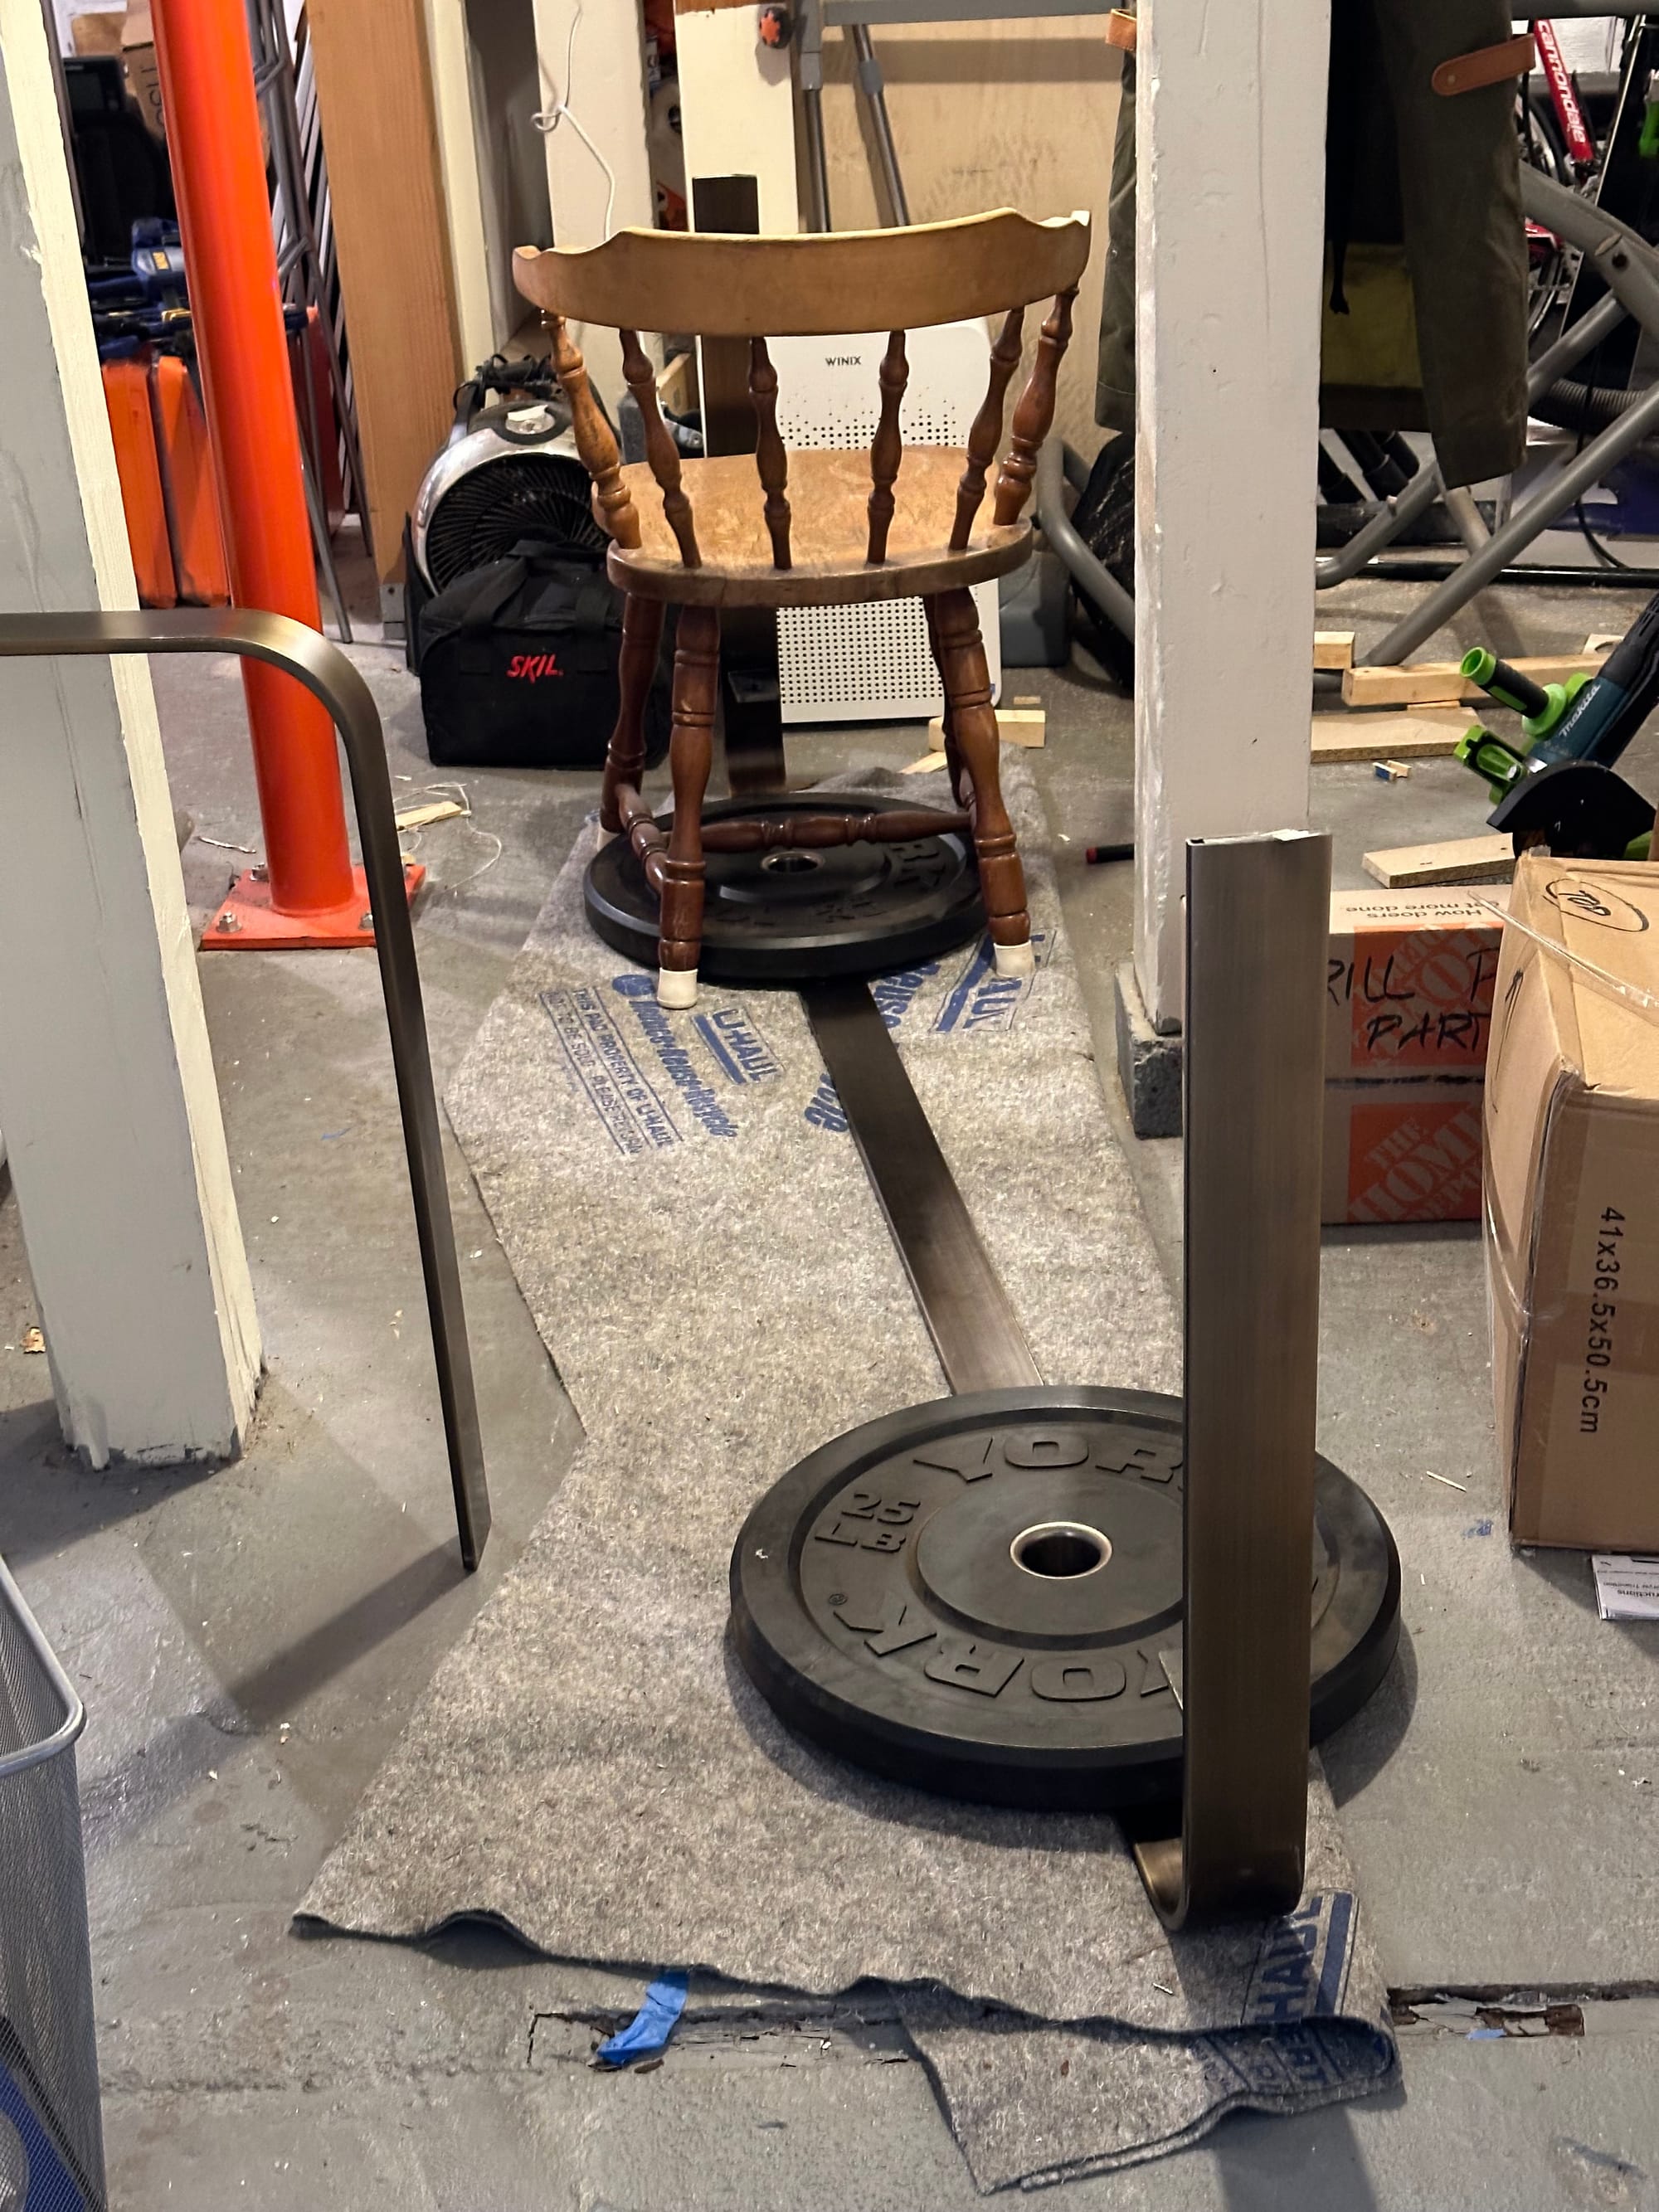
I used some wood I had on hand to build some quick support pieces to go in the corners and keep the frame up off the ground, then it was back out to the driveway to cut.
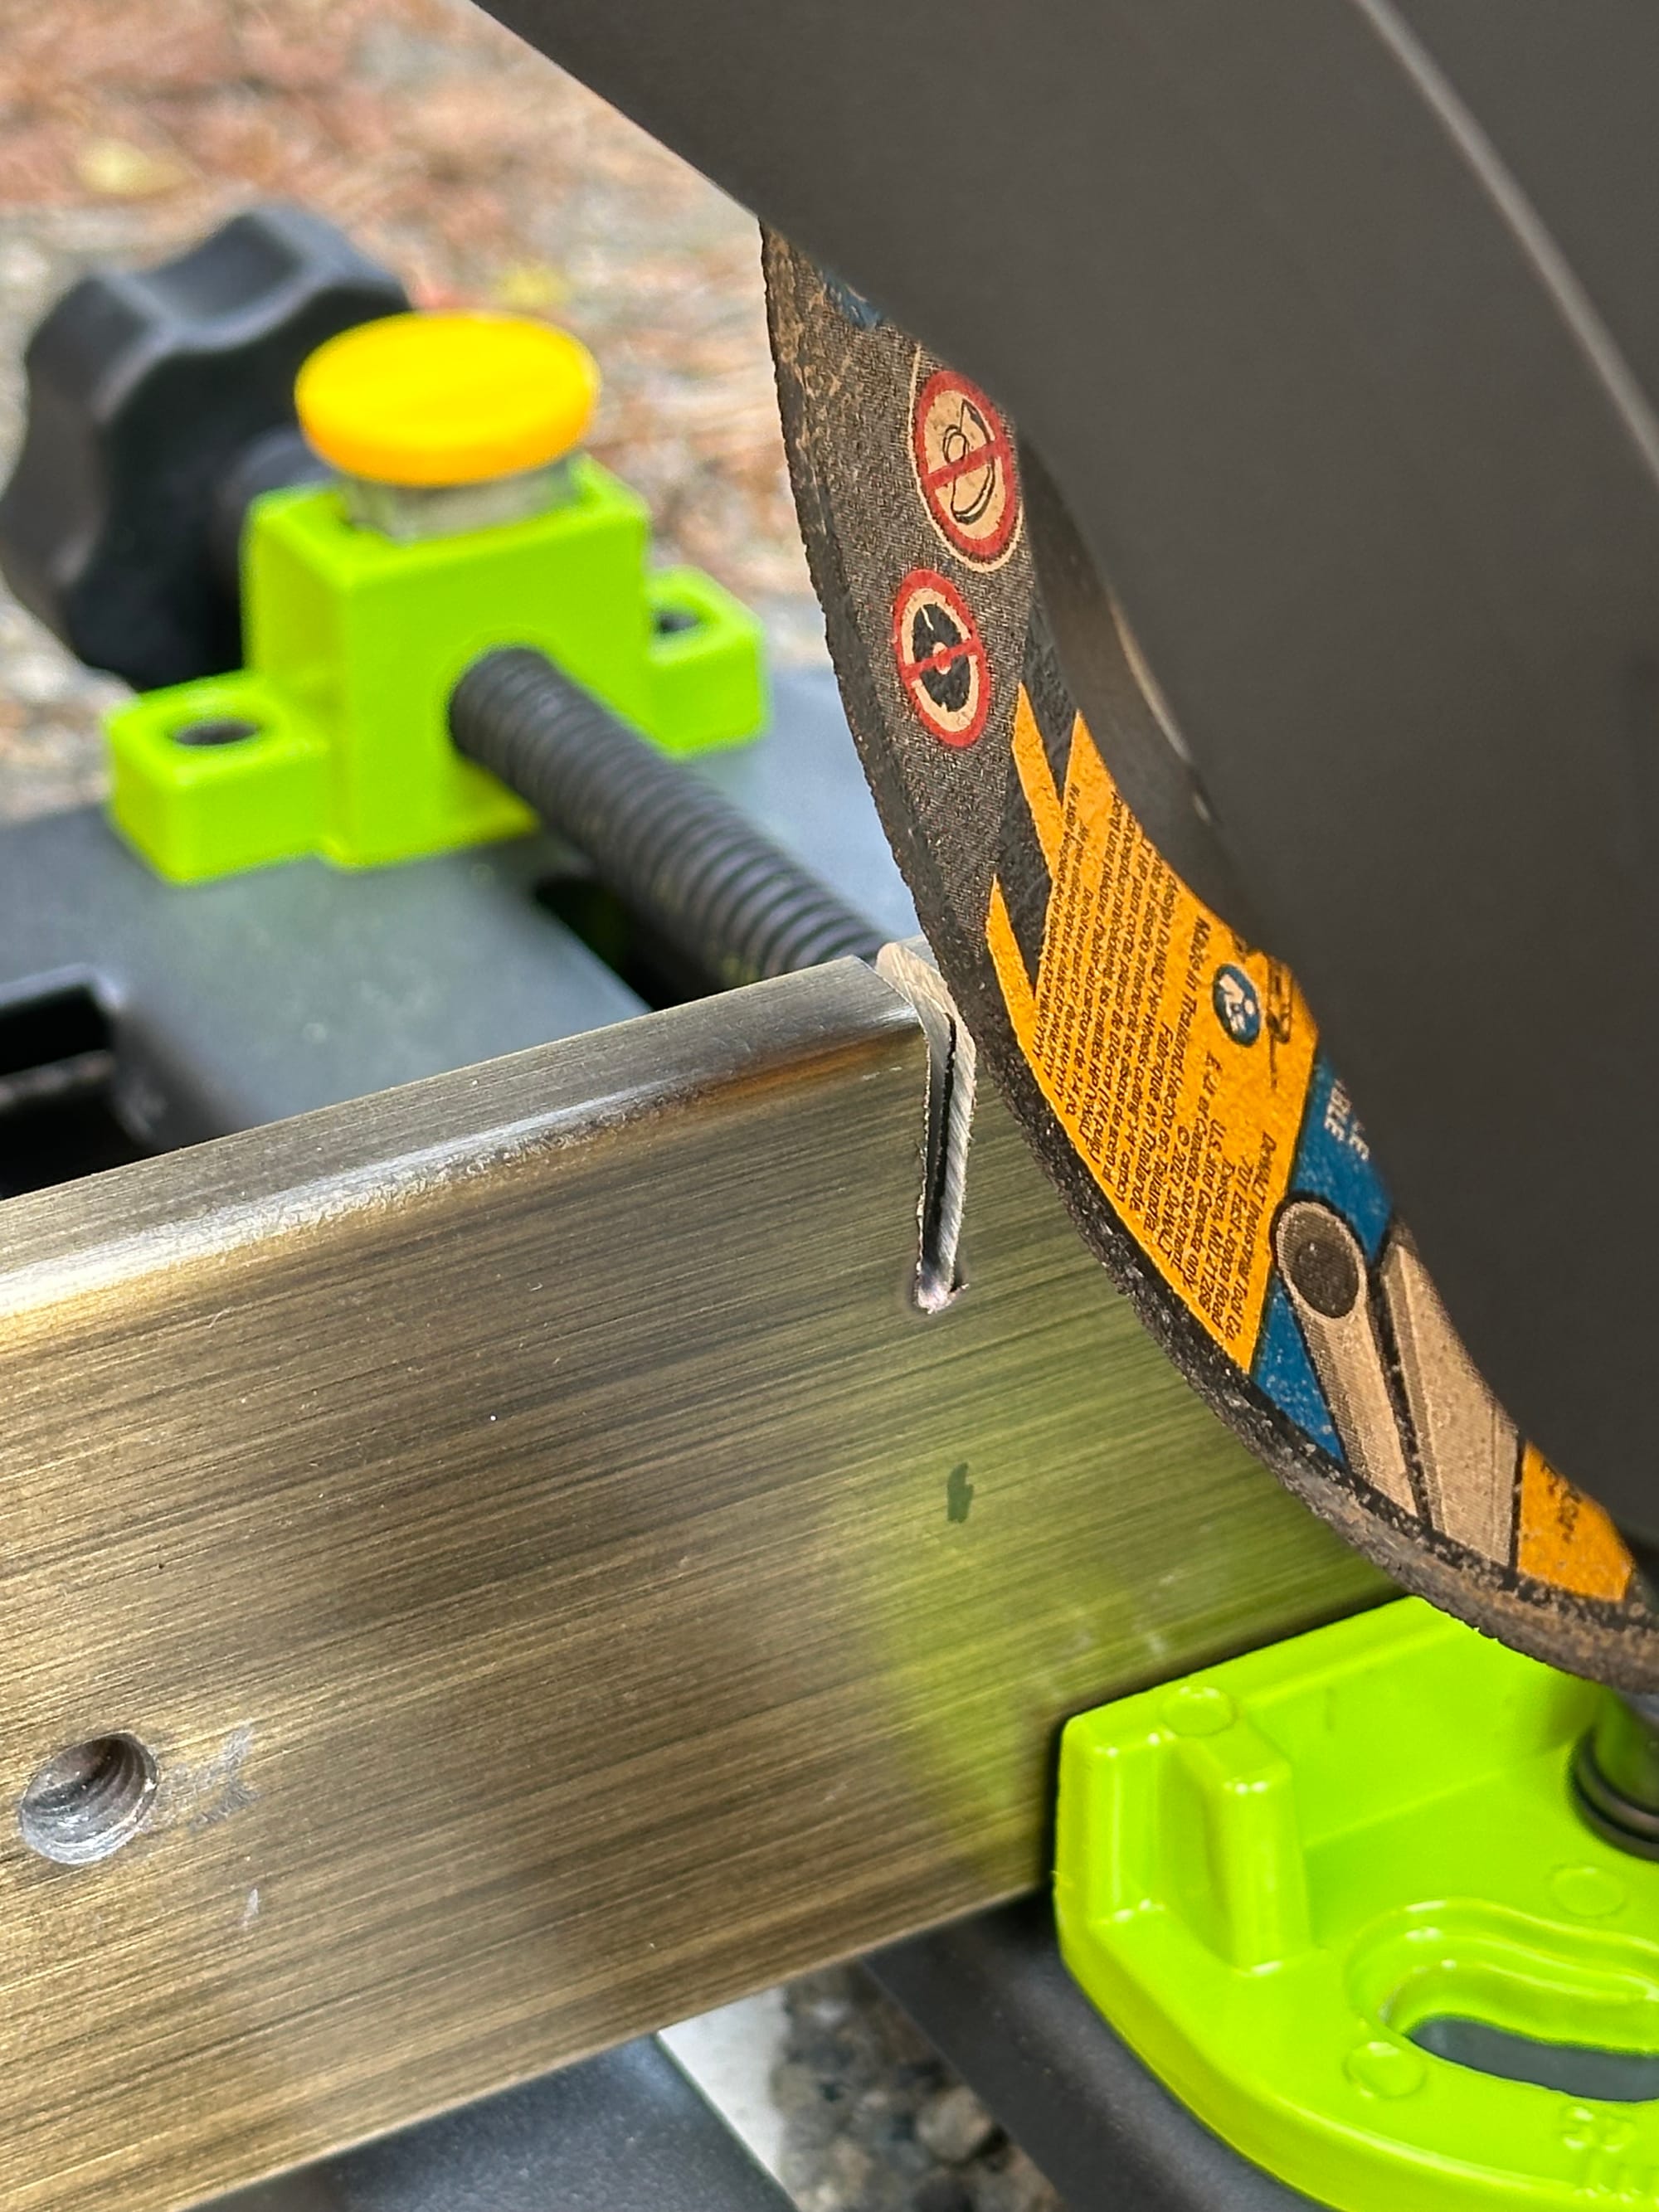
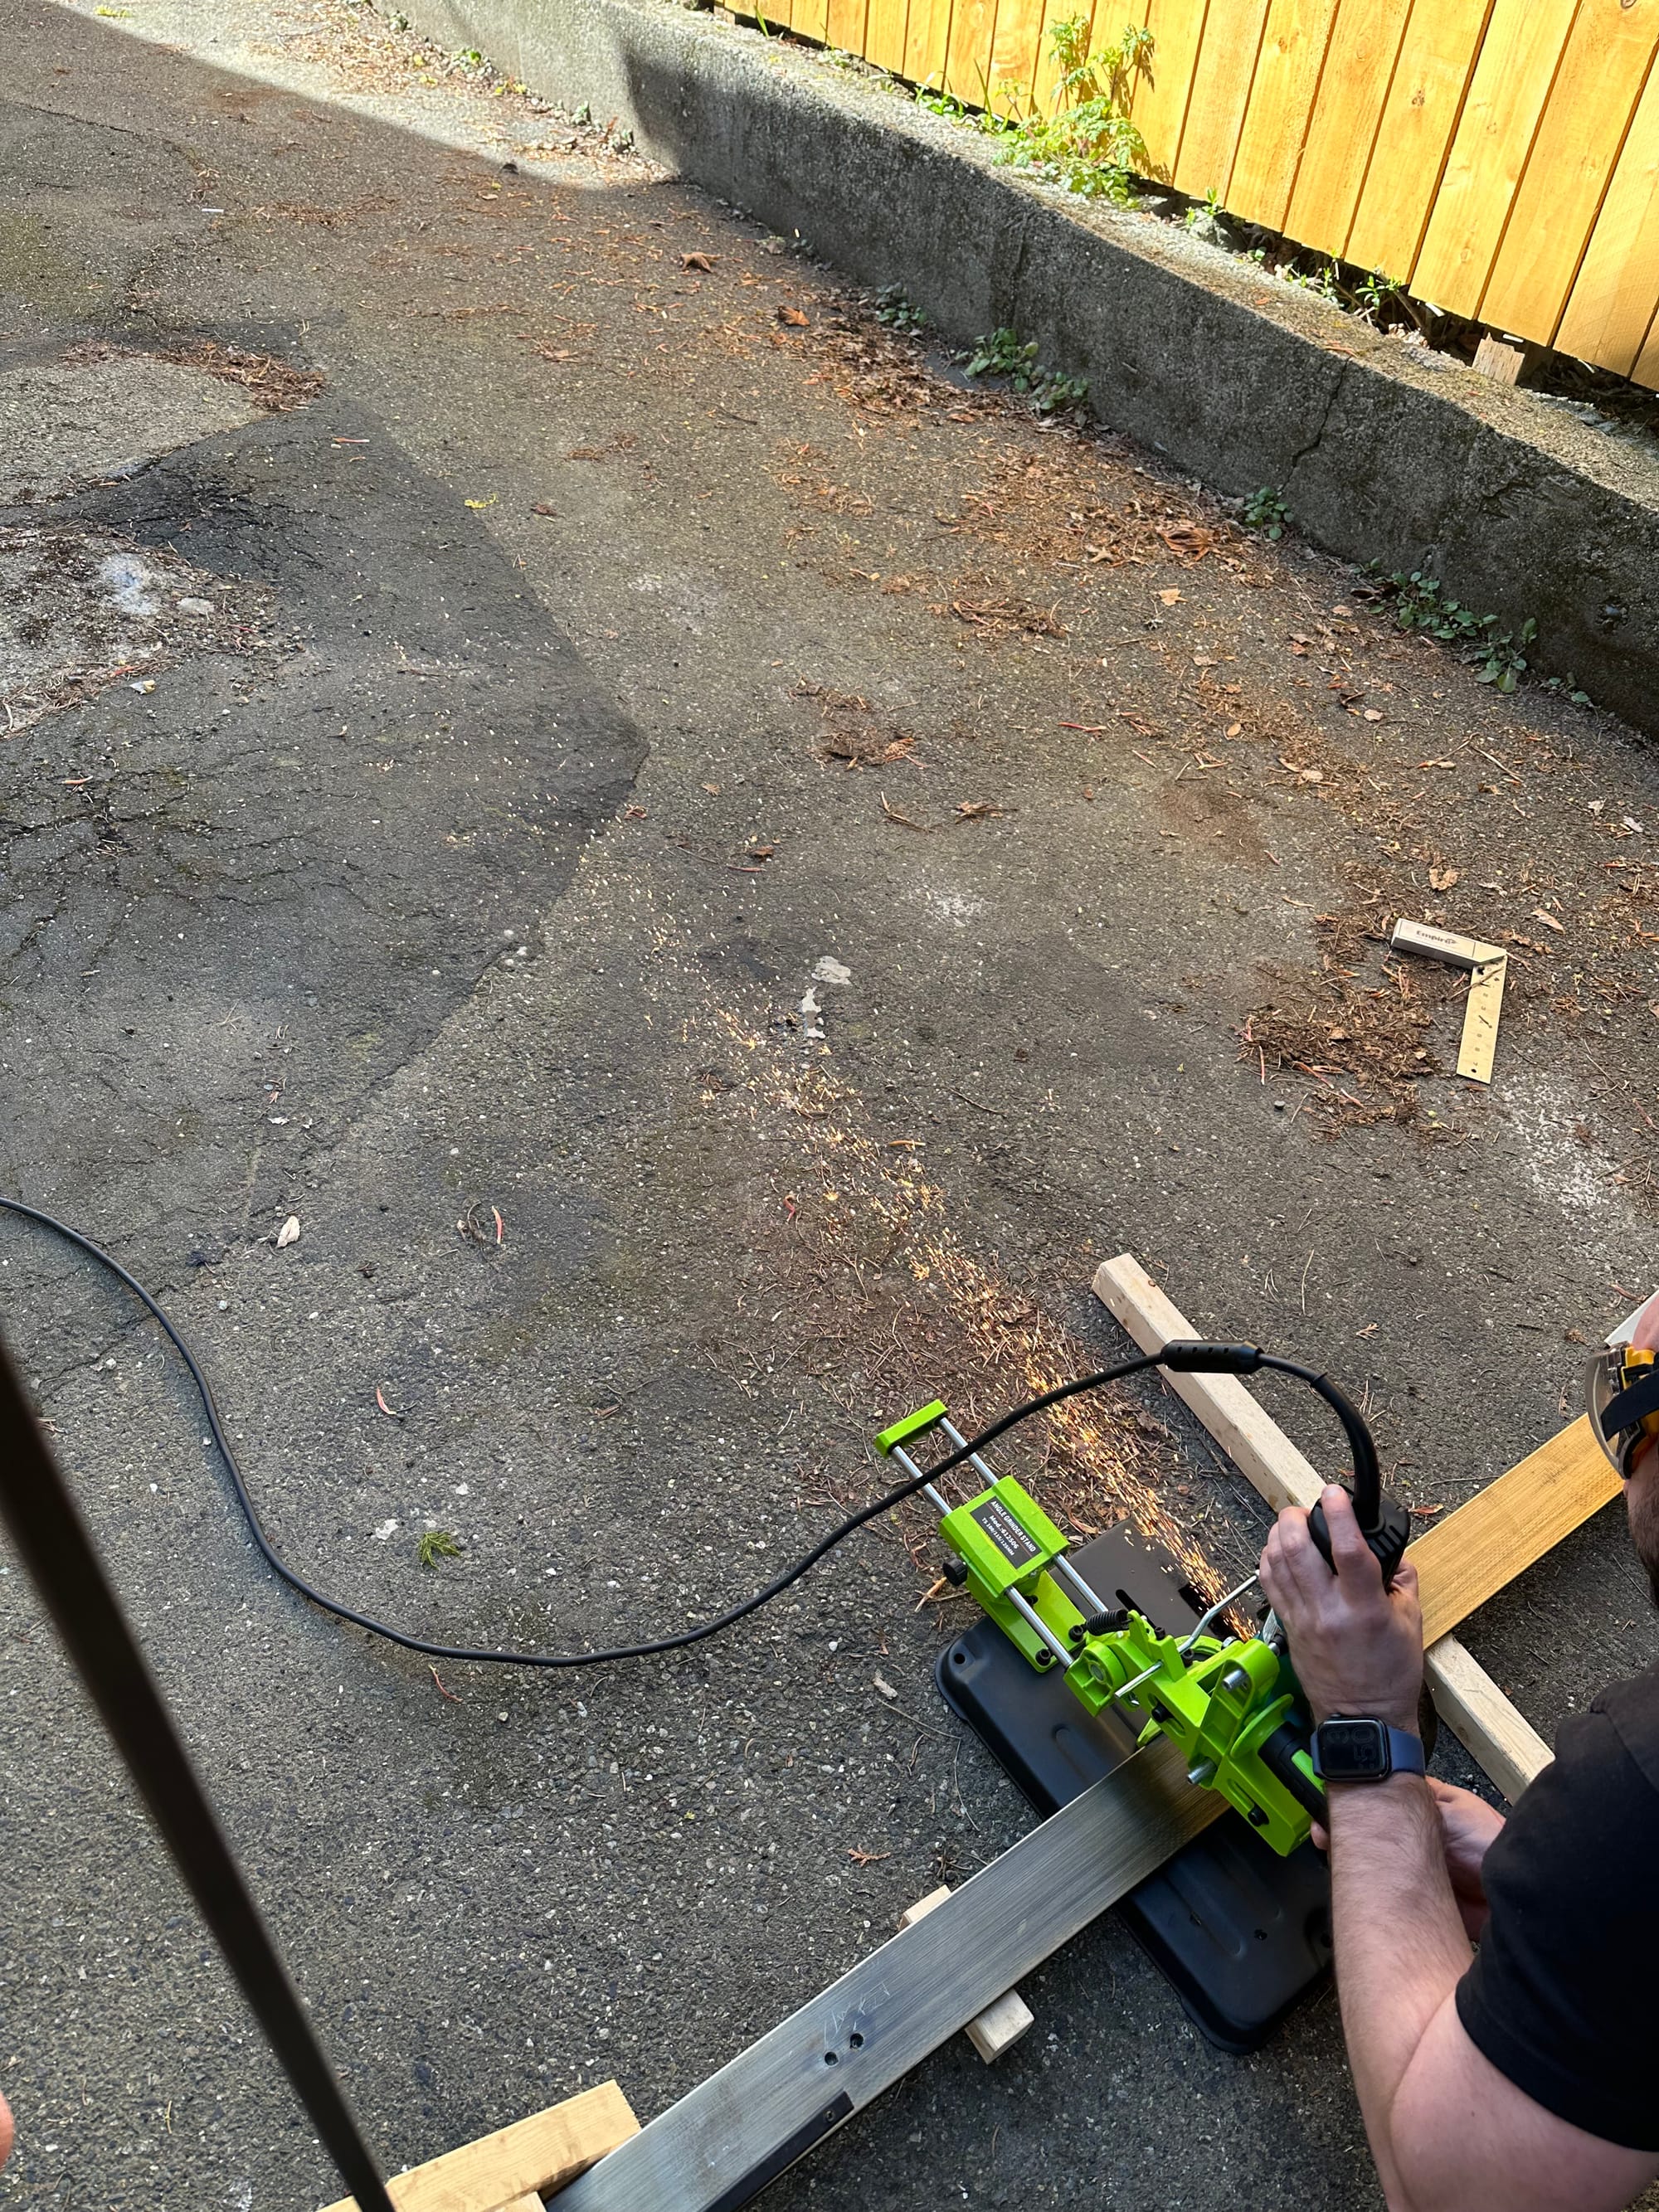
I put a metal cutting wheel on my new angle grinder, and got a machine stand to allow me to make relatively precise 90 degree cuts.
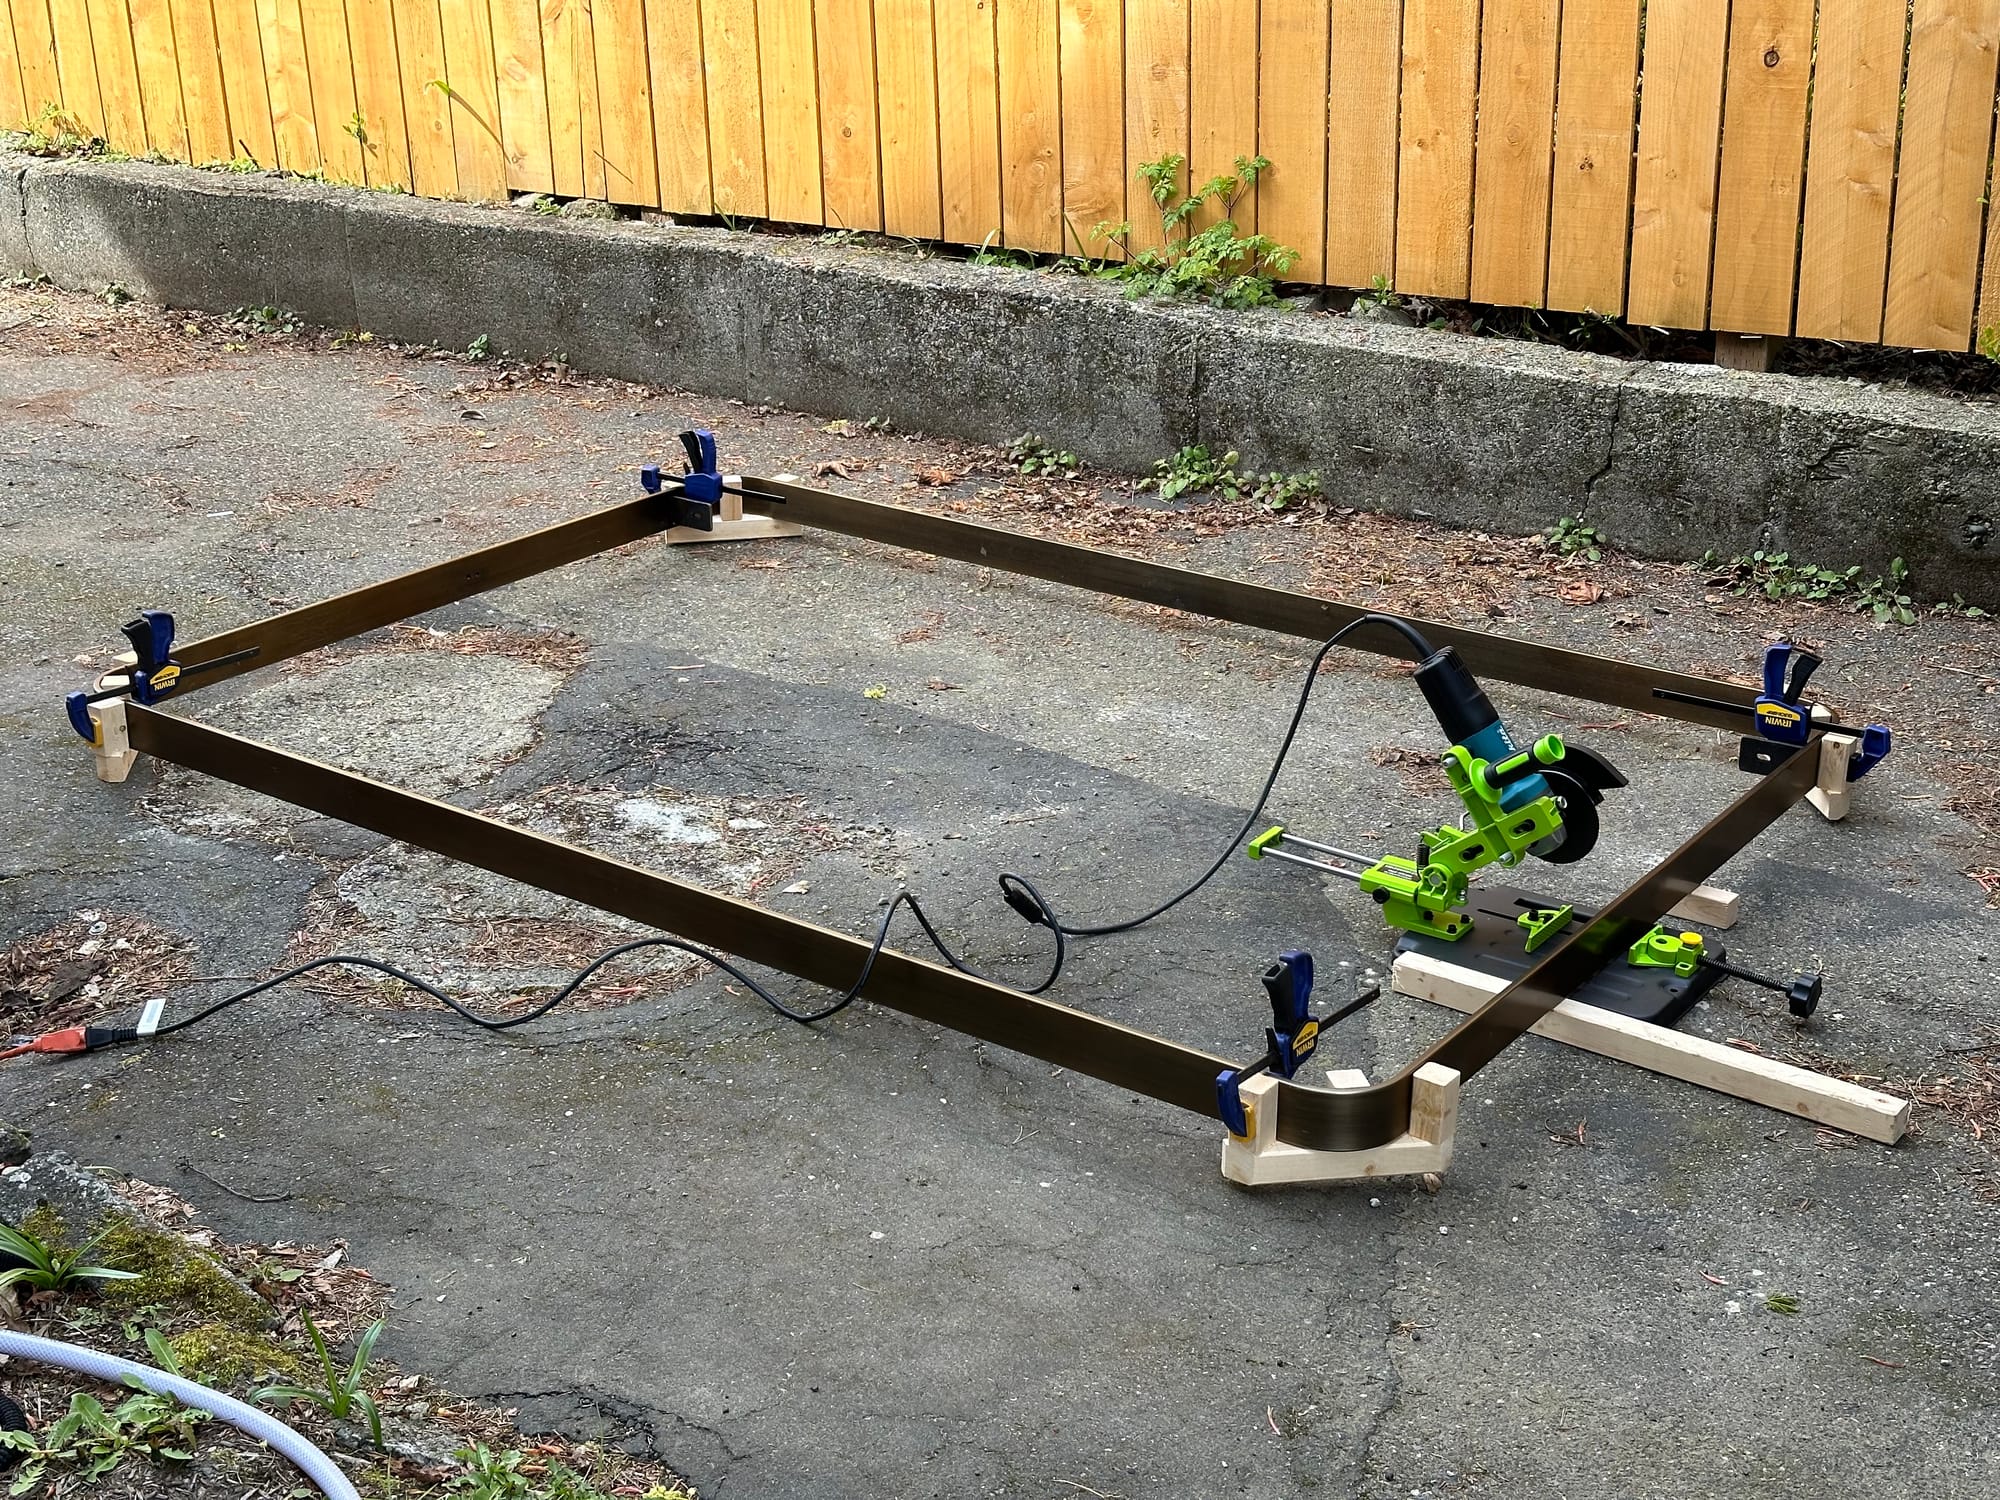
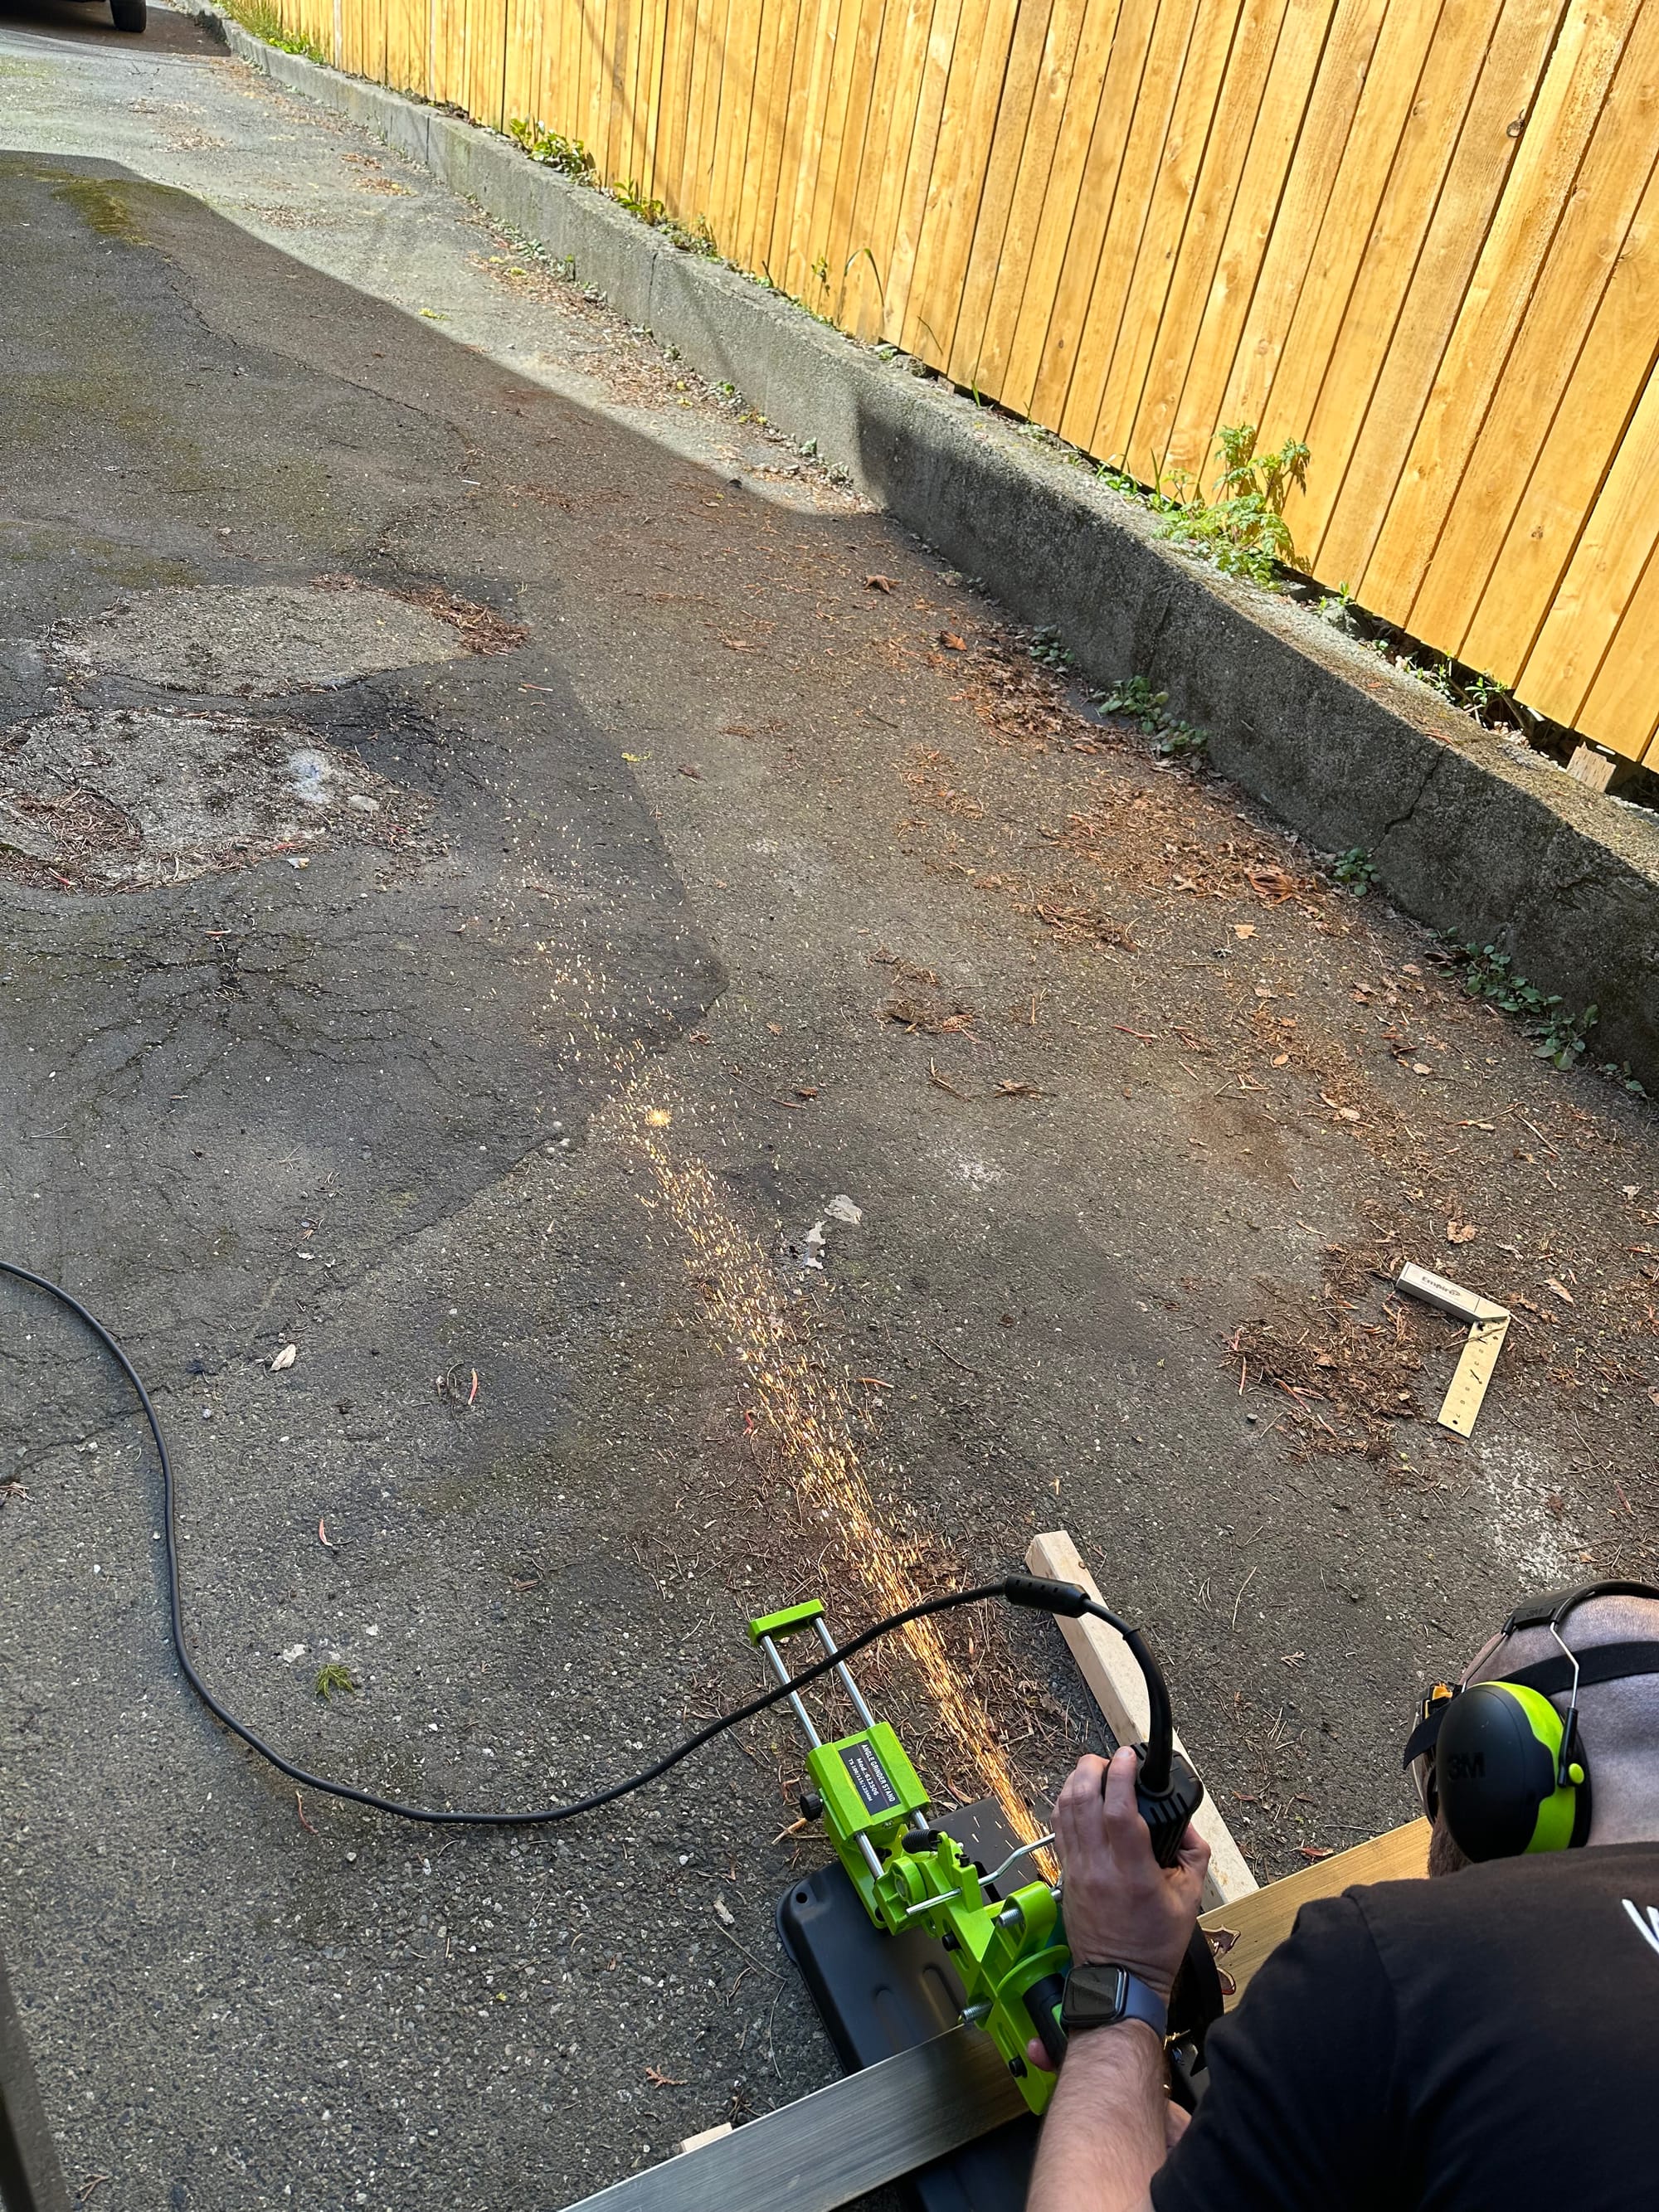
Then, to cut! I tried to go slow and careful, plenty of cutting fluid. I did end up needing to press harder than I expected, and heated the metal enough to discolor slightly once or twice.
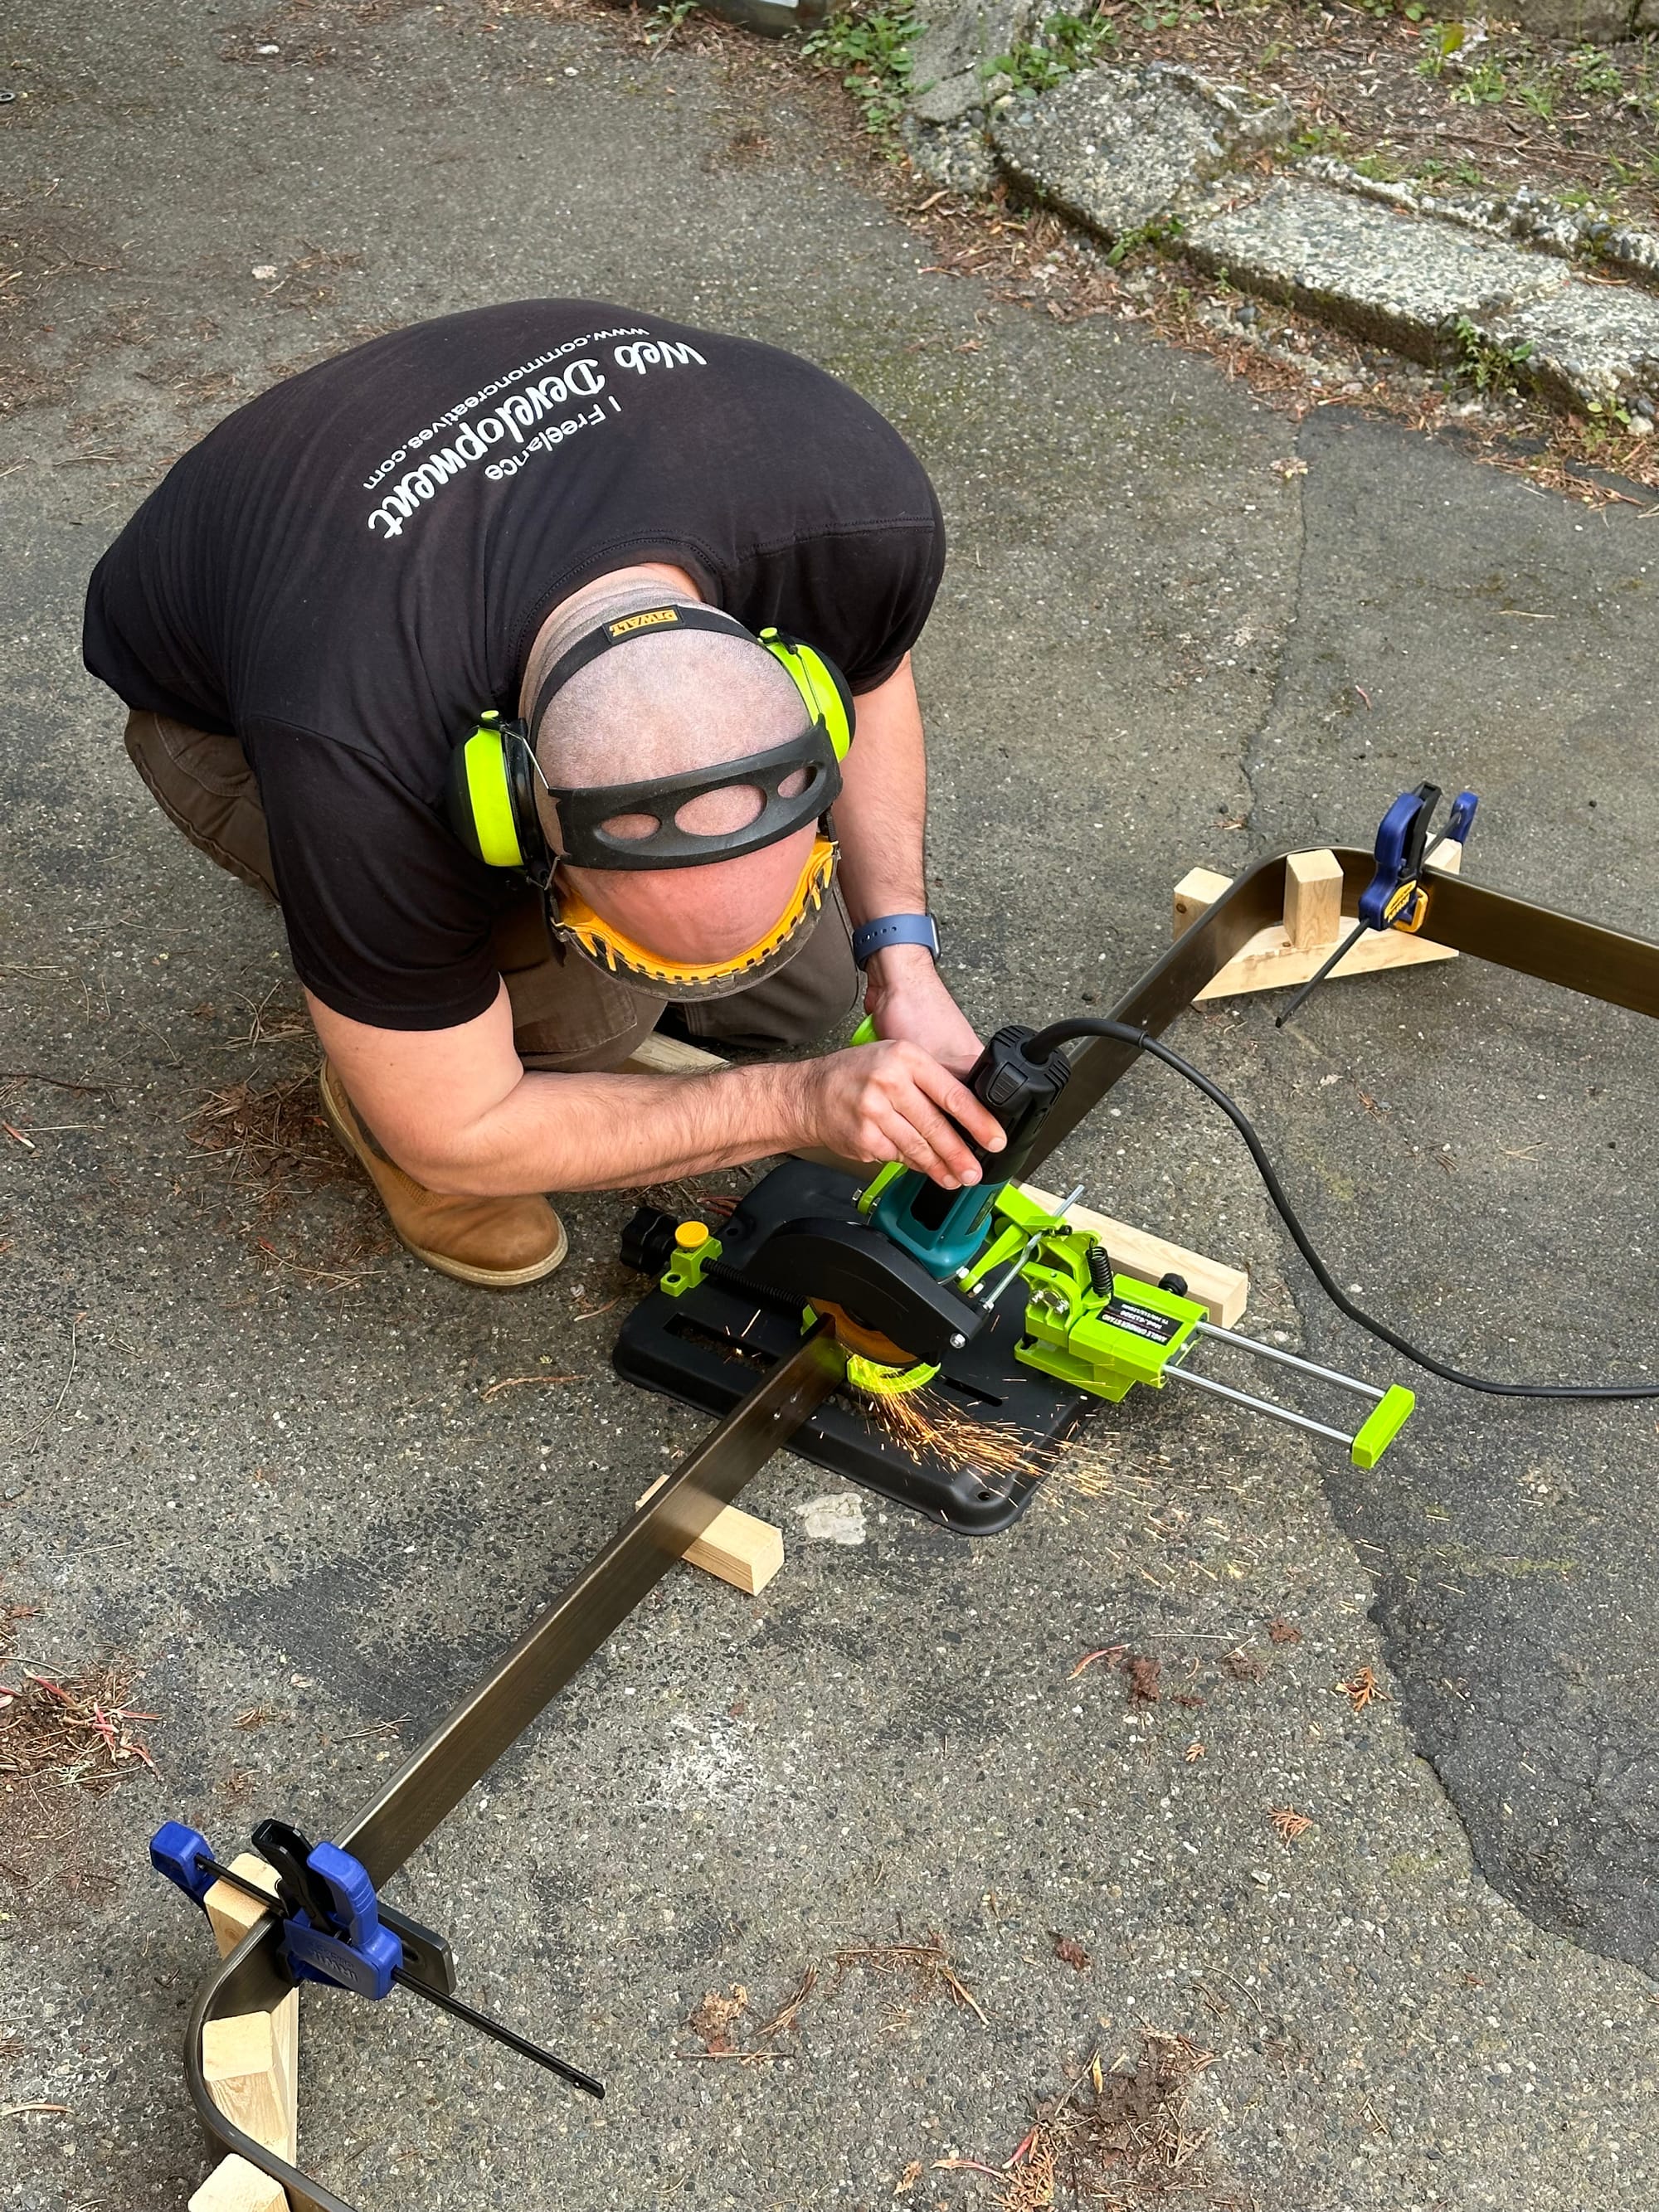
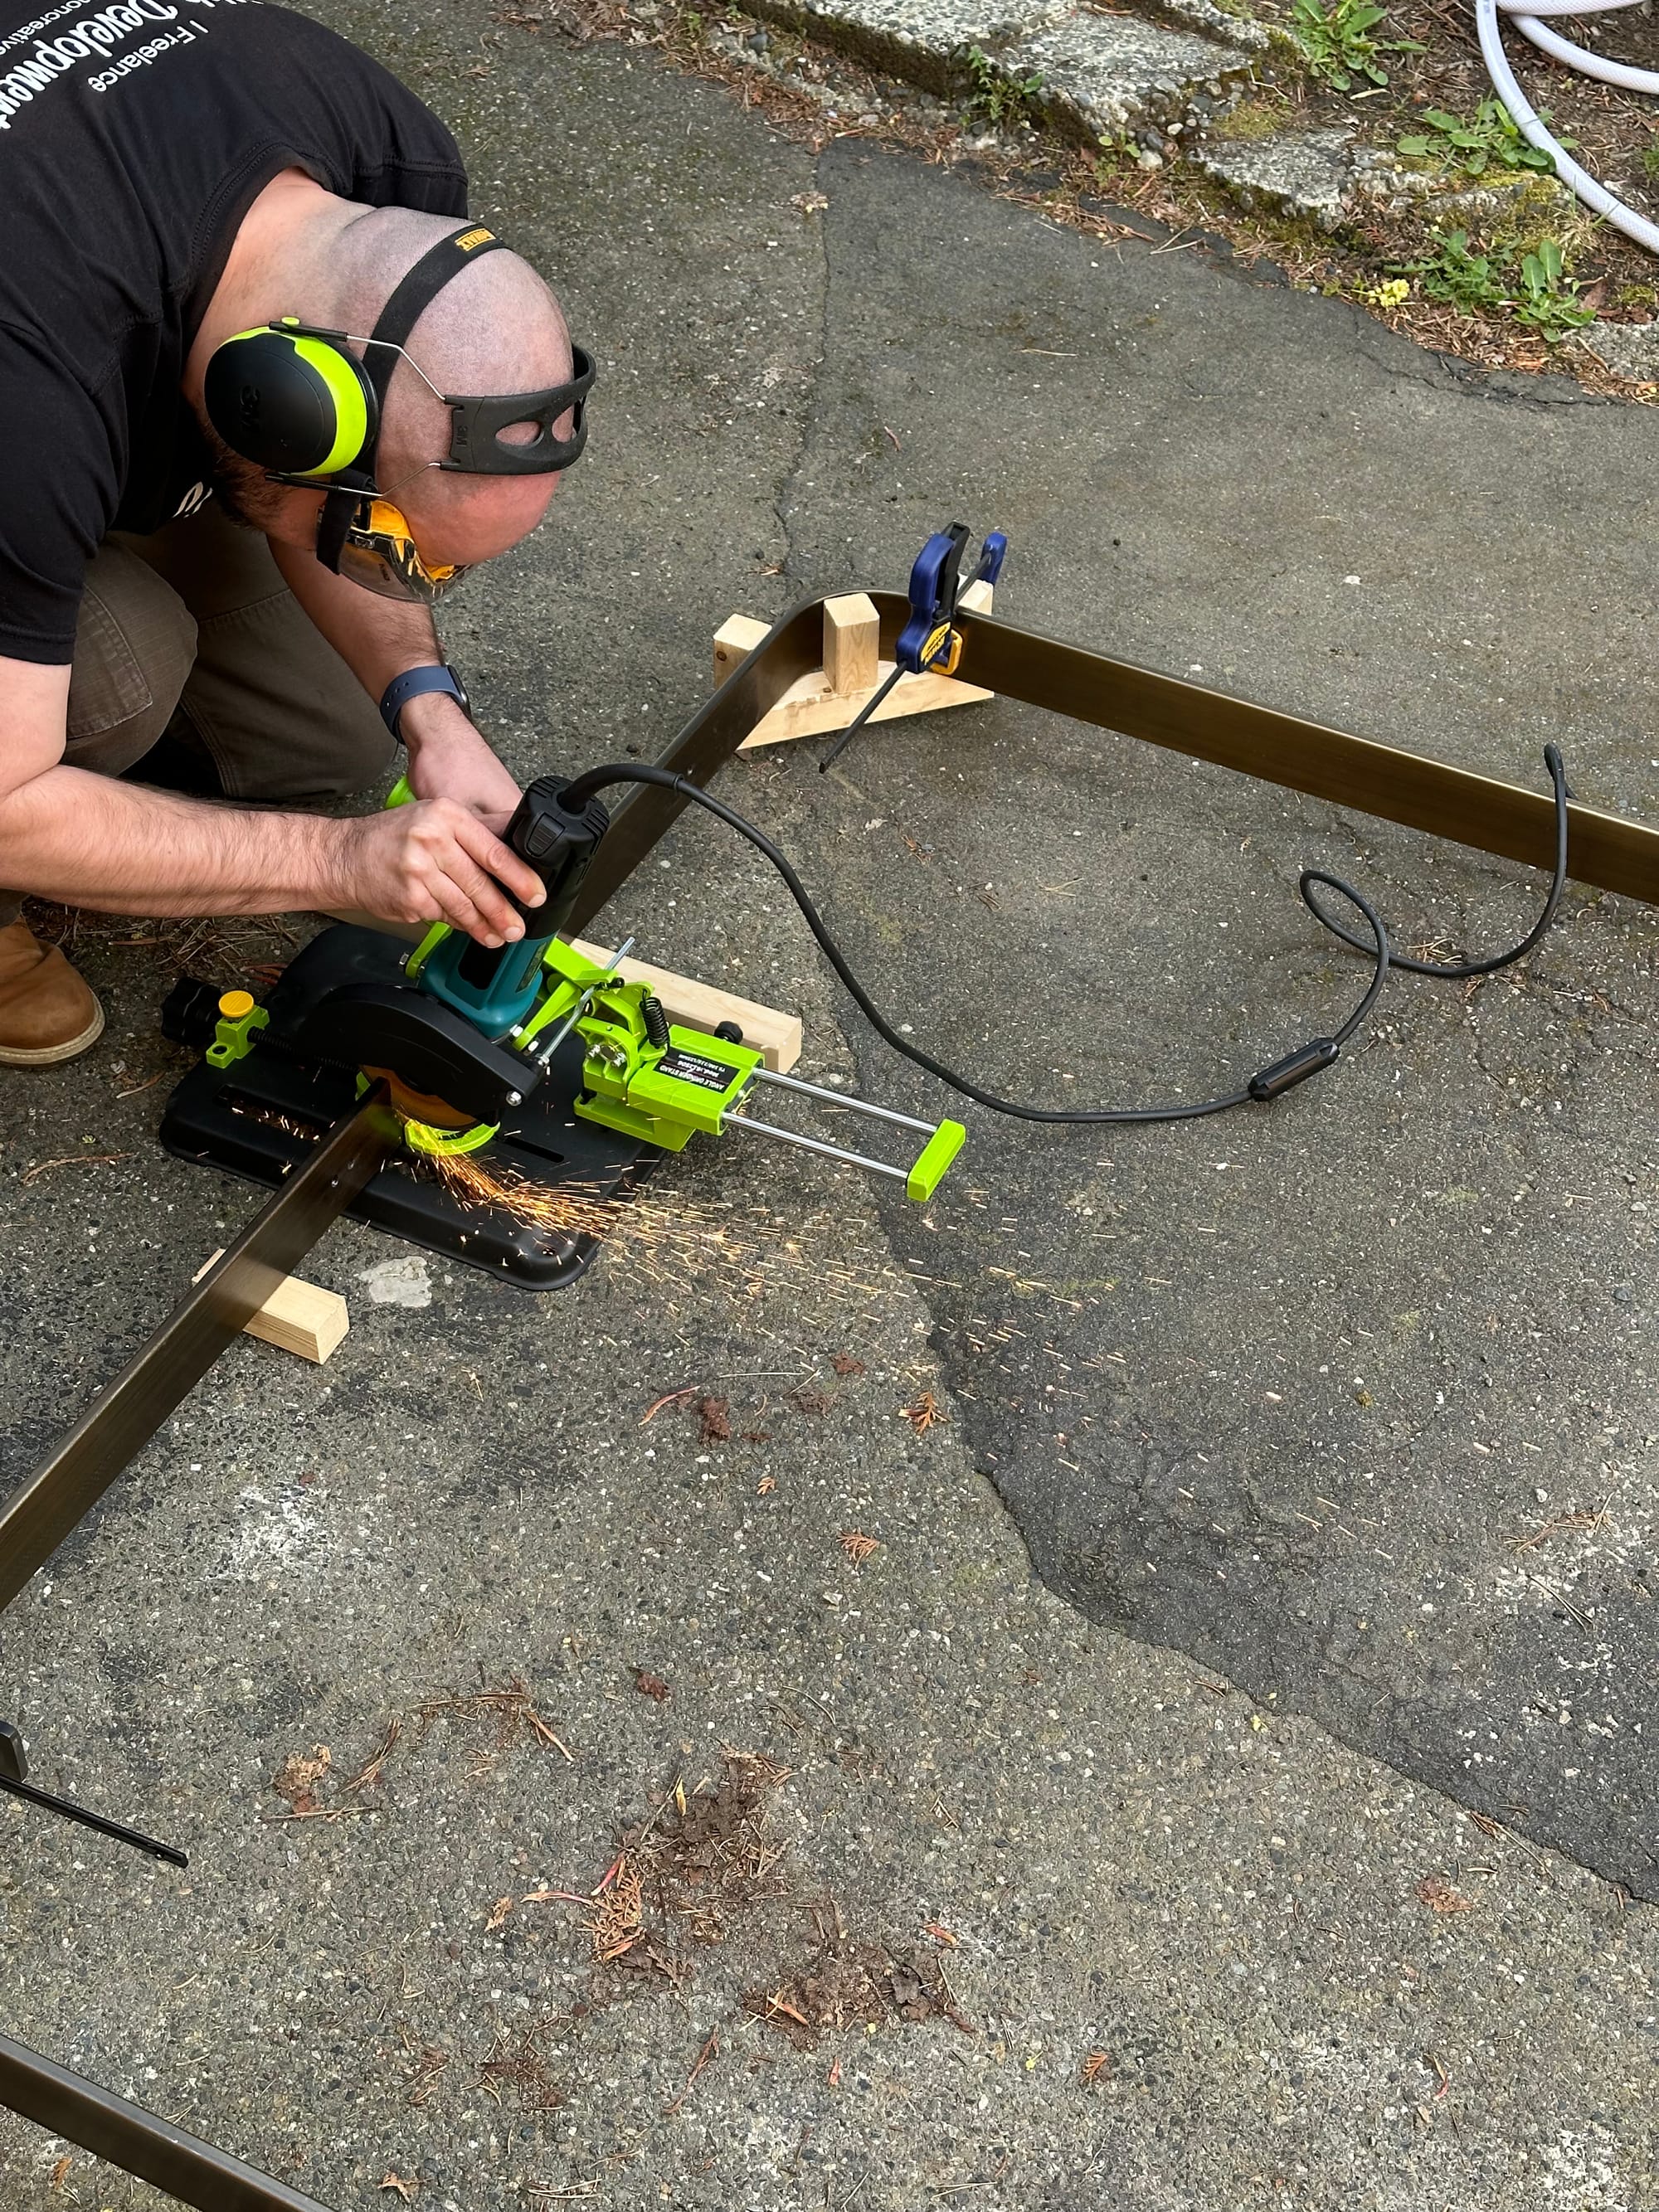
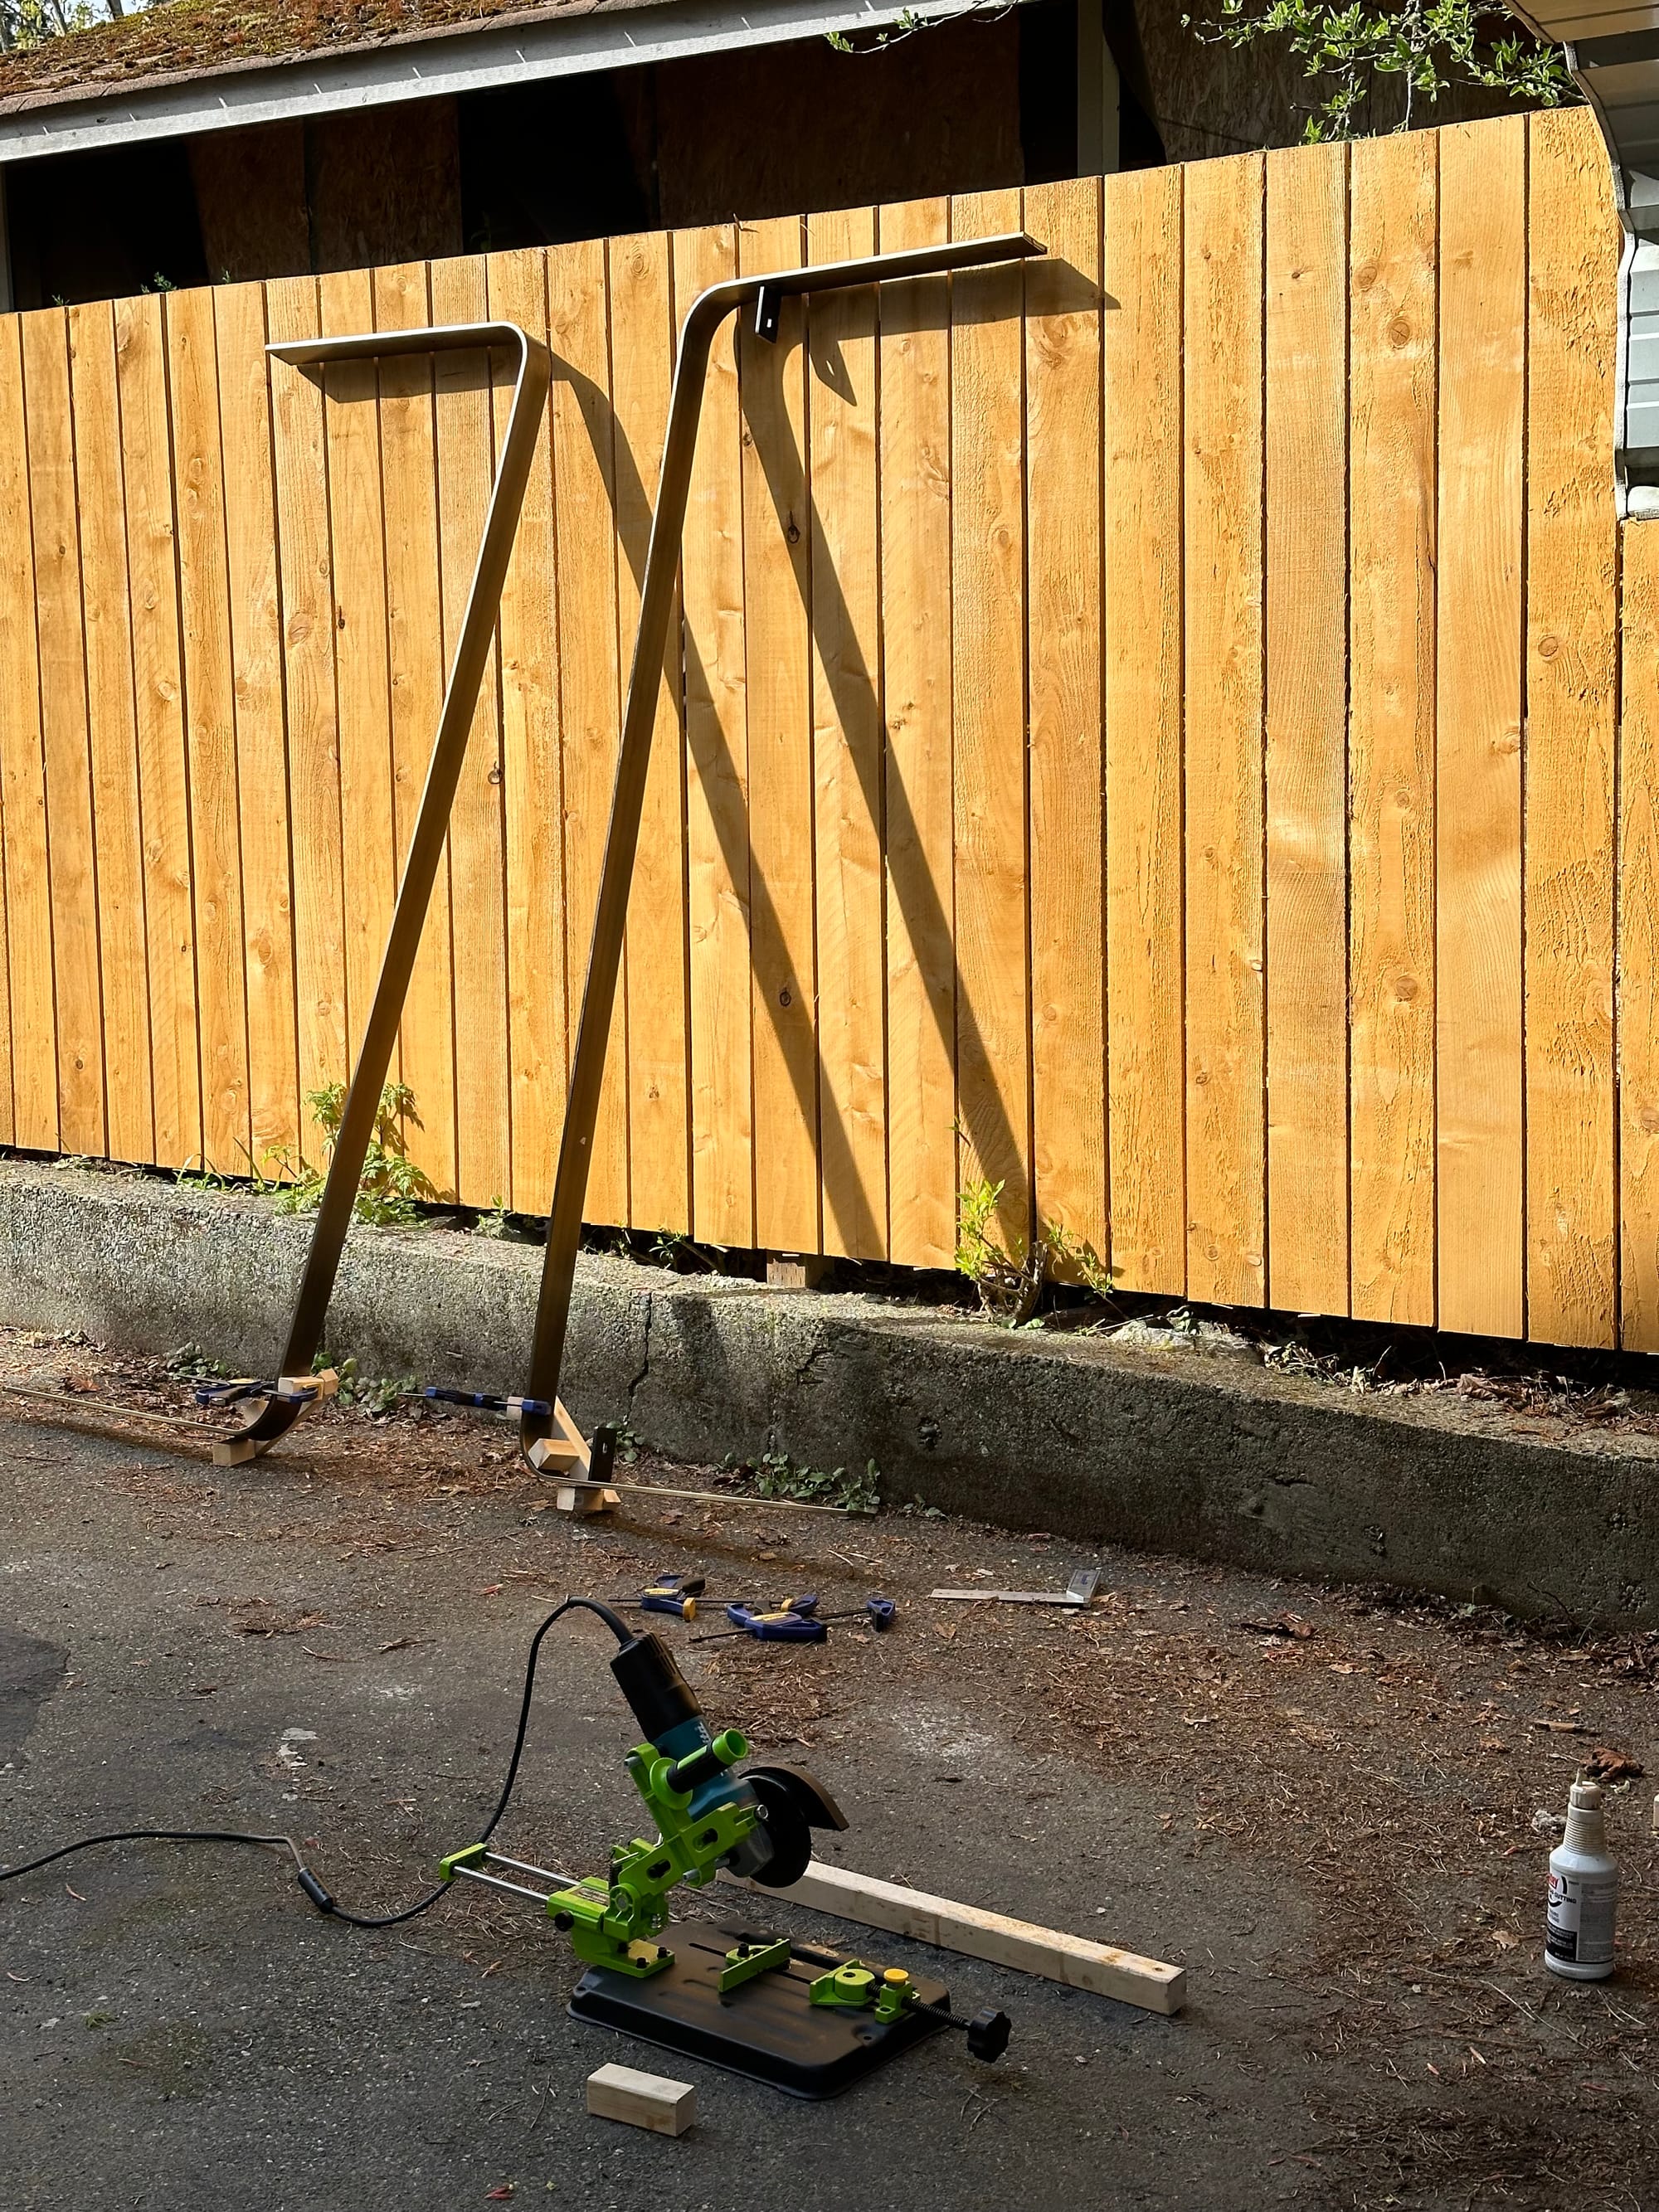
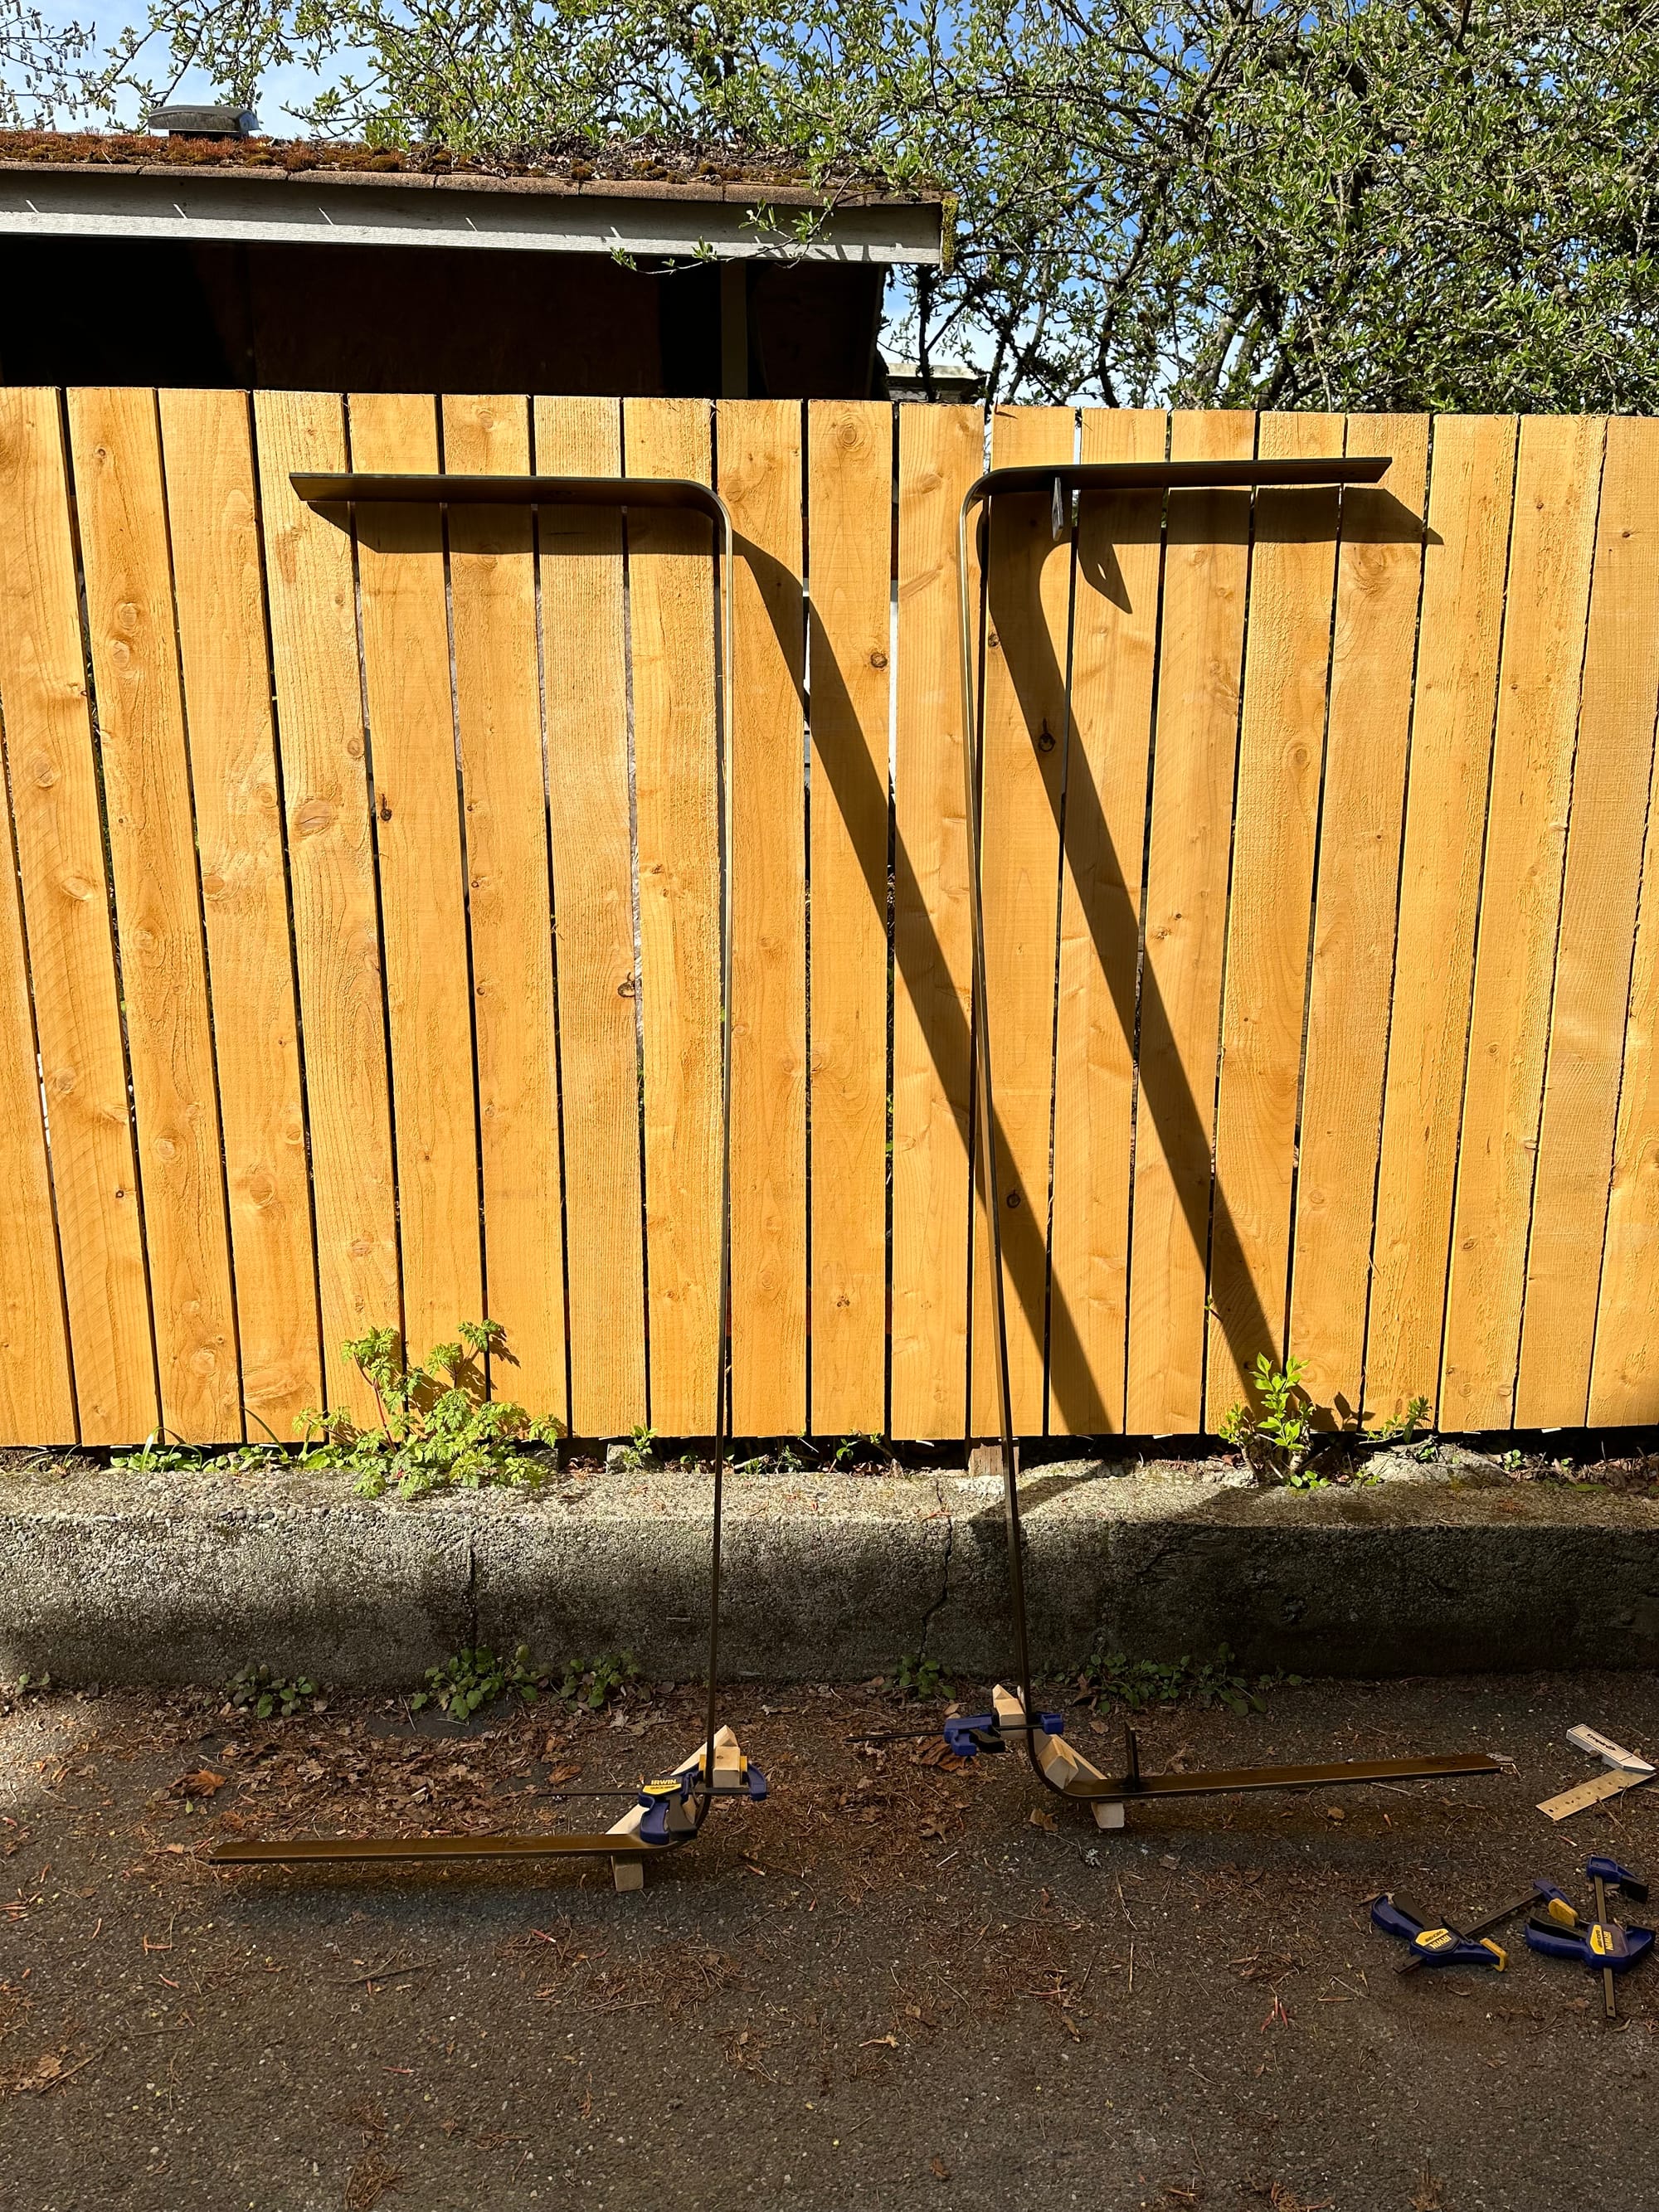
I ultimately found the cuts went better standing the frame up on end. The cuts weren't perfectly straight due to having to make adjustments mid-cut, but in the end, I had two pieces.
With that completed, I moved the pieces back into my basement workshop. I needed to clean up the edges, where were a bit jagged; two weeks later, I brought metal files and a deburring tool to bear and cleaned them up.
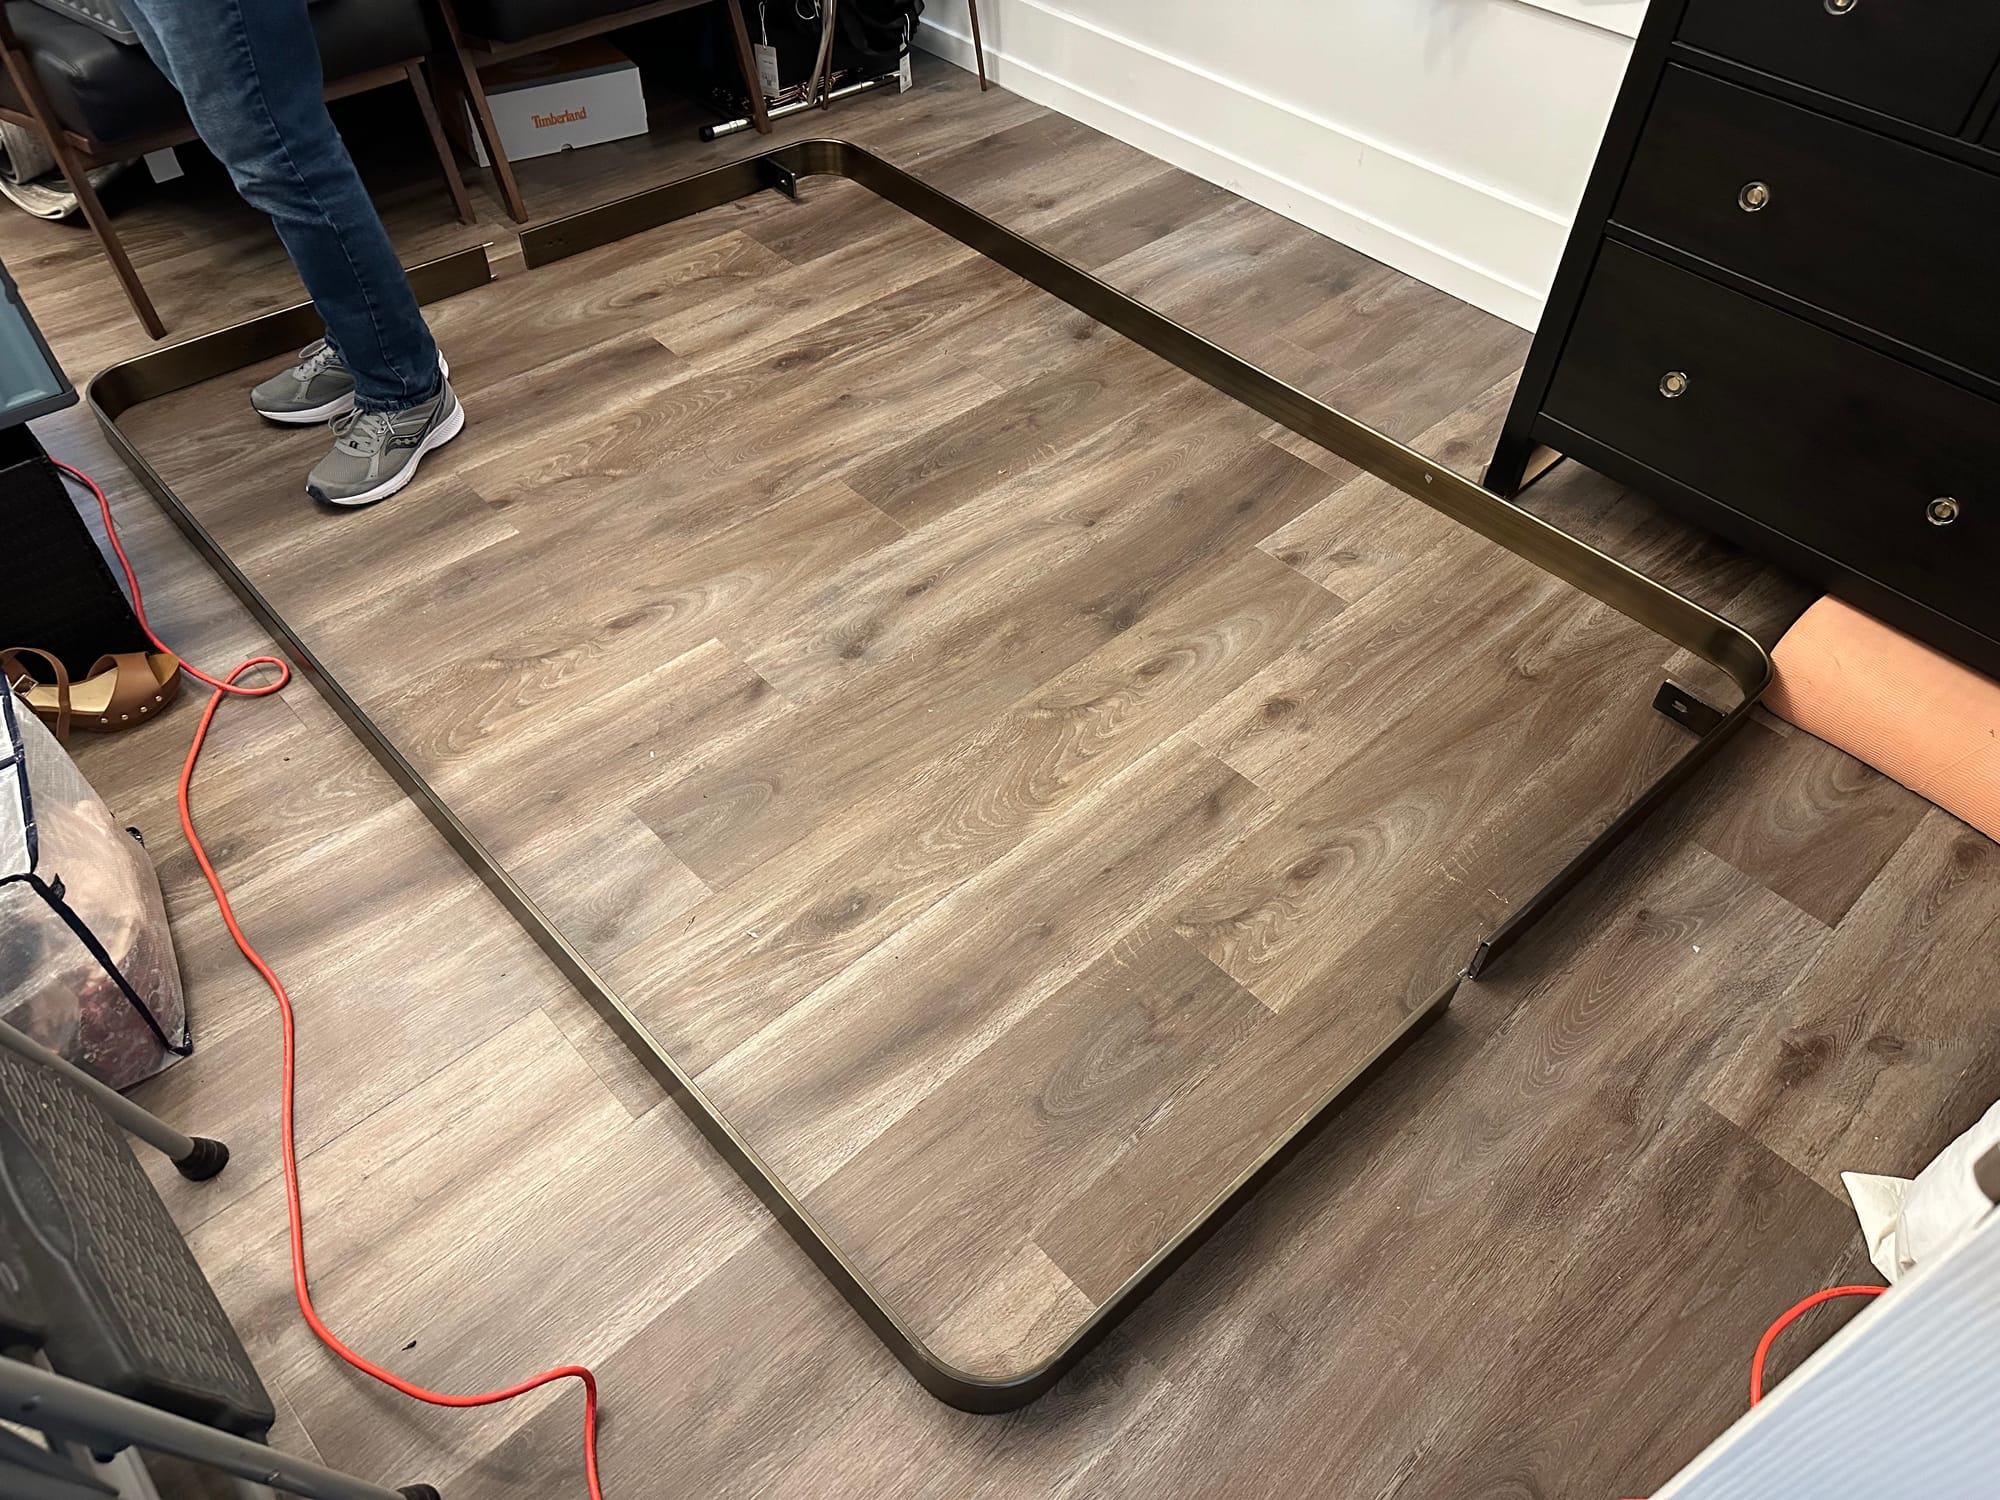
Now in early May, it was finally time to bring the pieces up to the bedroom and put it together. Even without the metal frame, the upholstered middle was a very tight squeeze; we successfully got it rotated through, leaving only a surface scratch that was easily skimmed over with putty and paint. The metal frame halves came up easily, and I'd achieved the thing that was impossible until that point—the headboard was in our master bedroom, albeit in 3 pieces instead of one.
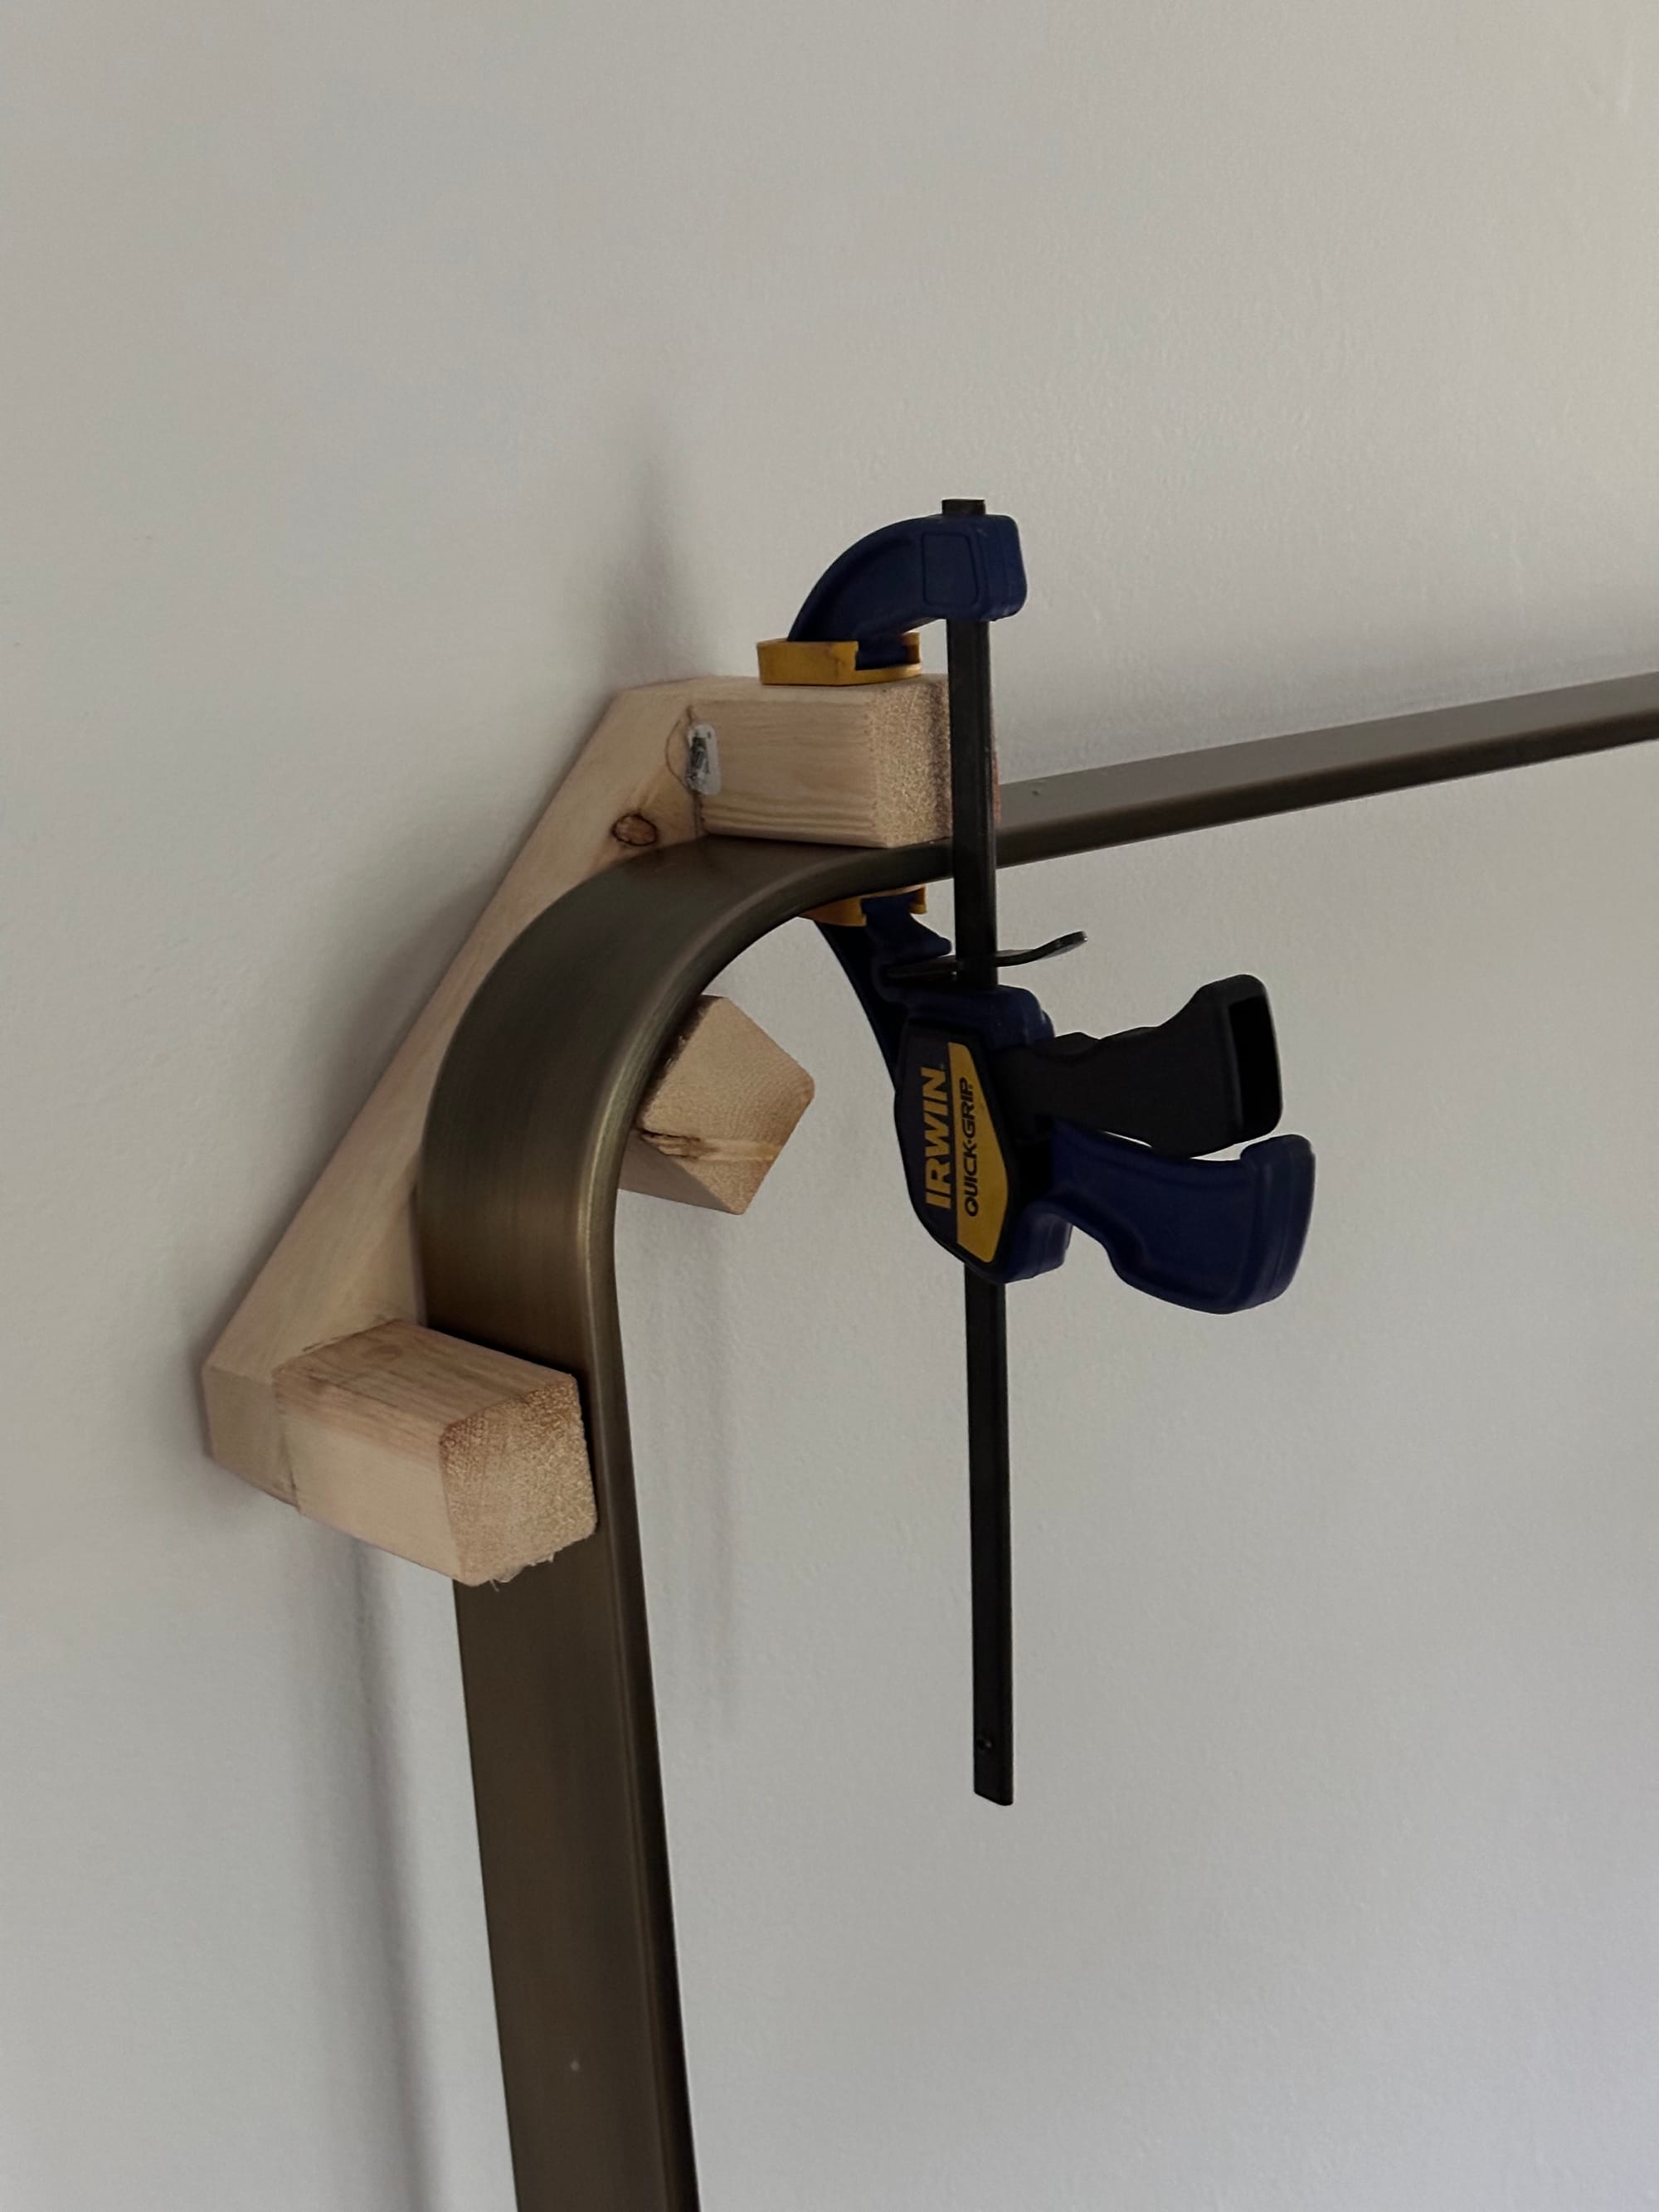
I then set about reattaching the bolts, which was more challenging than expected. The bolts, clearly not designed for civilians, were very difficult to get aligned and seated back into their threads. With the application of some clamps and spare wood, I was able to finally get all the bolts in place.
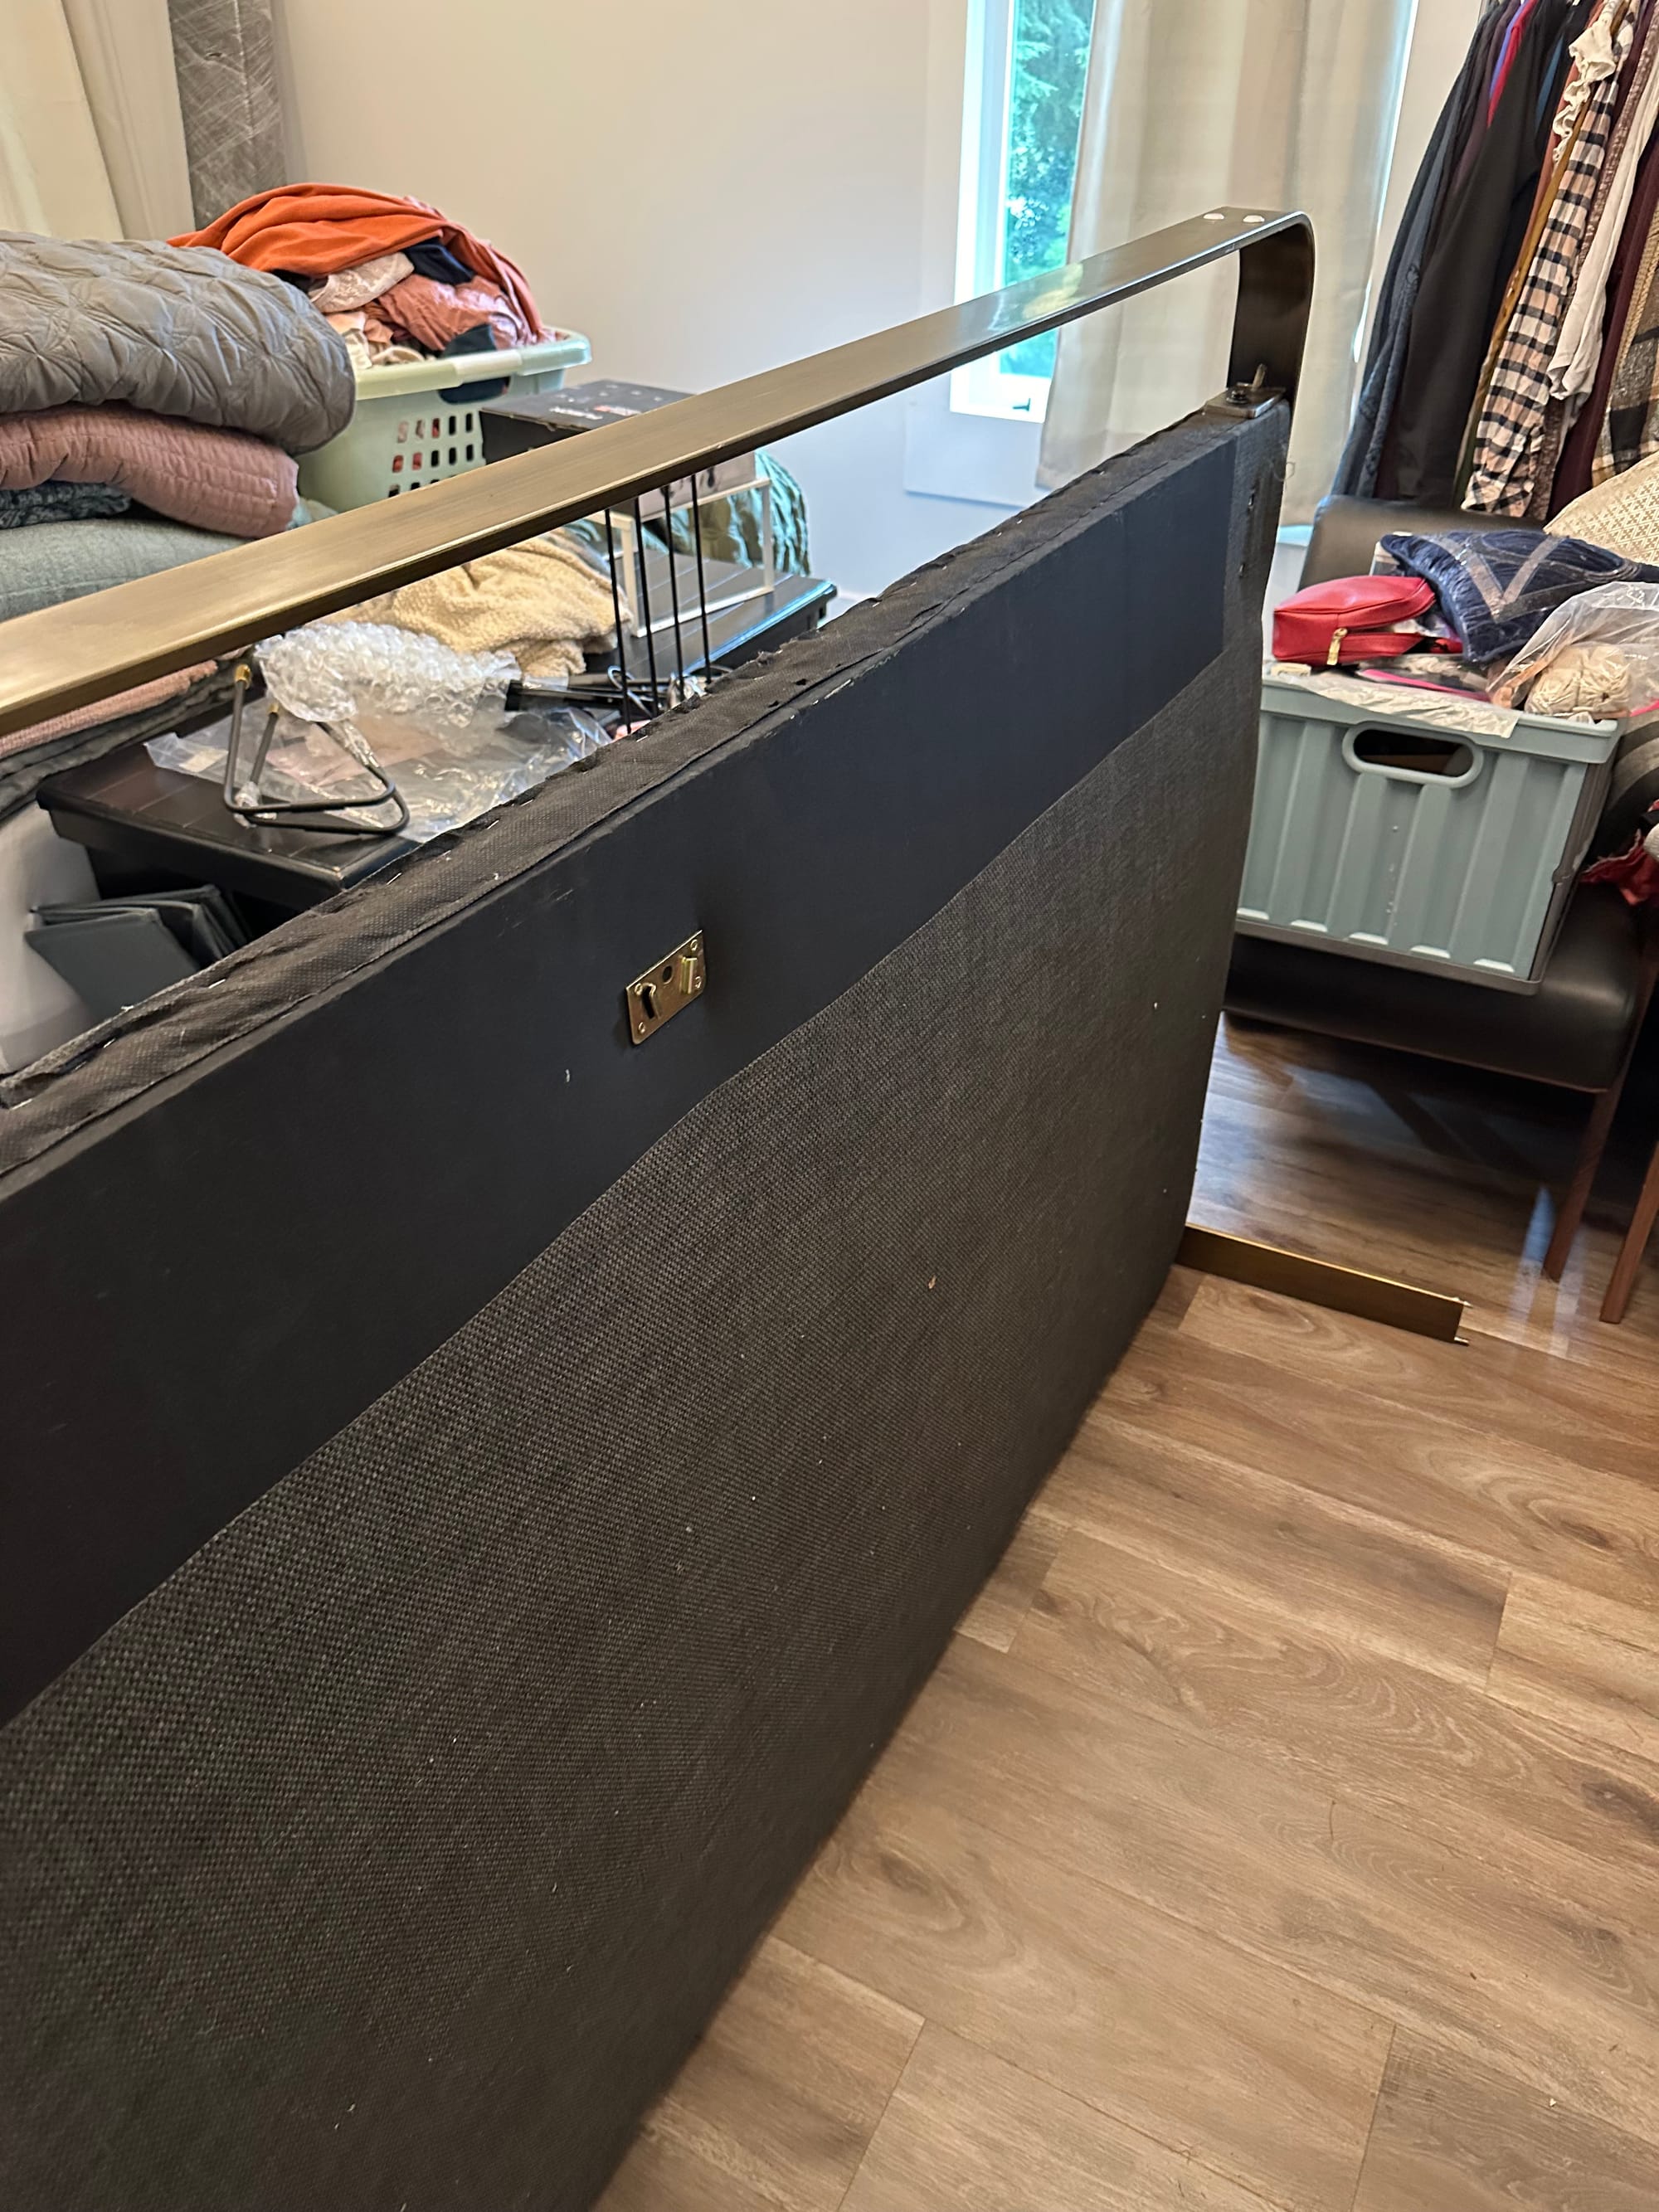
... and discovered a problem. The frame appeared to hold a bit of tension, and with it cut, the sides wanted to bow out slightly. Because of where I'd elected to cut it (a strategic decision), one end was held tightly against the upholstered middle, but the other side, being secured a few feet away, bowed out maybe a quarter inch. That was clearly not going to be acceptable, but I was going to have to think about how to address it.
Again, in the face of the difficulty of the next task, I had to wait both to mull over my approach and deal with more pressing needs (some of which will be covered in future posts).
(Late intermission: Aurora Borealis, as captured by me on iPhone camera, May 10, 2024.)

September. I have come up with a plan. I purchased a 1/4" steel rod earlier in the process, thinking I might need to cut a slot and use a rod to keep the pieces from rotating relative to each other, but ultimately deemed it unnecessary. It occurred to me that I could drill out holes in the core of the metal frame and use pieces of steel rod as pins to align and hold the two ends, such that neither would bow out.
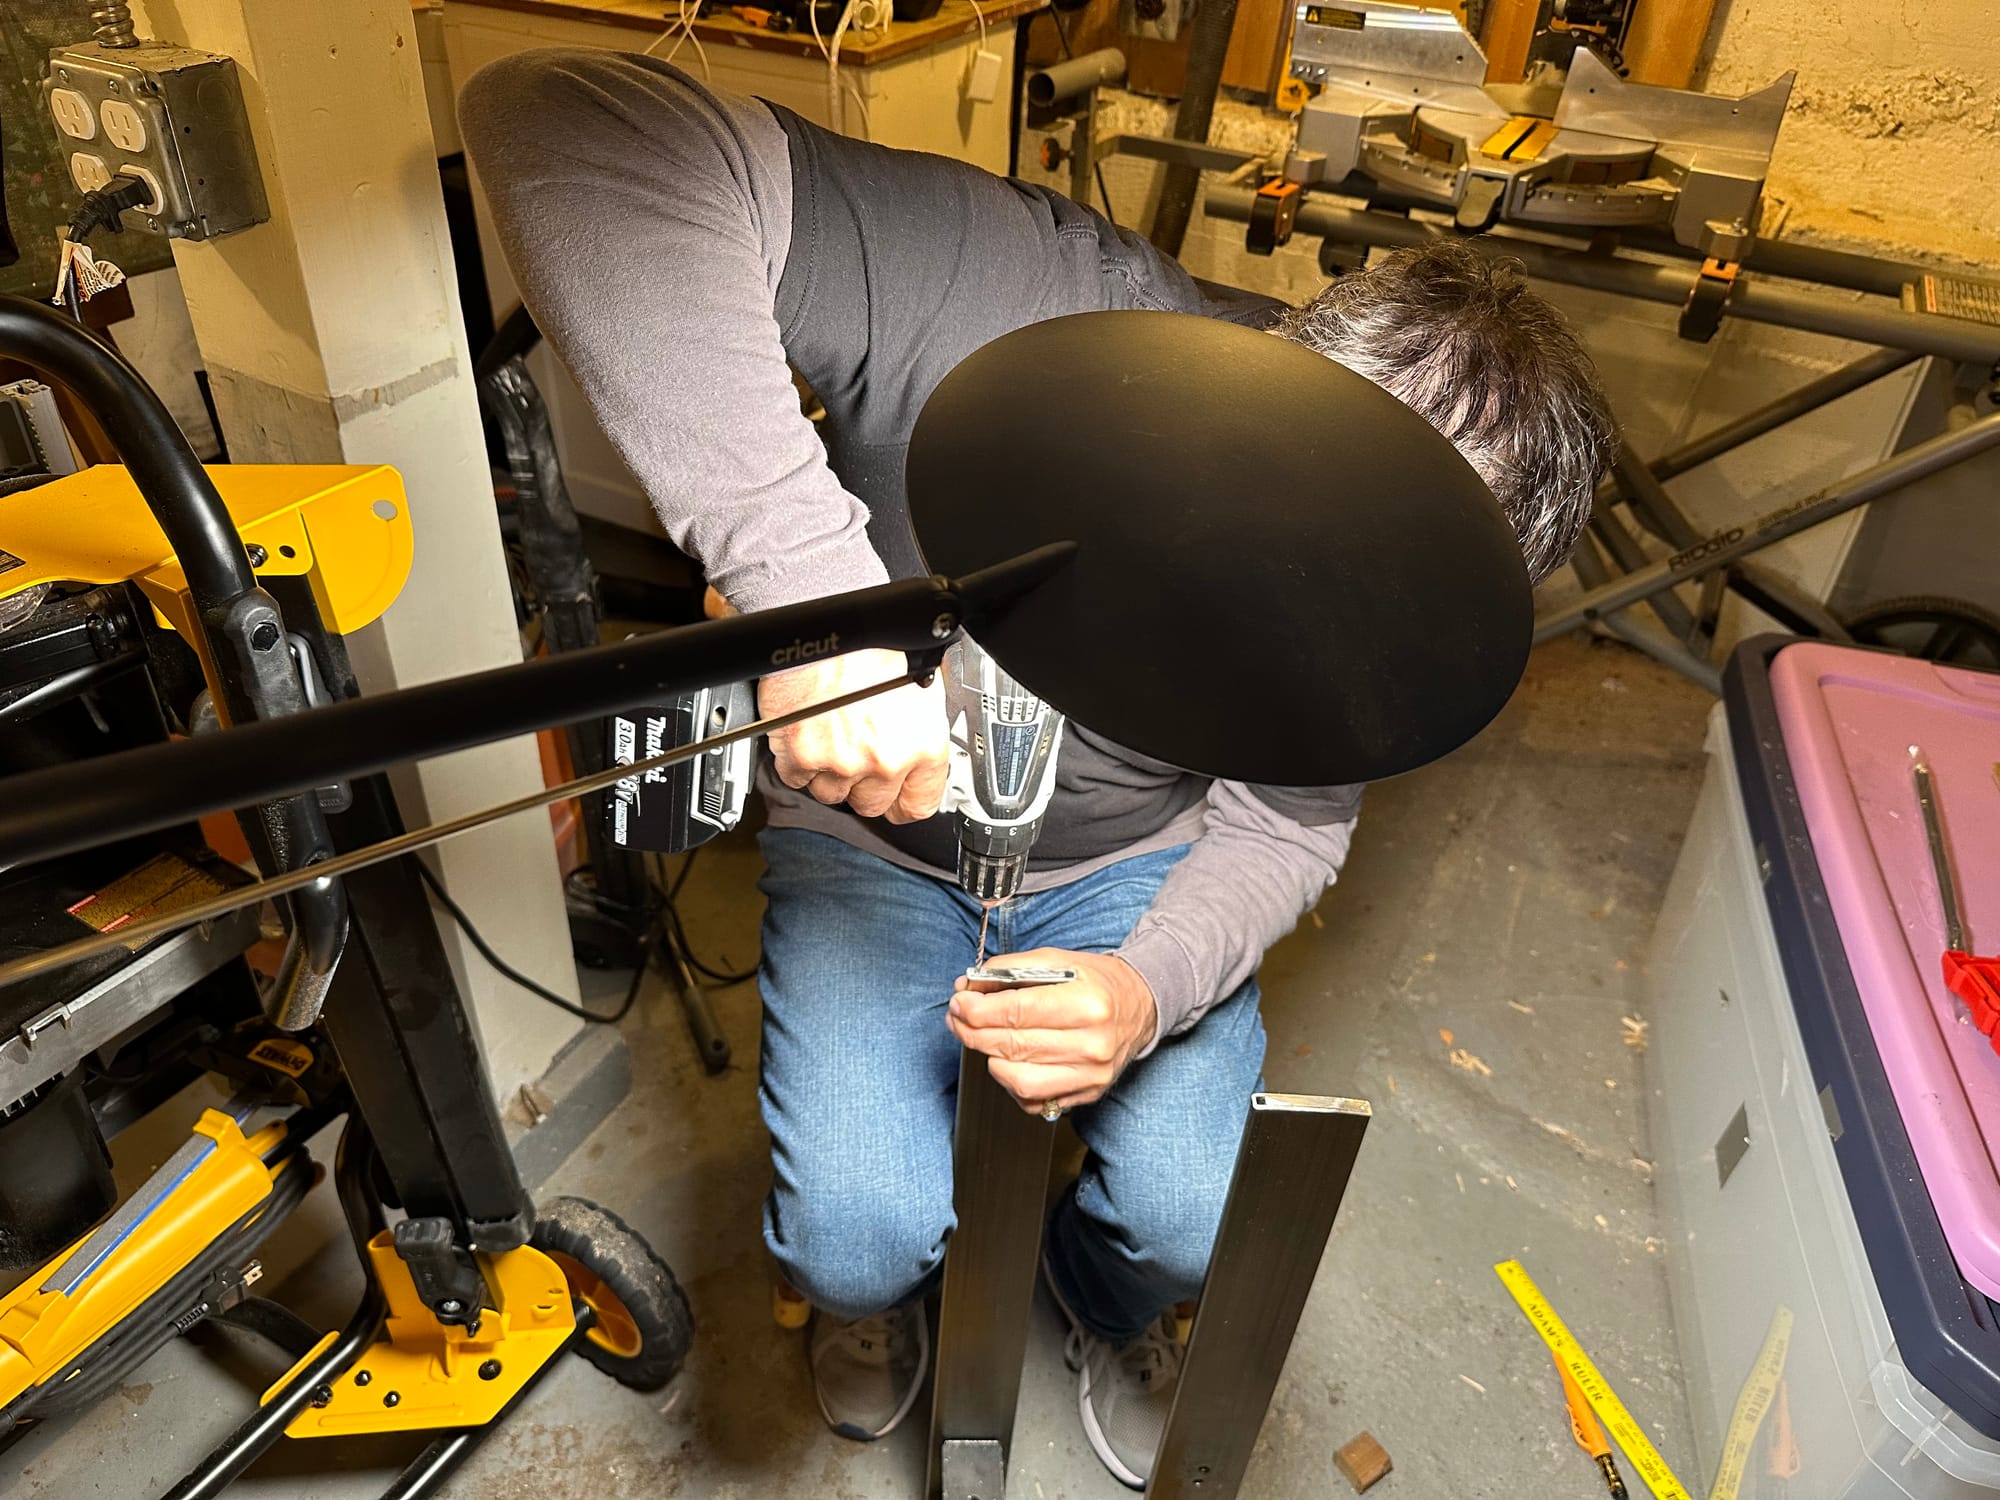
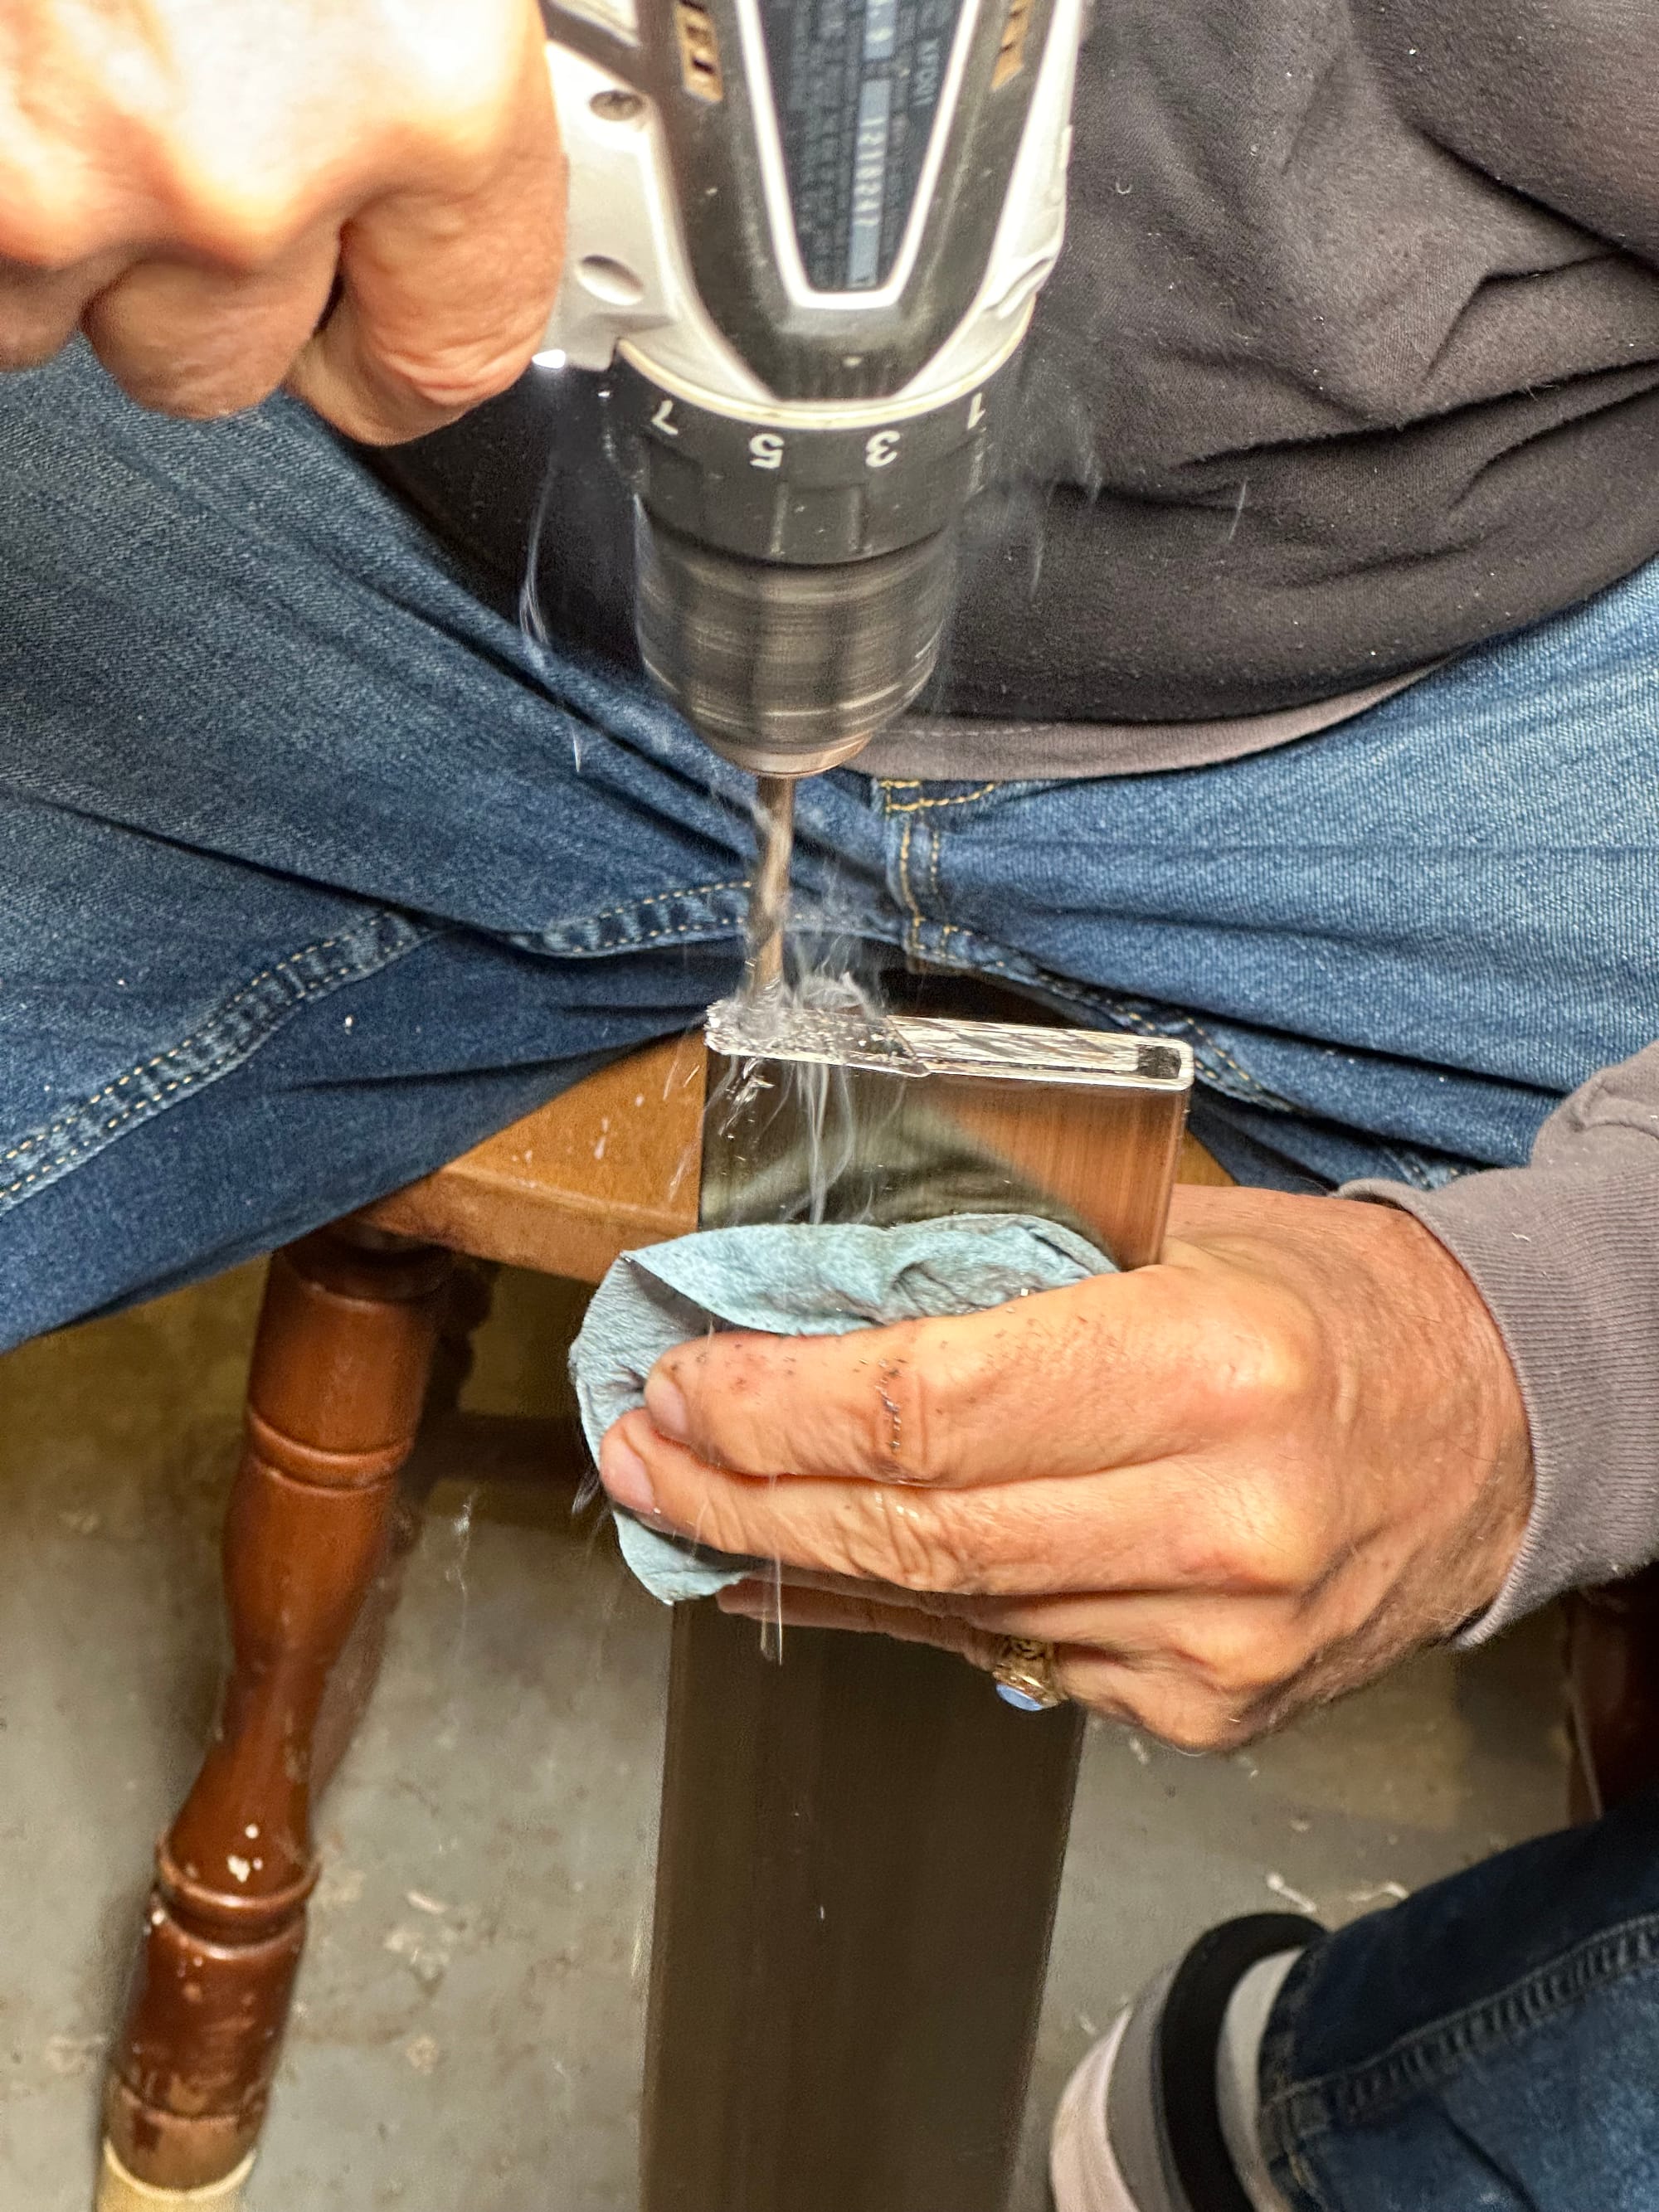
My parents were visiting, and this felt like a good project to tackle with my father, from whom I got my DIY sensibilities and who always likes helping me with projects.
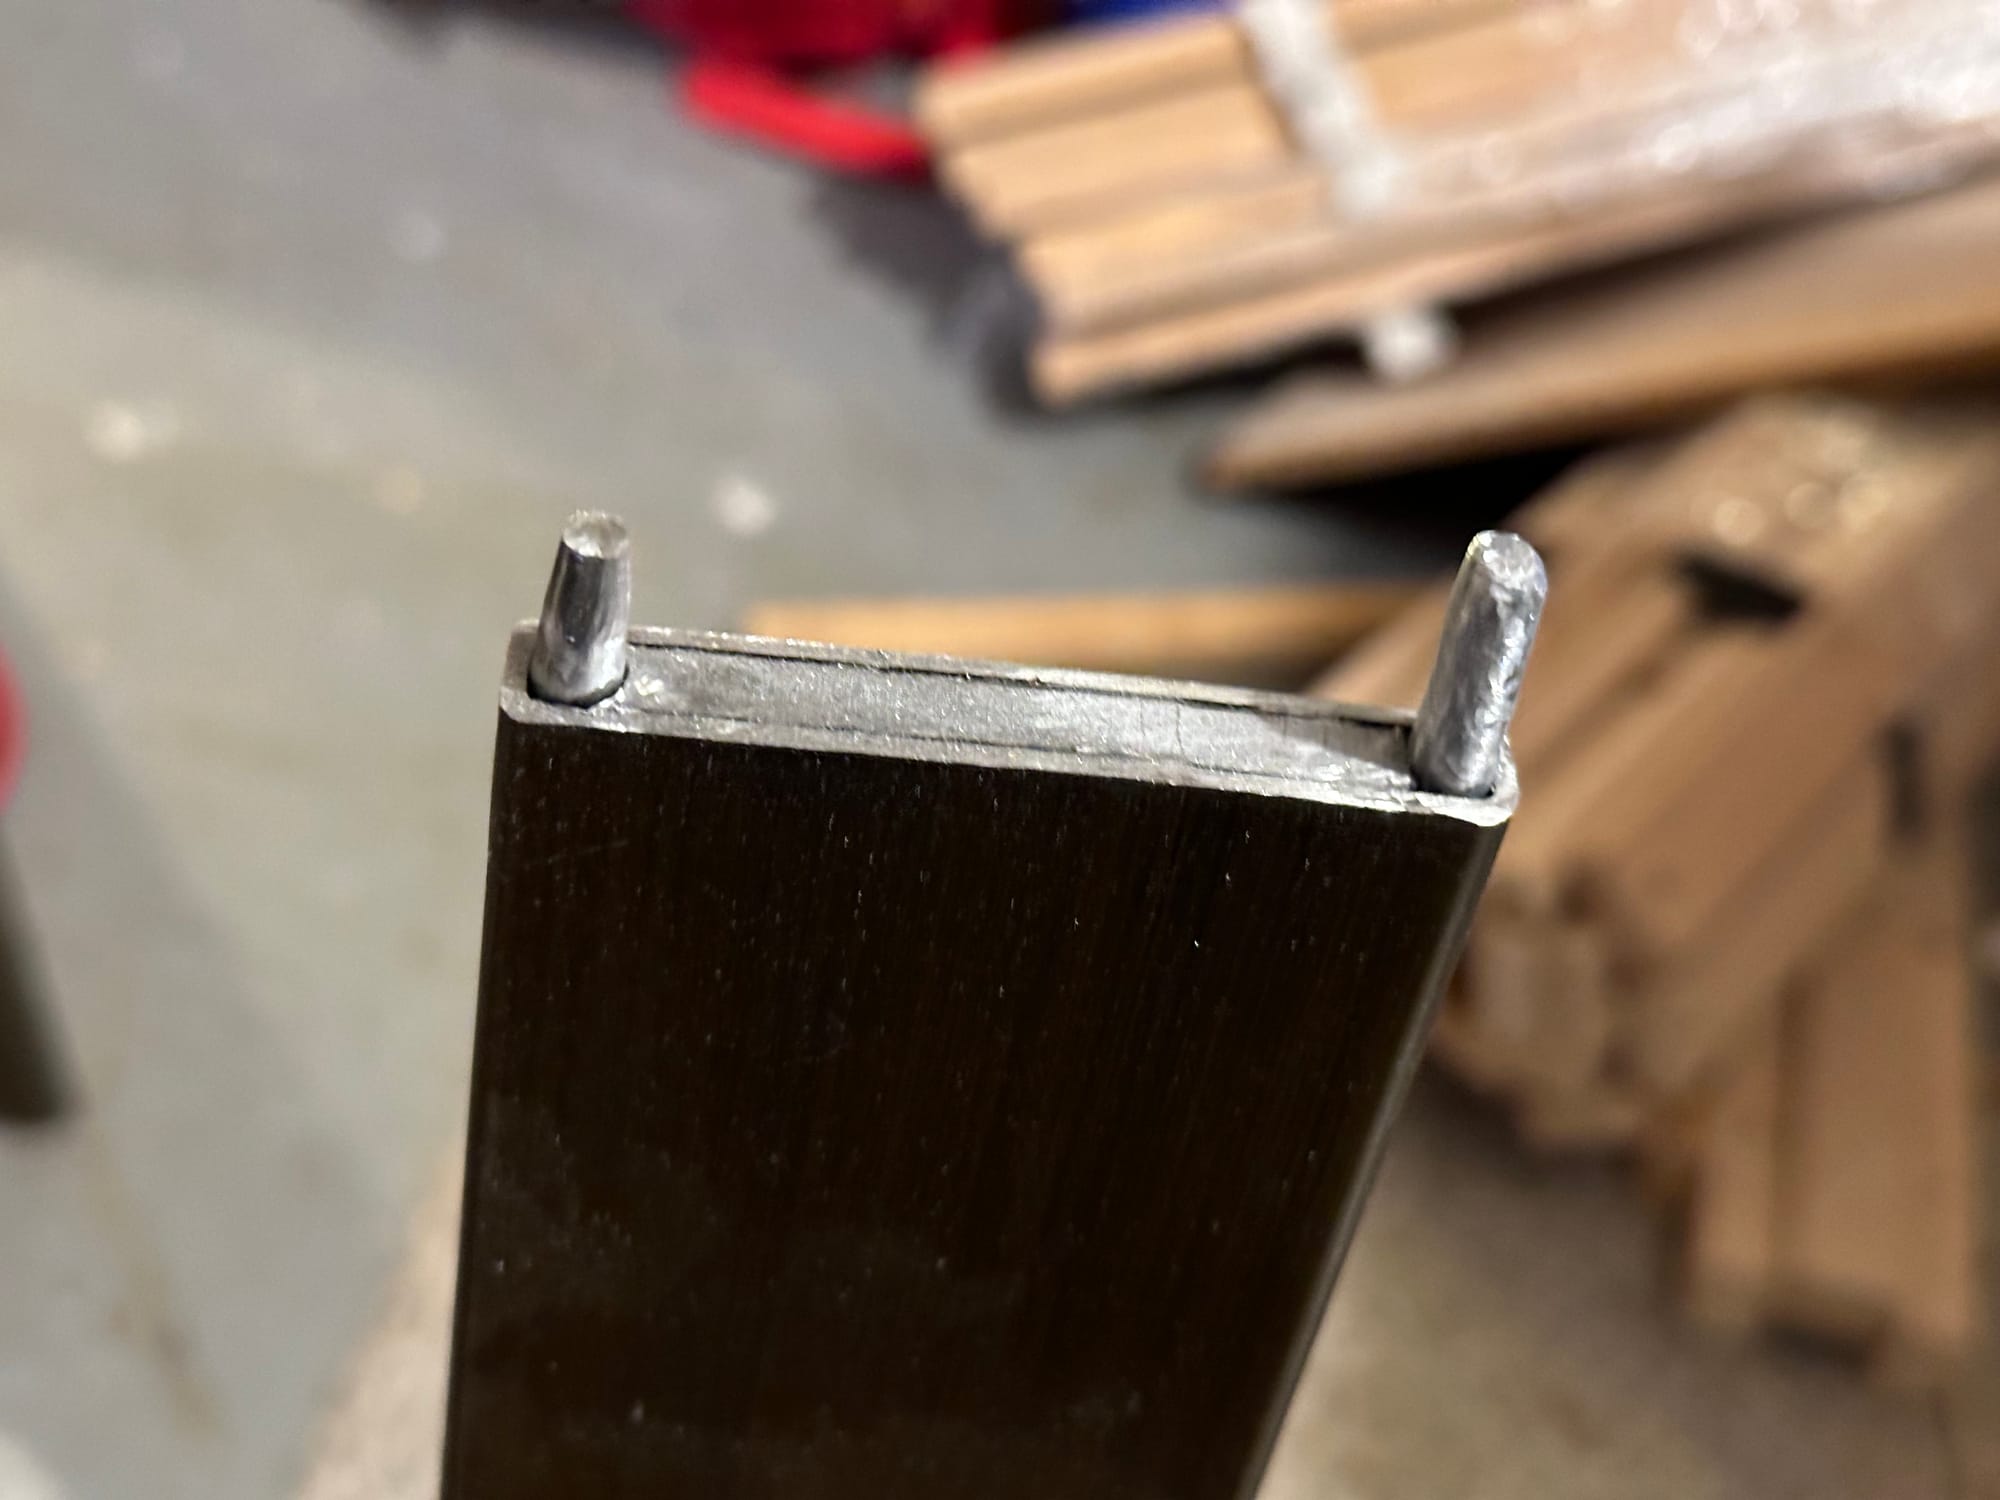
The metal frame had a core that was offset to one side, and we determined that we could grind down one edge of the metal rod and fit it in that side, saving us some drilling. We then set to work drilling out holes, as carefully as possible. Cutting fluid, staring with a small metal bit, working up the a 1/4" bit. Slightly imperfect, including a spot where we started blowing out the side, but we ultimately had spots for two pins for each joint.
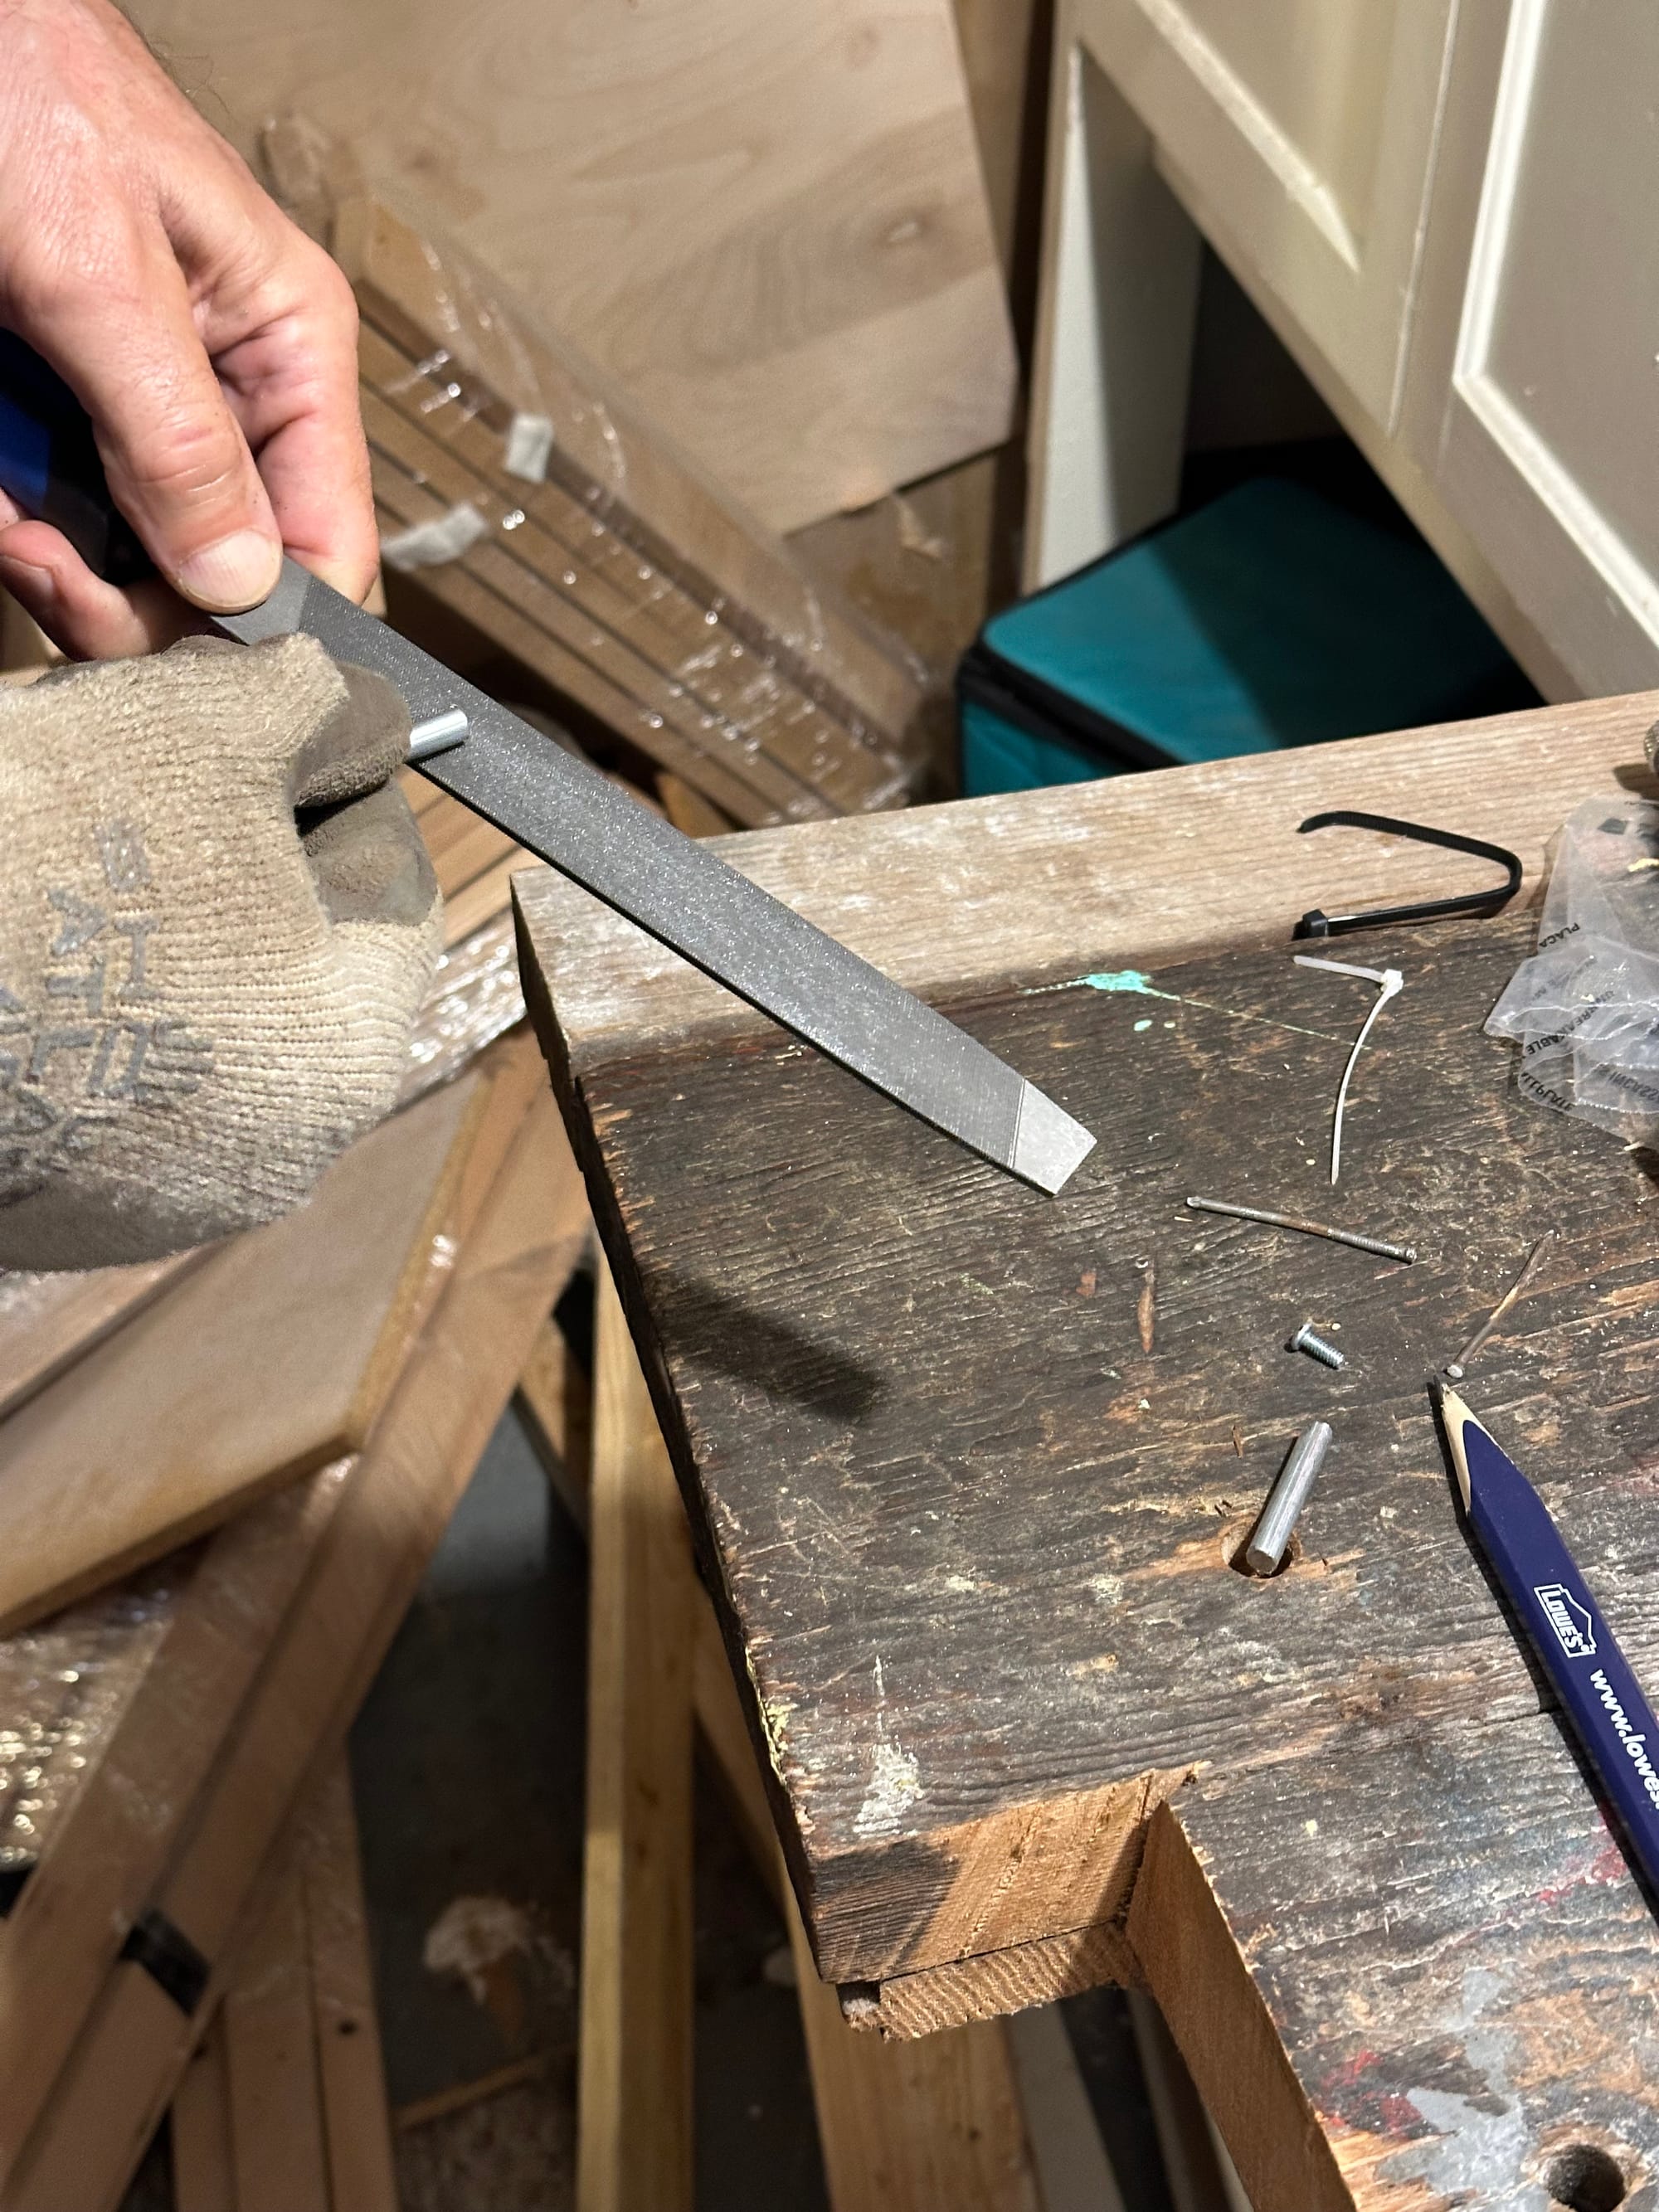
We cut pins, giving them a bit of rounding with the angle grinder, and then a dry fit. From both the bowing and the angling of the holes we'd drilled, we needed to taper the pins more aggressively, but were able to do that with a grinding wheel on the Dremel.

Then, back upstairs.
Moment of truth! It slots together.
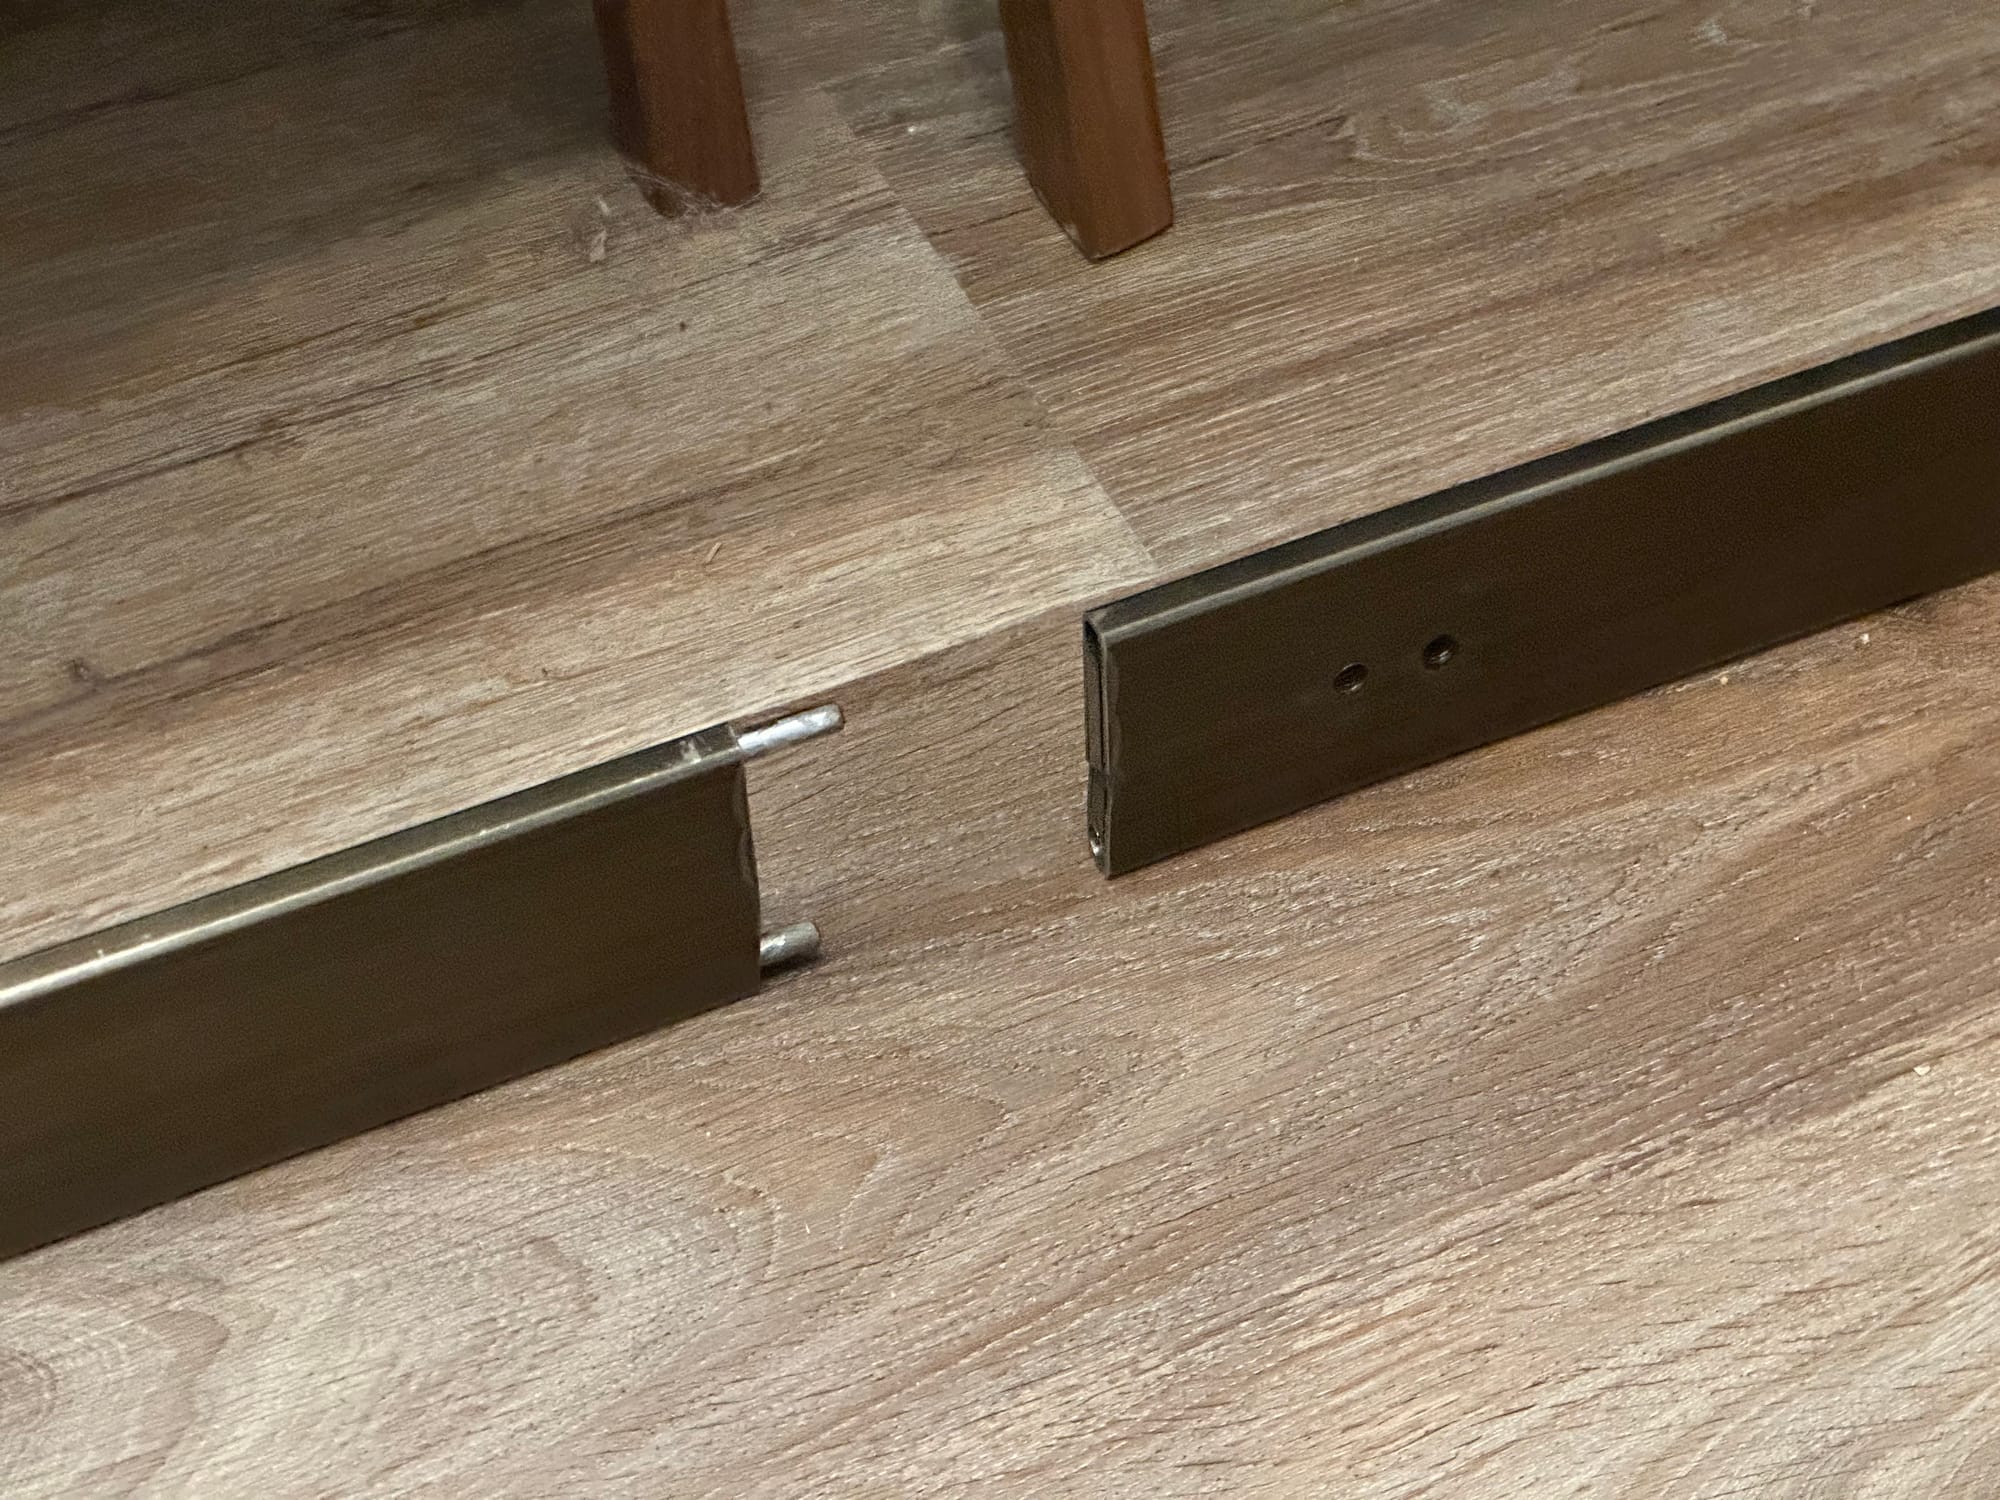
Still a little bit of a trick getting the bolts in, but with the pins holding in alignment, as well as a second pair of hands, significantly easier.
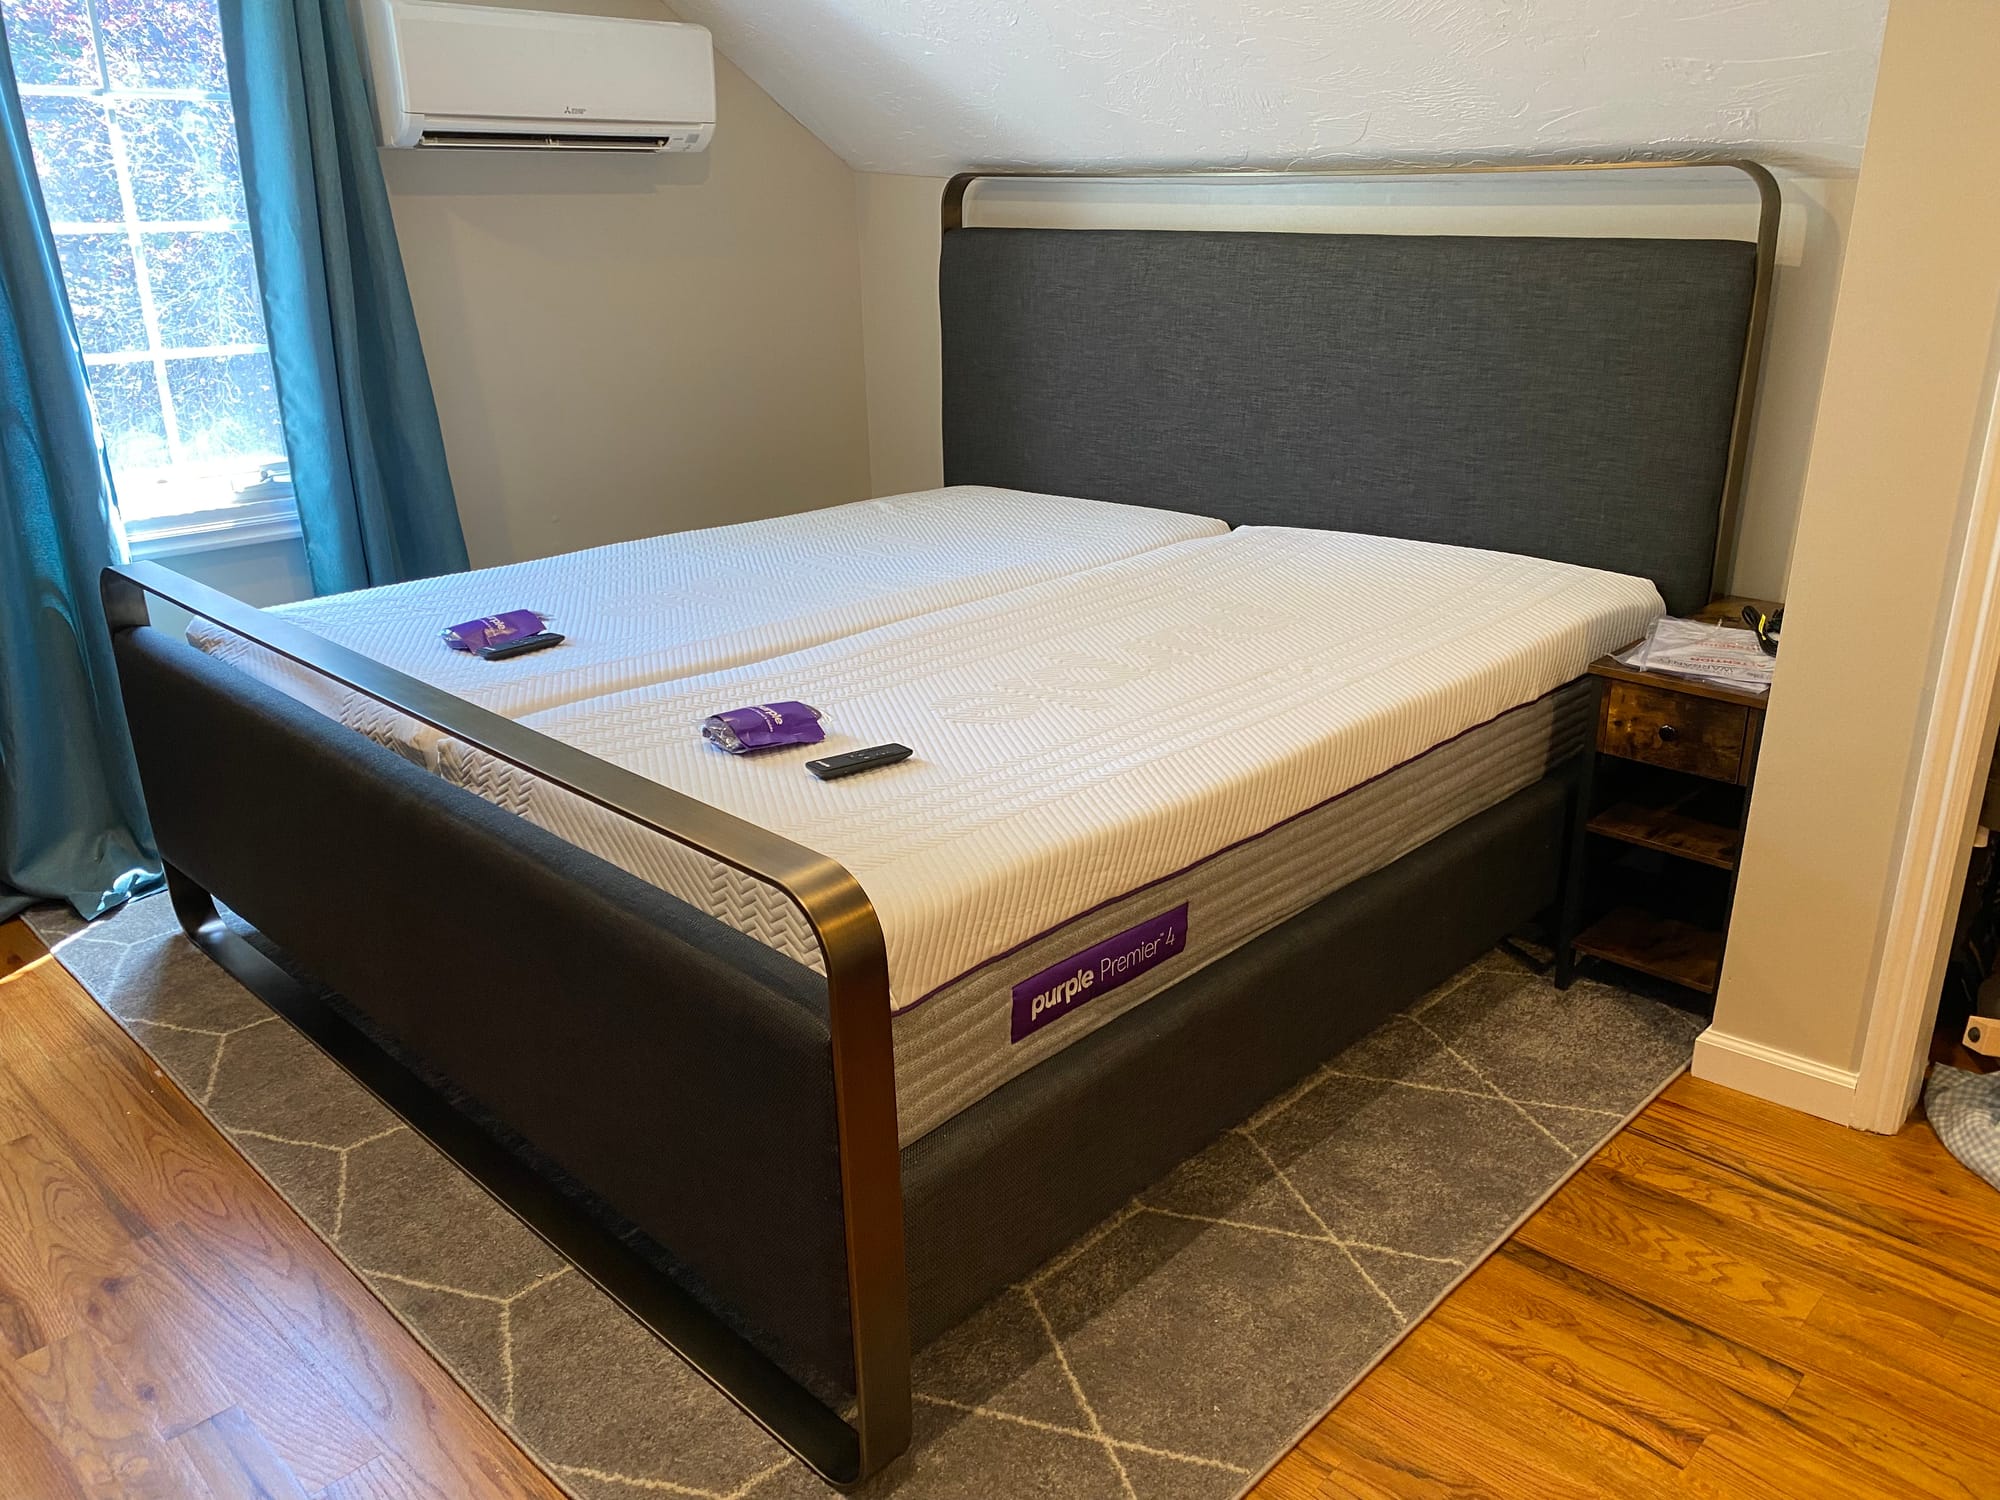
And suddenly... we have a completed headboard!
And just like that, we finally have our bed frame back together.
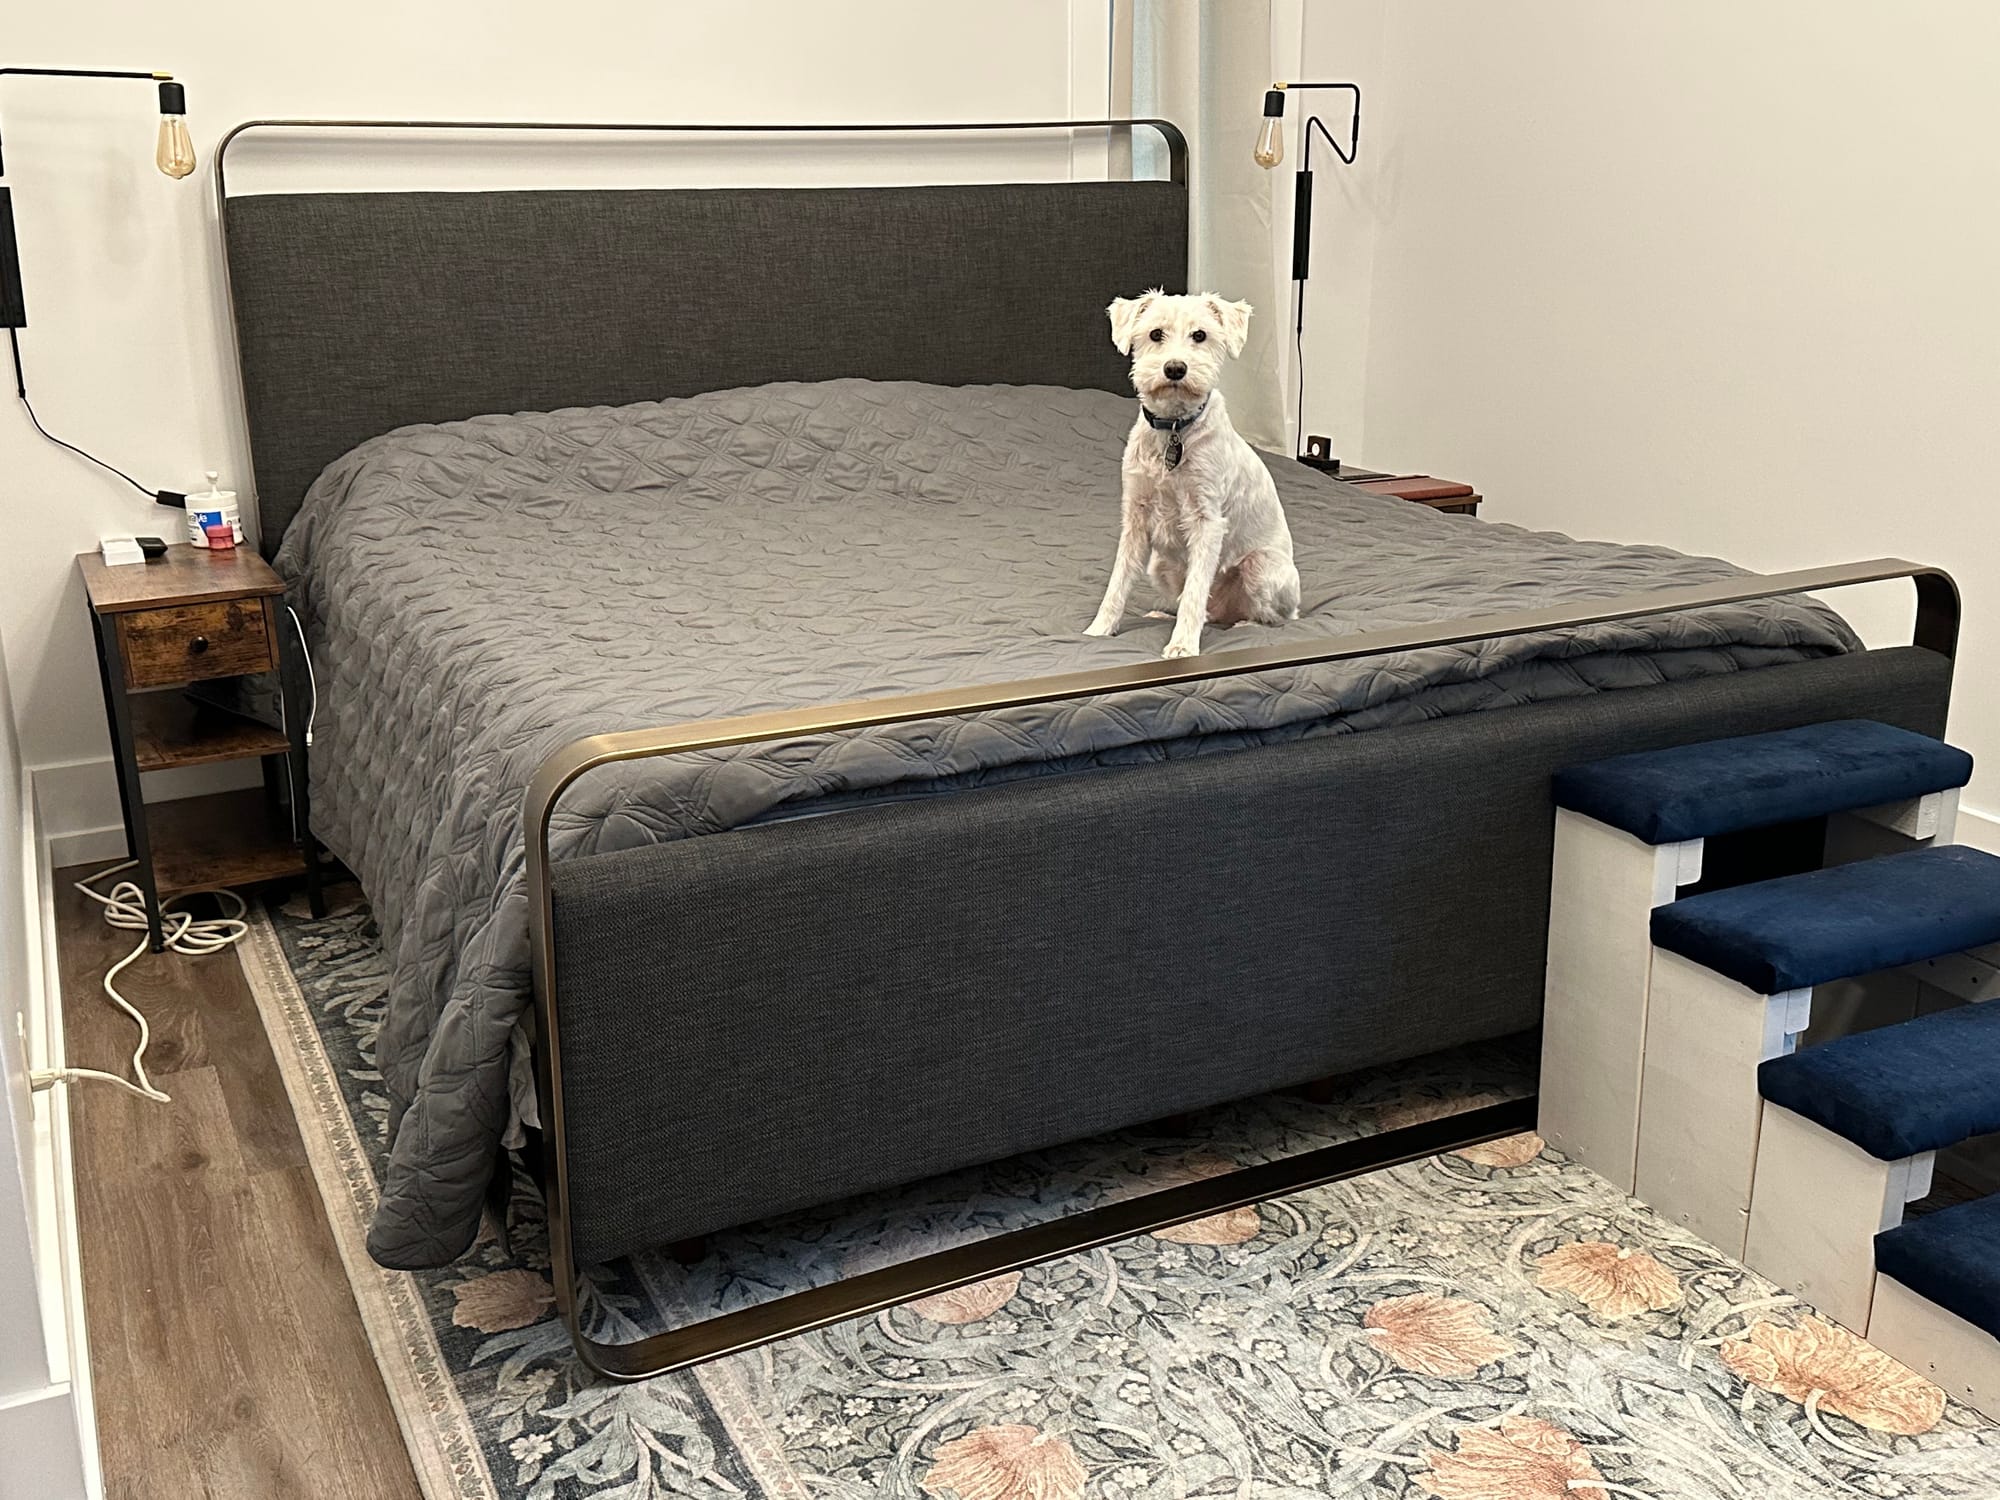
My wife is very happy with it, as am I. Again—a reasonable person would not do this. But I am not always a reasonable person, and I am willing to spend my energy and ingenuity to keep a piece of furniture that we both loved, not letting it go to waste and not having to compromise on something we like less. In the words of one of my inspirations, “repair, don't replace.”